

Adding Vehicles to Your Fleet
Add one vehicle end to end: pick a variant, set rates, register the VIN and plate
Adding a vehicle in SpectroNova Express runs through a four-step wizard: pick the variant that defines its make and model, configure this vehicle's own details and purchase VAT, set its rental rates, and register its VIN and licence plate. The vehicle's number is generated for you on save. If a vehicle ends up on the wrong variant, you can correct it afterwards.
This guide covers adding one vehicle by hand. To import many at once, see Bulk Vehicle Import; for the make and model catalogue, Managing Vehicle Variants & Brand Catalog; for a vehicle's documents, Vehicle Documents & Compliance.
Before you start:
- You need permission to add vehicles. The Workspace Admin, Fleet Manager and Office Manager roles have it. Without it, the Add Vehicle button is hidden on the fleet list, so ask an administrator.
- Your plan sets how many vehicles you can have. Once that limit is reached, a new vehicle can't be saved.
- At least one vehicle variant must exist. The wizard opens on a variant picker, and the variant sets the make, model, year, category, transmission, fuel type, and available colours. If none exist, you'll see No Variants Available and must create a variant first — see Managing Vehicle Variants & Brand Catalog.
Step 1 — Vehicle Details
Open the Add Vehicle wizard
On the Vehicle Fleet list, click Add Vehicle in the top right. The wizard opens on Step 1 of 4 — Vehicle Details, with all four steps listed down the left: Vehicle Details, Rental Rates, Registration, and Review. You can click back to a completed step, but you cannot skip ahead.
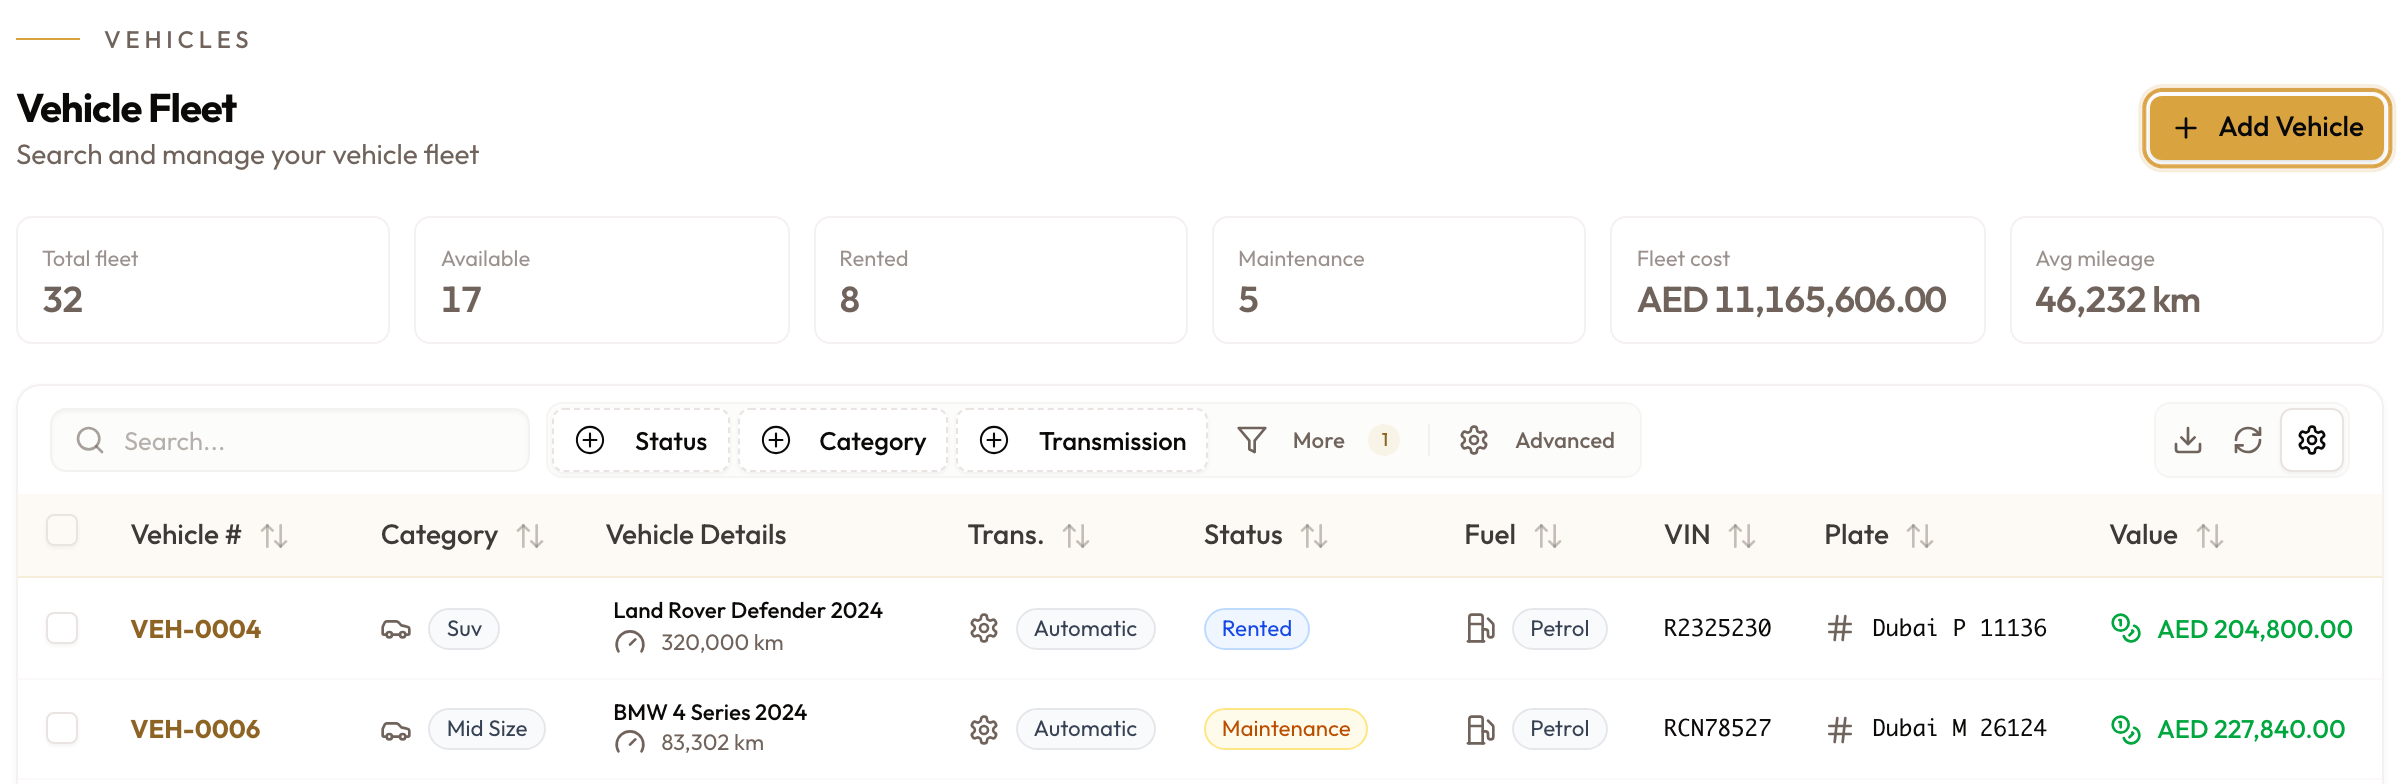
The Vehicle Fleet list. Add Vehicle is at the top right.
Select the vehicle variant
Click Select Vehicle Variant and pick the variant. Each option shows:
- the make's logo, with the make, model and year;
- underneath, the variant name and its code (for example VAR-0020).
To narrow the list, type in the search box, "Search by make, model, variant name or code...". More variants load as you scroll.
Once you choose one, a specs bar appears — Year, Class, Trans, Fuel, and MSRP — and the rest of the form appears below it.
Make, model, year, category, transmission, and fuel type now come from the variant. To swap variants, click the ✕ on the picker to reset it. To add a vehicle type you haven't defined yet, use Create New Variant. Noticed a wrong variant only after saving? You can correct it afterwards.
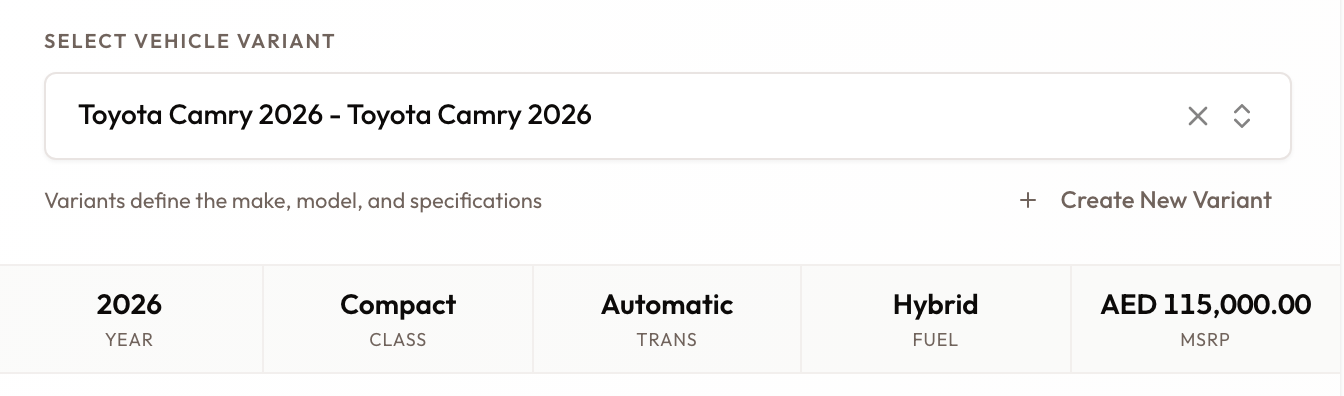
A variant selected. Its Year, Class, Trans, Fuel and MSRP appear in the bar below.
Set status, appearance, and condition
Choose the Initial Status — new vehicles default to Available; use Pending Delivery or Pending Inspection for a vehicle not yet cleared to rent. Then, under Appearance & Condition:
- Color (required) — pick from the variant's available colours; the swatch and any surcharge are shown.
- Condition (optional) — New, Excellent, Good, Fair, or Poor.
- Use Type — drives how input VAT is recovered: Commercial (full input VAT), Mixed (partial input VAT), or Personal (no input VAT). Defaults to Commercial.
- Mileage (km) (required) — must be 0 or greater. Enter
0for a brand new vehicle.
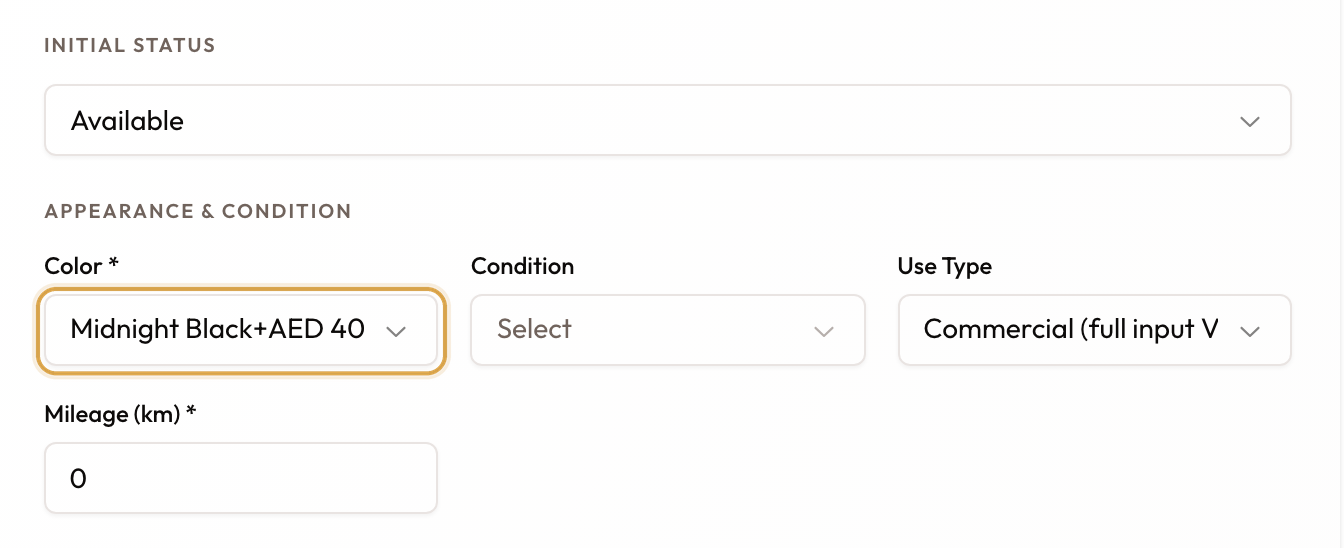
Initial Status set to Available, and a Color chosen from the variant's options.
Enter purchase, valuation, and VAT details
Under Purchase & Valuation, set the Current Value (required, greater than 0). If you leave it blank it defaults from the Price before VAT, or from the variant's MSRP. Purchase date, Price before VAT, and Location are optional; the purchase date cannot be in the future.
Under Purchase, record how the car was bought. Its VAT is claimed from here on the VAT return for the purchase month. All of these fields are optional:
- VAT amount — from the dealer's invoice.
- VAT treatment — Standard (5% VAT) (default), Zero-rated (0%), Exempt, Reverse charge, Out of scope (no VAT), or Disbursement (passthrough).
- Vendor and Invoice number — for traceability.
- Paid with — Cash, Card or Bank Transfer.
- Total paid (price + VAT) adds up the price and the VAT for you.
- Currency is read-only, shown from your organization's currency.
A car purchase is recorded here, never as an expense. Picking Vehicle purchase on the expense form sends you back to the car instead.
When the details are complete, click Next.
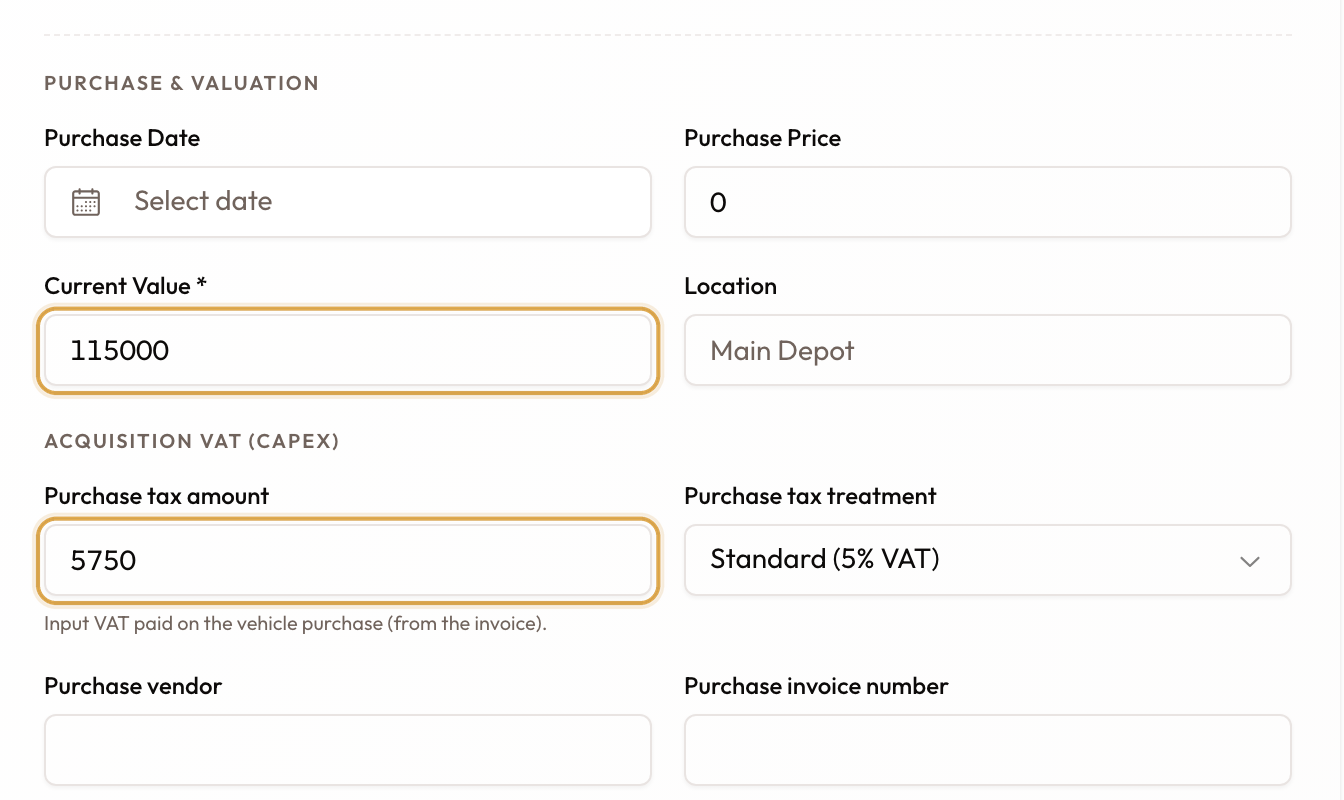
Current Value under Purchase & Valuation, and the VAT amount under Purchase.
Step 2 — Rental Rates
Set all four rental rates
On Rental Pricing, enter every rate under Rate Configuration: Hourly, Daily, Weekly, and Monthly. All four are required and must be greater than 0 — a rate of 0 or blank shows Must be positive and keeps Next disabled. Once all four are positive, click Next.
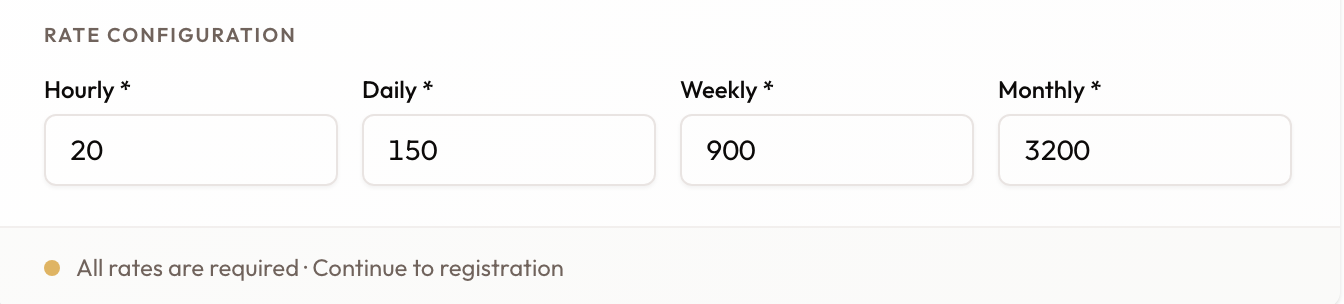
All four rates under Rate Configuration. Each must be greater than 0.
Step 3 — Registration
Register the VIN
Enter the VIN (Vehicle Identification Number). It must be exactly 17 characters — a live counter shows how many you've typed. As you enter a valid VIN, the system checks it isn't already in use and shows Checking…, then a green Available or a red Exists. If it's taken, the wizard names the vehicle it's already registered to and blocks the step.
Optionally click Decode to auto-fill the make, model, and year from the VIN.

A 17-character VIN with a green Available check.
Register the licence plate
Enter the plate in three parts: Plate source (the emirate or authority, e.g. Dubai), Plate code (the letter/category code, e.g. C), and Plate number (required). The combined plate is previewed below the fields and checked for uniqueness the same way as the VIN. A duplicate names the vehicle that already holds it. When the plate shows Available, click Next.
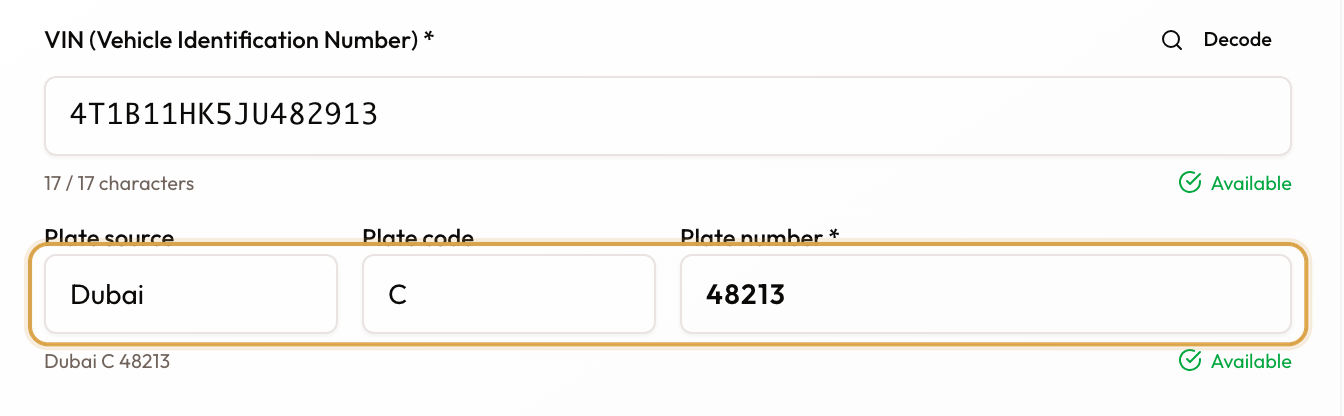
The plate in three parts. The combined plate shows below, with its Available check.
Step 4 — Review
Review and add the vehicle
The Review step summarises everything: the vehicle's make, model, and year, its colour and status, value, mileage, fuel, transmission, class, and condition, the four rental rates, and the VIN, licence plate, purchase date, price before VAT, location, and MSRP. Check it over, then click Add Vehicle — the button reads Adding… while it saves.
You'll see a success message — Vehicle created successfully! — and land on the new vehicle's detail page. The vehicle number is assigned automatically.
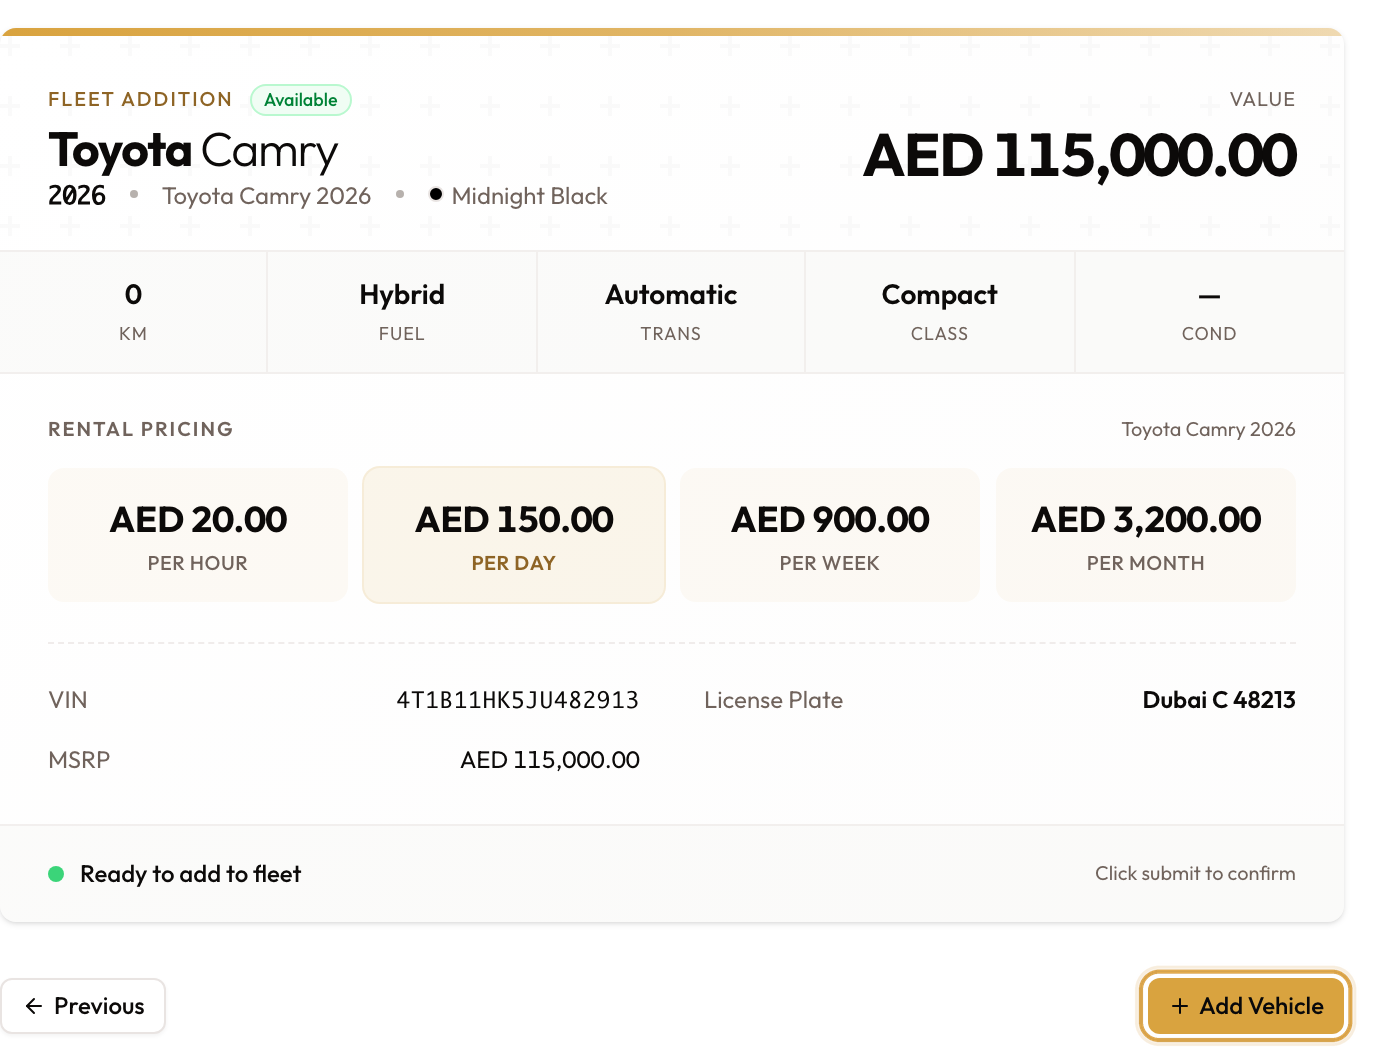
The Review summary: the vehicle, its rental pricing, VIN and licence plate. Add Vehicle saves it.
Correct a wrong variant
If a vehicle was saved against the wrong variant, you don't need to add it again. You need permission to edit vehicles (the same three roles have it).
Change the Variant on the vehicle's page
Open the vehicle from the Vehicle Fleet list and click Edit in the top right (it's also Edit Vehicle in the ⋯ menu). The page switches to Editing, and the Variant field at the top of the details becomes a picker. Search by make, model, variant name or code, choose the right variant, then click Save changes in the bar at the bottom.
The make, model and year on the vehicle, its listings and any new documents follow the new variant. Use this only to fix a wrong assignment. The variant can't be cleared, because every vehicle has one.

The Variant picker on the vehicle's page in Edit mode, with the hint below it.
Common mistakes and edge cases
- No variant exists yet. Step 1 shows No Variants Available with a Create Variant button. You can't add a vehicle until a variant exists — make, model, and specs all come from it.
- VIN not exactly 17 characters. Anything else is rejected with VIN must be exactly 17 characters, and Decode stays disabled until the VIN is 17 characters long.
- Duplicate VIN or plate. Both are checked against existing vehicles; a match blocks the step and names the vehicle that already holds it. If the save is still rejected as a duplicate, you'll get a Vehicle already exists error with a Retry action.
- A rental rate left at 0. All four rates are mandatory and must be positive — a single 0 keeps Next disabled on the pricing step.
- Current Value left blank. It falls back to the Price before VAT, then the variant's MSRP, but a final value of 0 is rejected — set a value greater than 0.
- Wrong variant saved. Don't add the vehicle again. Correct it on the vehicle's page instead: see Correct a wrong variant.
Next steps
Once the vehicle is saved, add its registration card, insurance and photos on the vehicle's own page. For the paperwork, see Vehicle Documents & Compliance.
Related Fleet guides:
- Managing Vehicle Variants & Brand Catalog — the make and model catalogue, and the variant definitions this wizard picks from.
- Bulk Vehicle Import — add many vehicles at once from a spreadsheet.
- Vehicle Documents & Compliance — upload and track a vehicle's registration, insurance, and other documents.