

Managing Vehicle Variants & Brand Catalog
Define the vehicle types you rent — create variants from the make/model catalog
A variant is the reusable template for a kind of vehicle — a specific make, model, year and trim, with its specifications, colours, and MSRP. When you add a vehicle to your fleet you pick a variant first, and it fills in the make, model, and specs; each physical vehicle is one instance of a variant. So variants are the groundwork in SpectroNova Express: define them once, then add as many vehicles against each as you like.
This guide covers two related surfaces: vehicle variants (creating, editing, and duplicating them) and the brand catalog — the makes and models, with brand logos, that variants are built from.
Before you start:
- Variants need the vehicles: create permission (the same one that gates adding a vehicle); it's what shows the Create Variant button.
- The brand catalog (Vehicle Reference Data) is under Settings → Vehicles and needs the settings: workspace.update permission.
Part 1 — Vehicle variants
Open Vehicle Variants in the sidebar — a searchable table of every variant, with Create Variant at the top right. Clicking a variant opens its detail page.
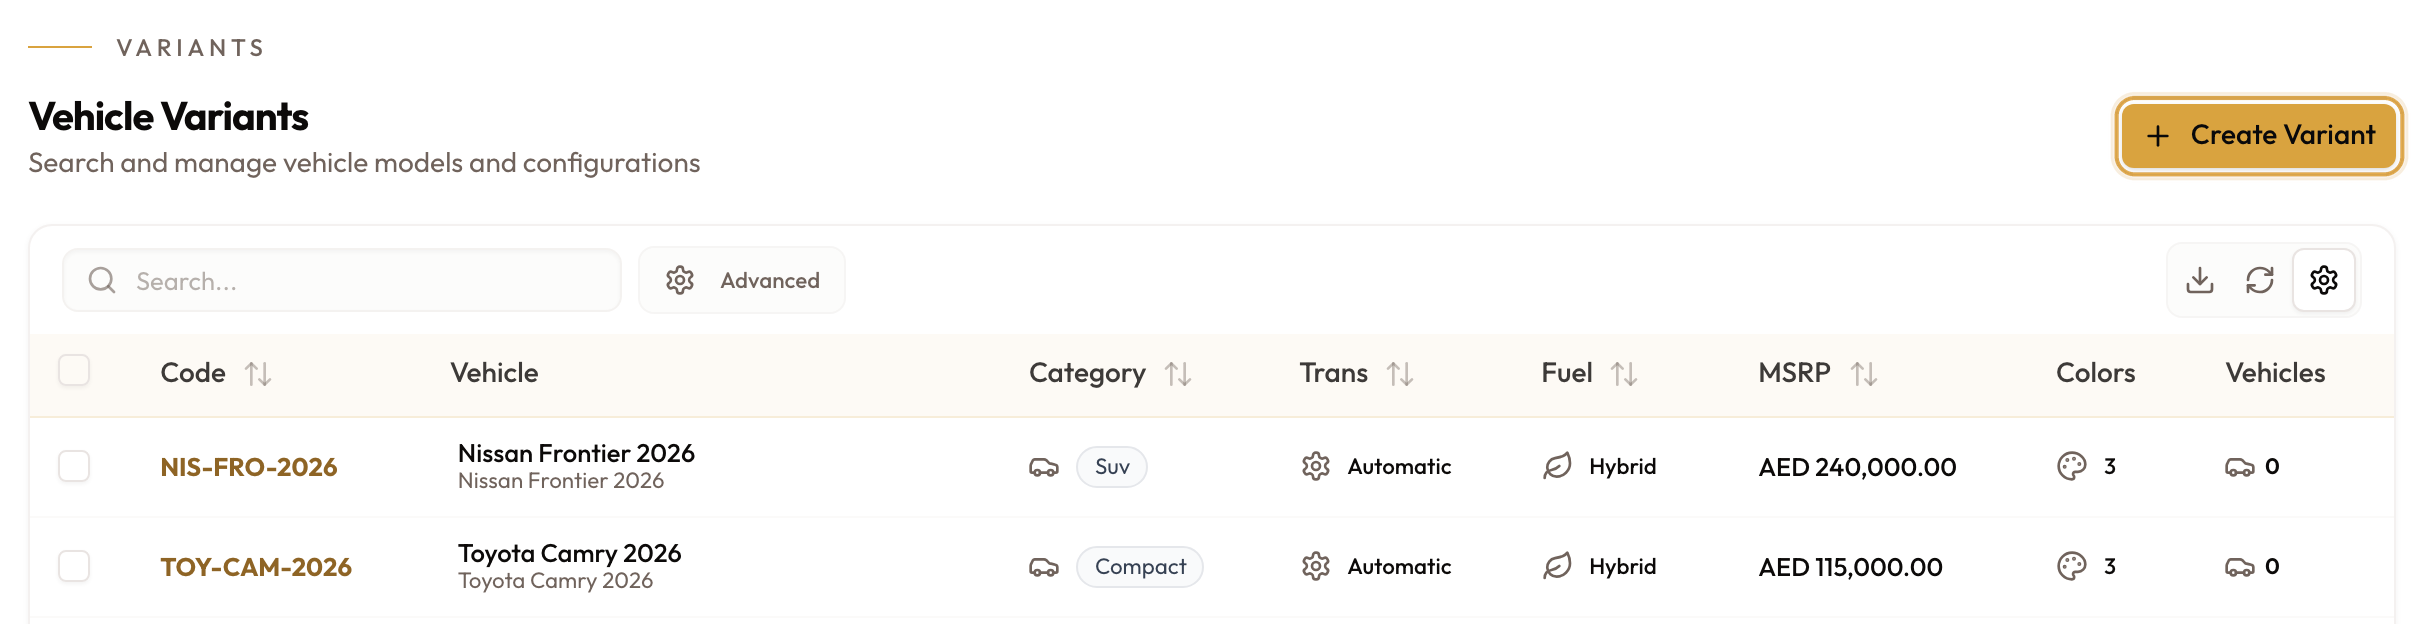
Click Create Variant to open the five-step wizard — Basic Info, Specifications, Colors & Pricing, Features, Customization, listed down the left. You can click back to a completed step but cannot skip ahead. Steps 1–3 hold the required fields; steps 4–5 are optional.
The Add Vehicle wizard leads here too: Create New Variant under its variant picker (or Create Variant when no variants exist yet) opens this same wizard.
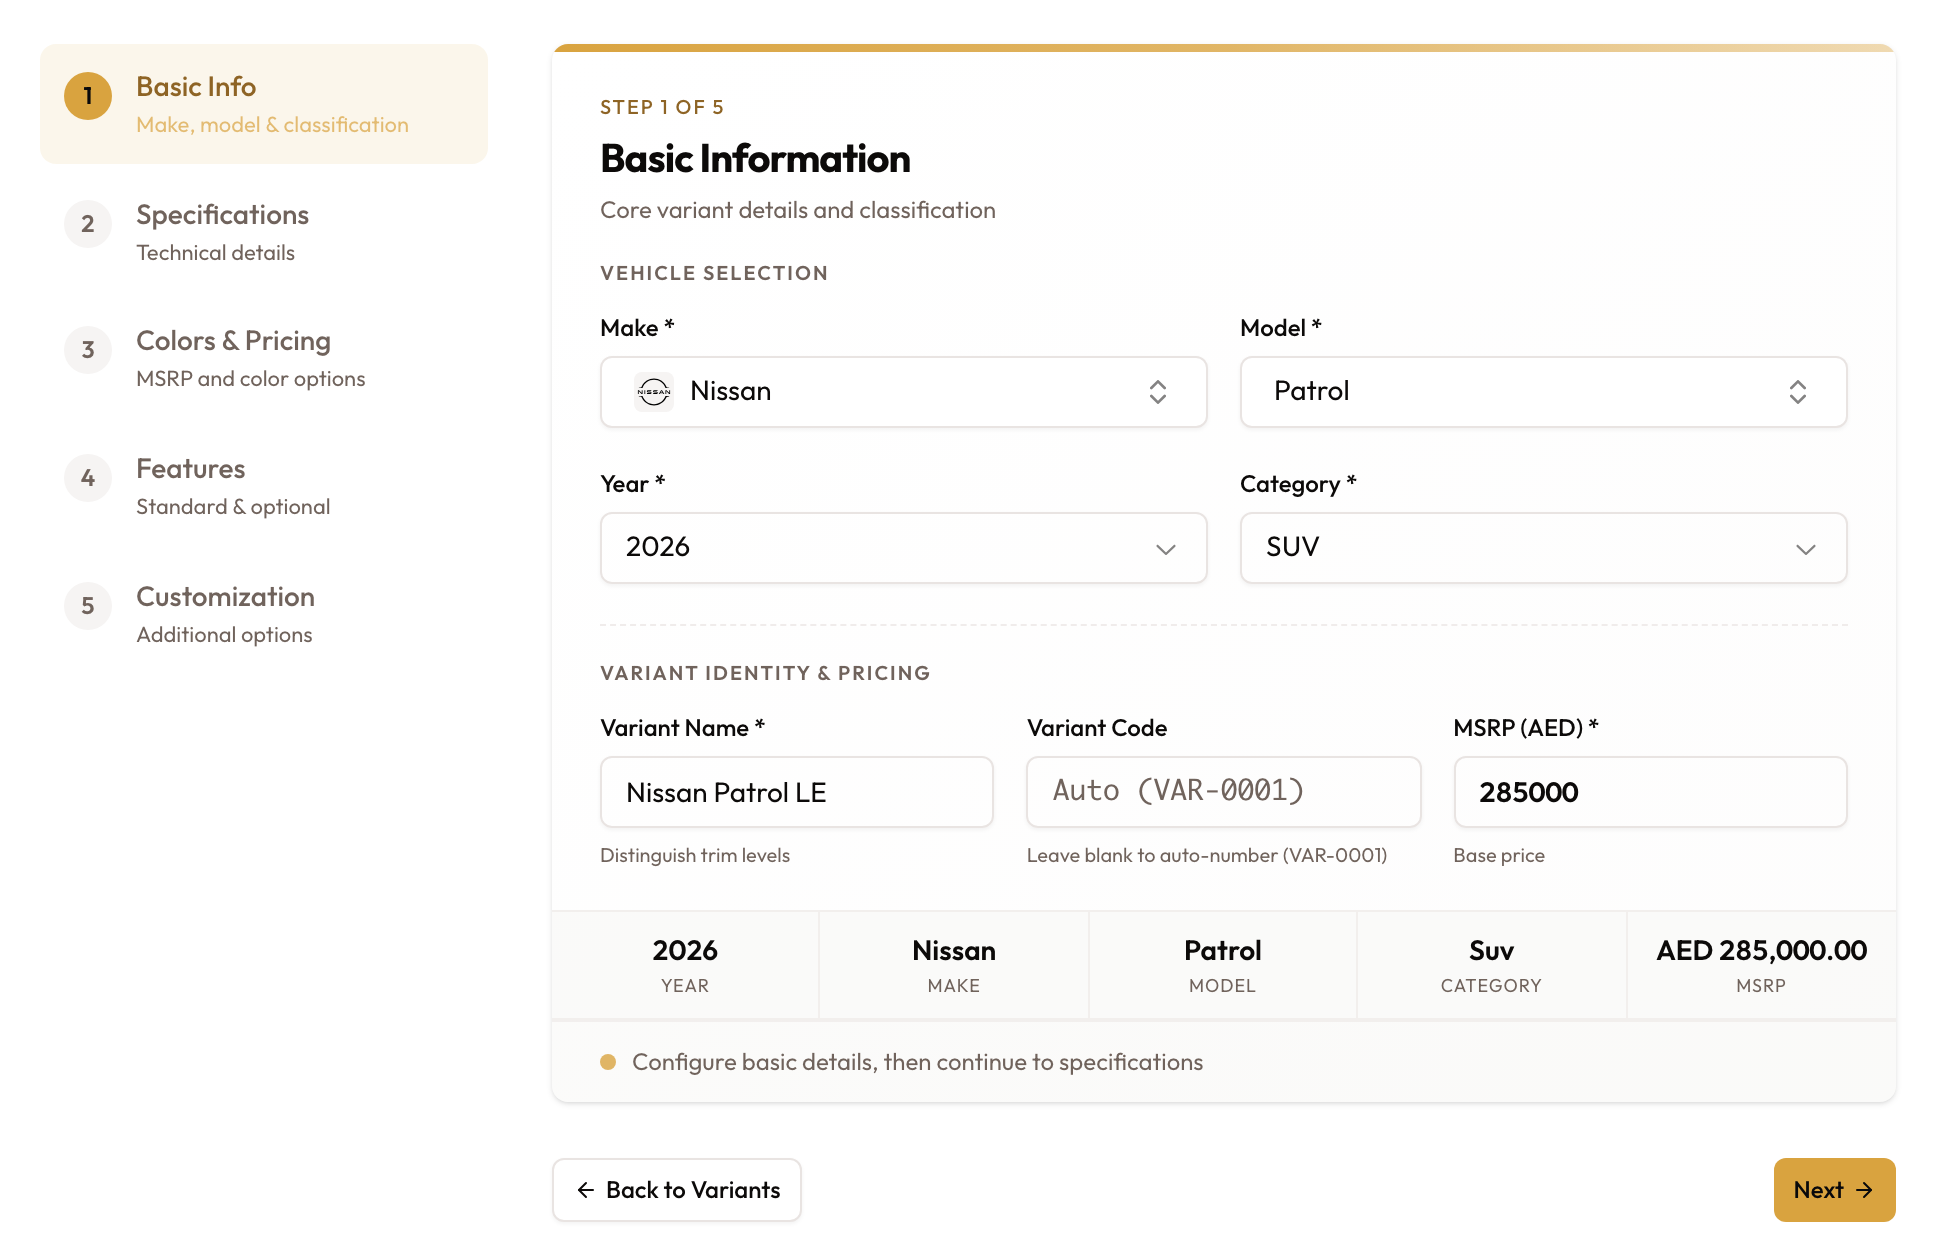
Step 1 — Basic Information
Under Vehicle Selection, pick the Make (searchable, shows brand logos), then the Model — the model list enables once a make is chosen. Set the Year and Category (Economy, Compact, Mid Size, Full Size, Luxury, SUV, Van, or Truck).
Variant Name auto-fills to "Make Model Year"; override it to name a trim
(e.g. Camry SE). Leave Variant Code blank to auto-number (VAR-0001) —
the server issues the next sequential code on save. Enter the MSRP (AED),
which must be greater than 0.
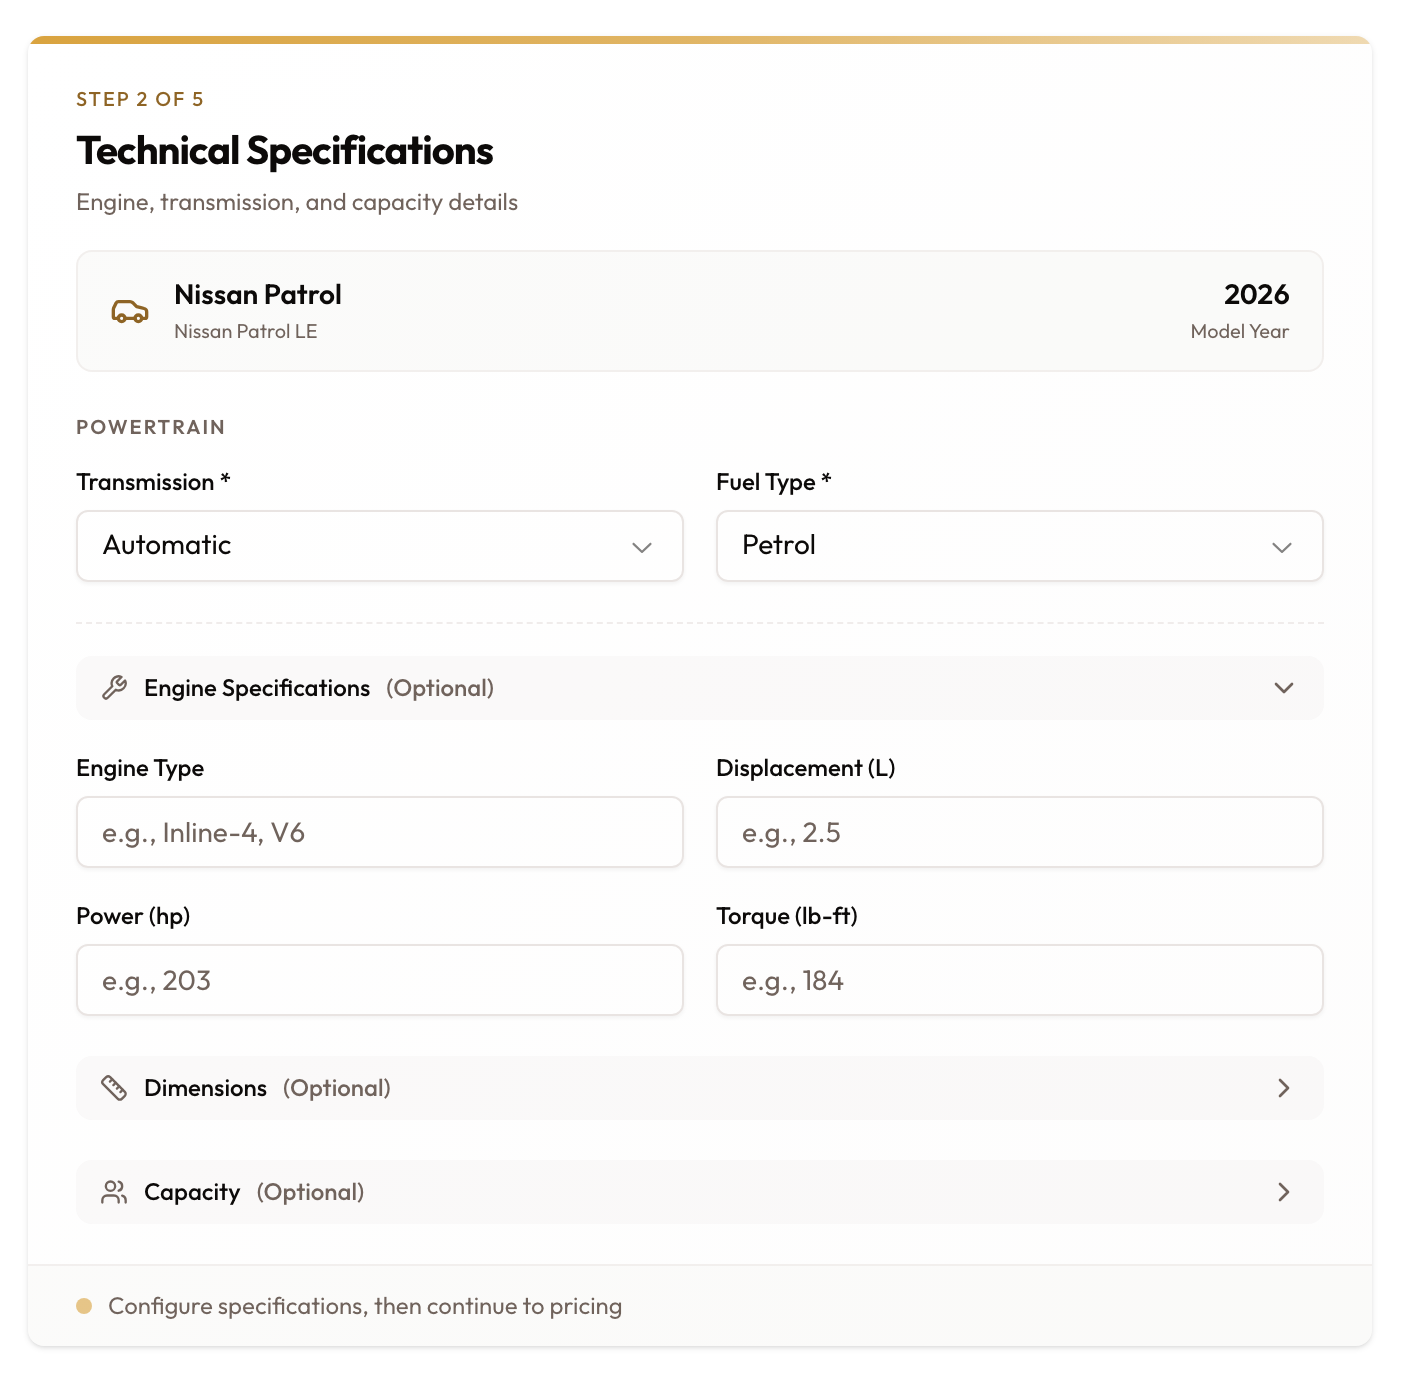
Step 2 — Technical Specifications
Under Powertrain, choose the Transmission (Manual, Automatic, Semi-Automatic, or CVT) and Fuel Type (Petrol, Diesel, Hybrid, Electric, or LPG) — both required.
Three collapsible sections are optional: Engine Specifications (Engine Type, Displacement, Power, Torque), Dimensions (Length, Width, Height, Wheelbase), and Capacity (Passengers, Cargo, Fuel Tank).
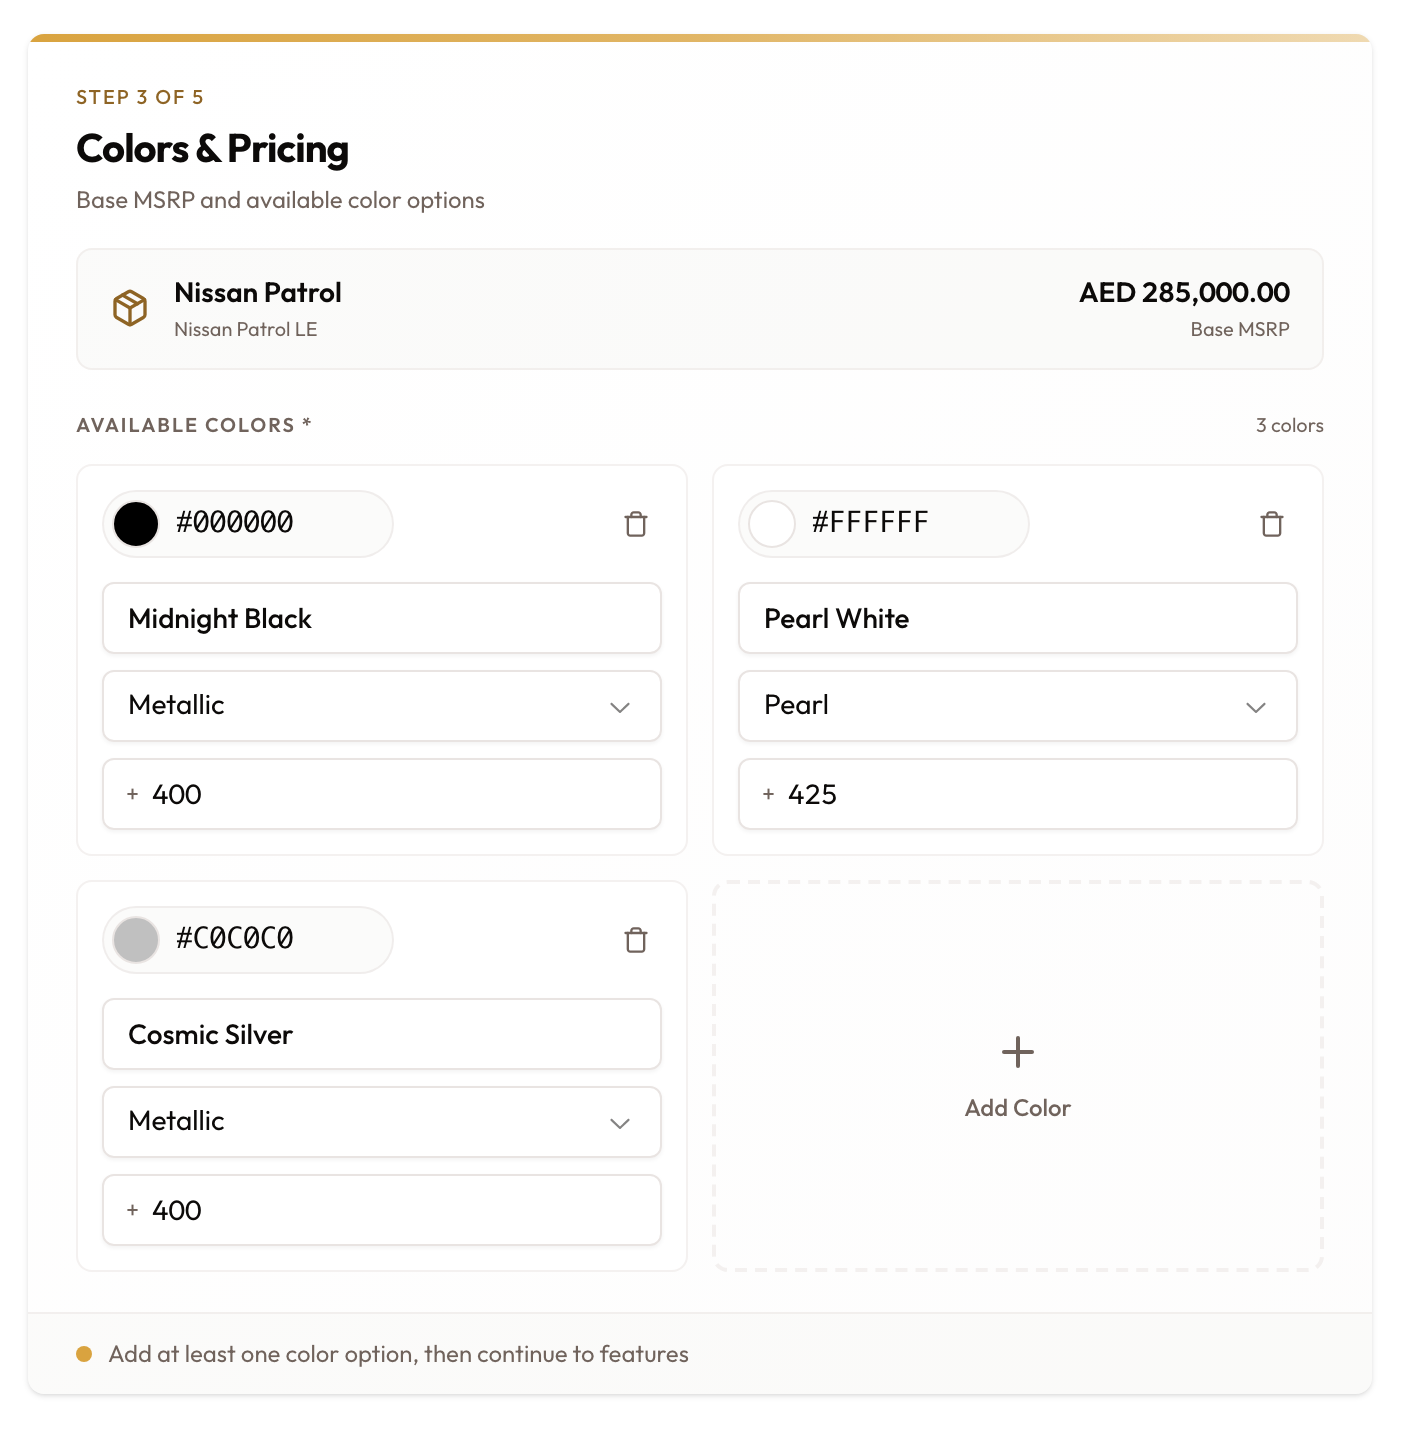
Step 3 — Colors & Pricing
Every variant needs at least one colour. The step opens with three common colours already filled in: Midnight Black, Pearl White and Cosmic Silver. Edit or remove them to match the variant.
For each colour:
- Give it a Color name. Every colour needs its own name, and no two can share one.
- Set its swatch (hex code) and pick the type: Solid, Metallic, Pearl or Matte.
- Add a premium price if the colour costs extra.
Add Color adds another; the trash icon removes one. These are the colours you'll choose from when adding a vehicle of this variant.
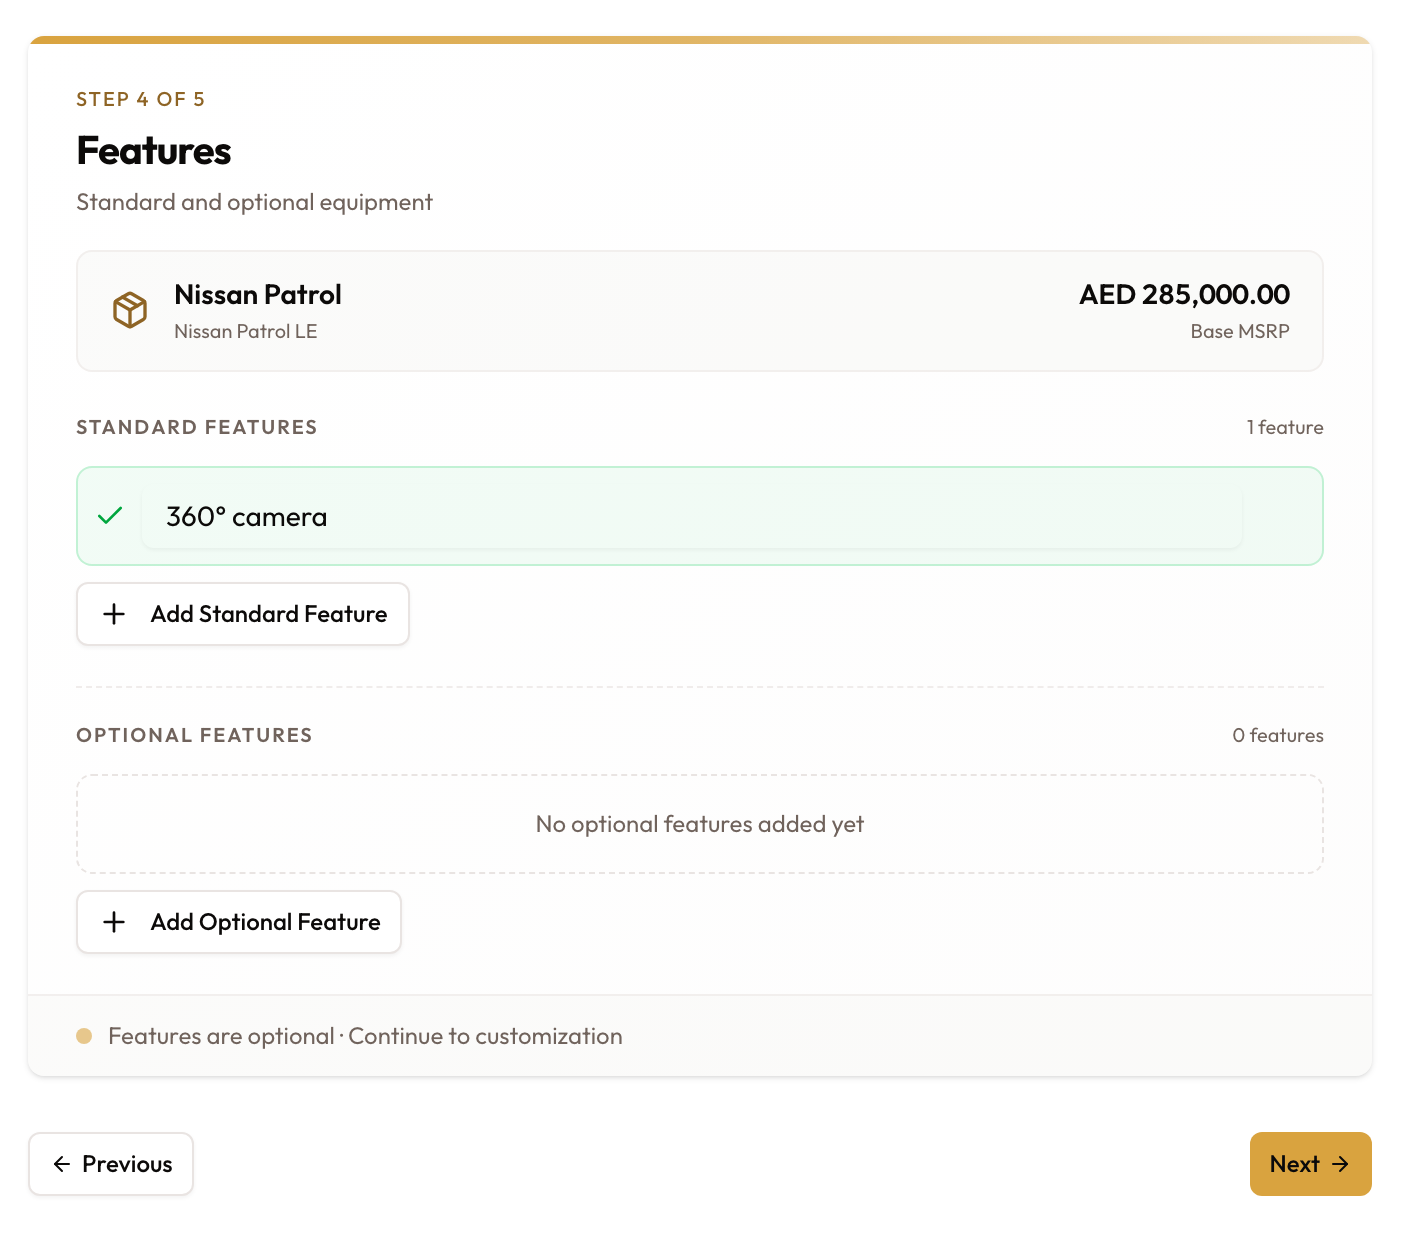
Steps 4 & 5 — Features and Customization (optional)
Add Standard Feature and Optional Feature rows as free text — e.g.
LED Headlights, Apple CarPlay or Sunroof, Leather Seats; empty rows are
dropped on save. Customization holds any extra interior/exterior options.
Both steps are optional.
Finish
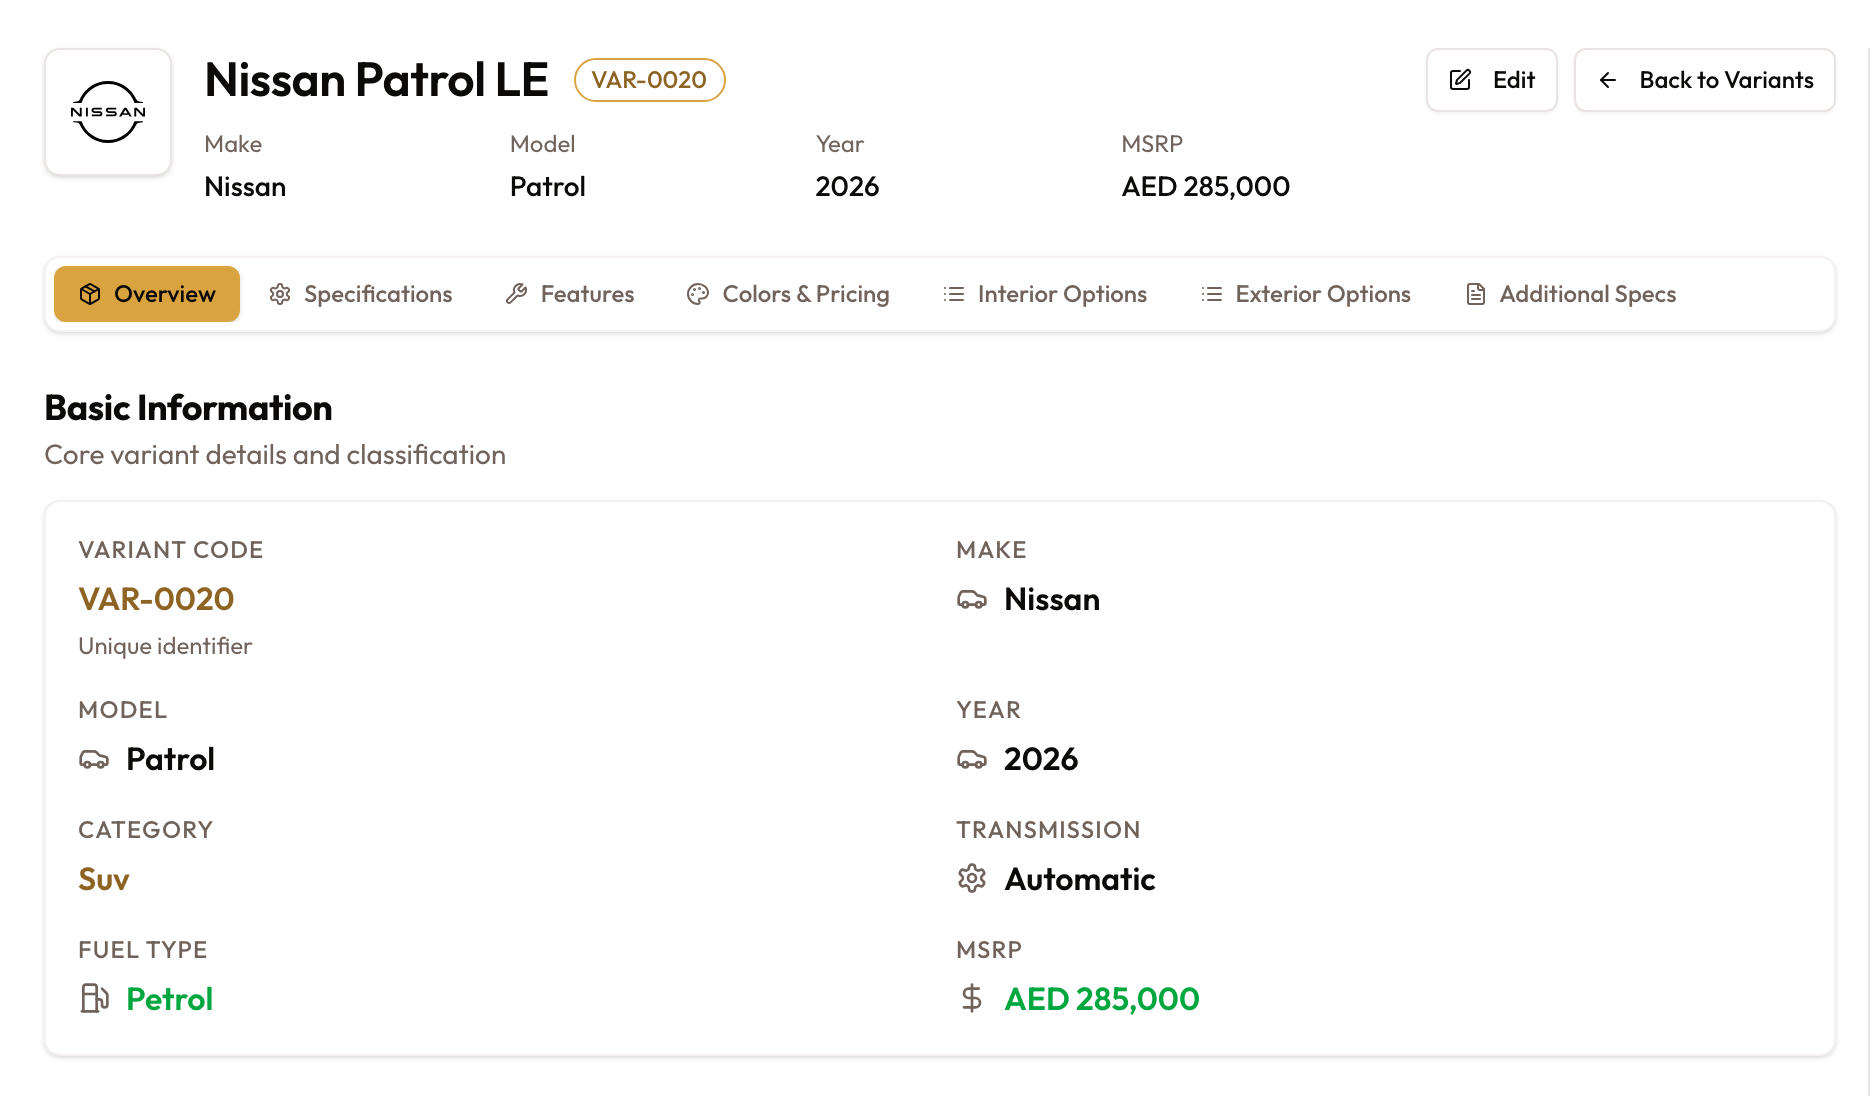
Click Create Variant. The button reads Saving… while it saves, then you
land on the new variant's detail page — created with its own VAR-#### code
and now selectable when you add a vehicle. If a required field is missing, a
Missing required fields message names exactly which.
Editing or duplicating a variant
The same wizard handles edits and duplicates. Edit reopens it pre-filled (the heading reads Edit Vehicle Variant, the button Update Variant). Duplicate clones an existing variant as a starting point — the name gains " (Copy)" and the code is cleared so a fresh one is issued, handy for trims that differ only slightly.
A vehicle on the wrong variant
Editing a variant changes the template, not which variant a vehicle belongs to. If a vehicle was added against the wrong variant, open that vehicle, click Edit (needs vehicles: update), and pick the right one in the Variant field at the top of Vehicle identity. The make, model and year on the vehicle follow the new variant, so change it only to correct a wrong assignment.
Part 2 — The brand catalog (Vehicle Reference Data)
In Settings, under Business, open Vehicles (the Vehicle Reference Data page) — the library of makes and models that variants are built from. Each make or model is either Global (shared reference data available to every organization) or Custom (specific to your organization). It has two tabs.
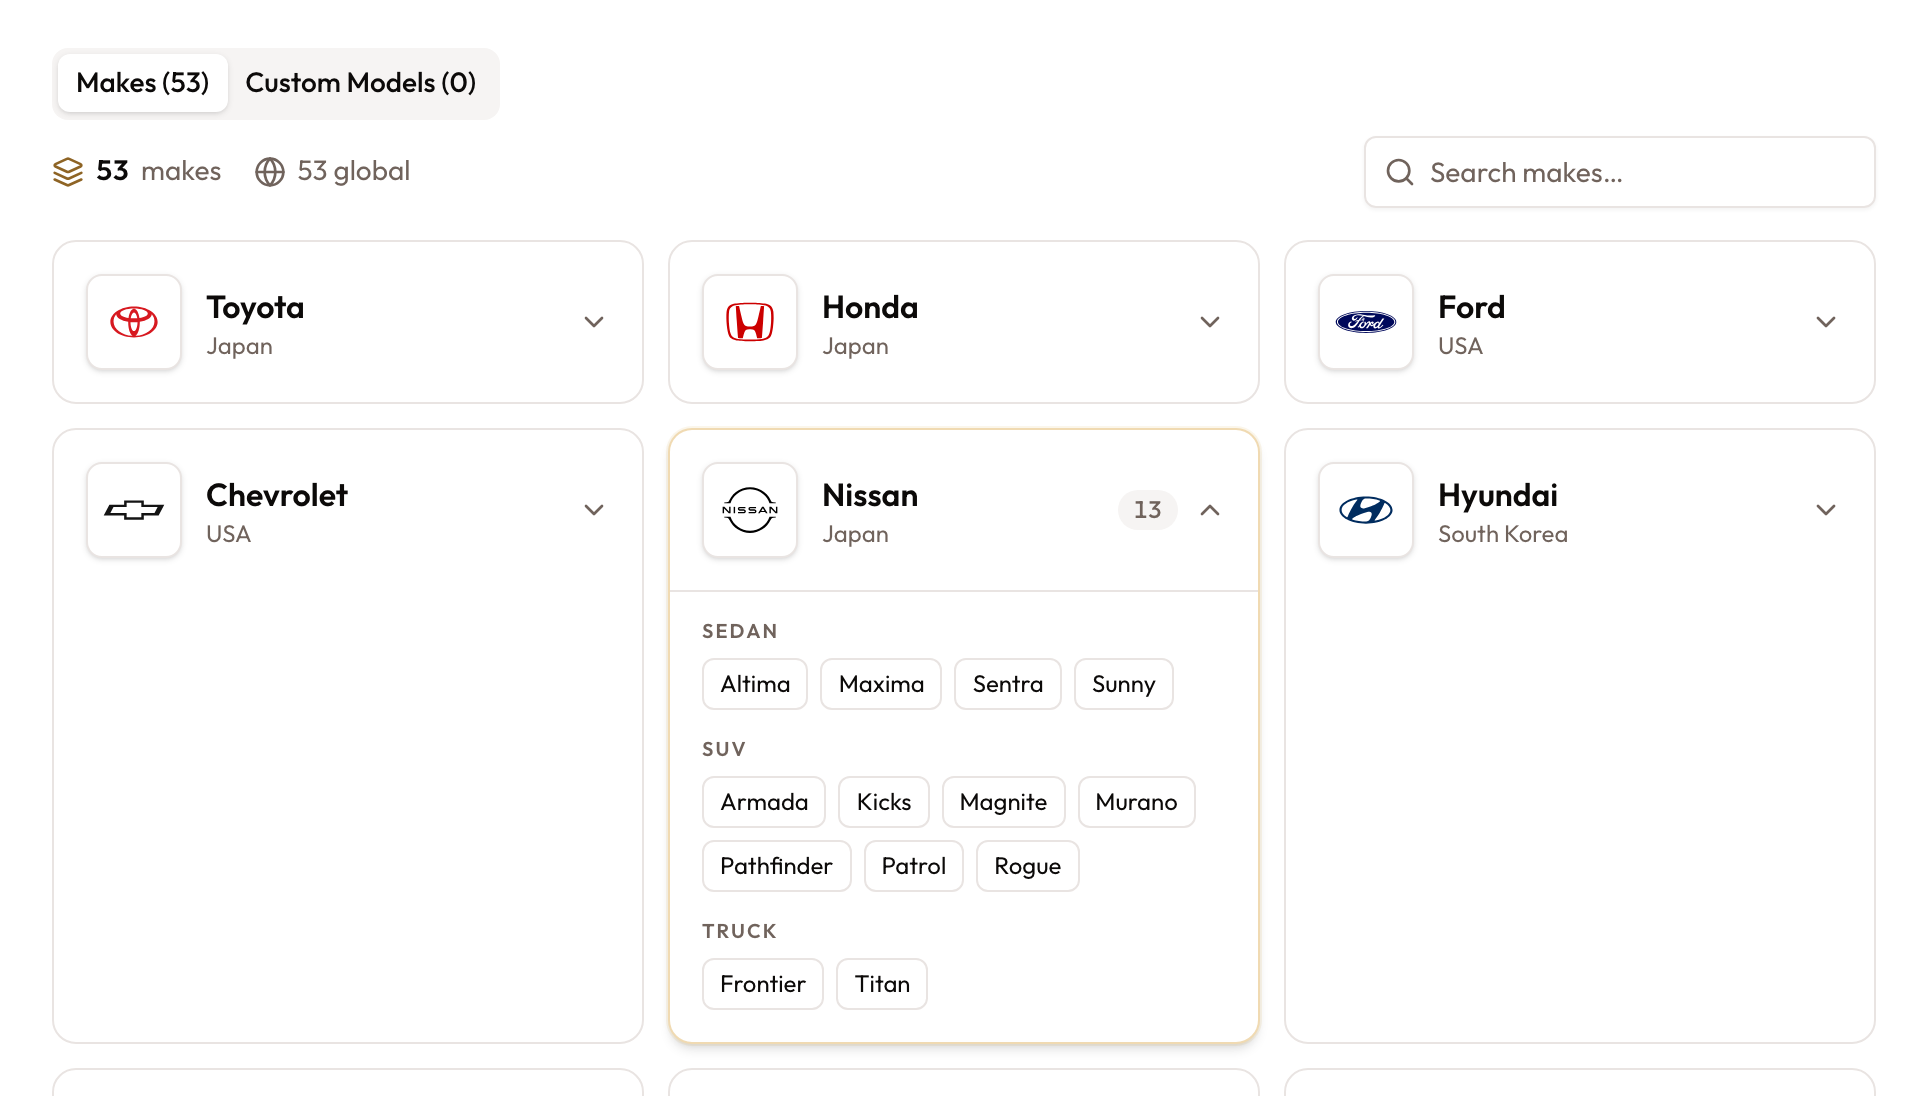
Makes is a logo-forward catalog grid. The stat line shows the total make count and how many are global vs custom, and Search makes… filters by name or country. Click a make card to expand it and see its models. Each card shows the brand logo, falling back to a generated mark when a make has no logo on file.
Custom Models is a table of your organization's custom models — Model Name, Make, Body Type, Status, and Actions. From the row menu you can Edit or Delete a custom model; the edit dialog exposes the Model Name and Body Type (Sedan, SUV, Truck, Van, Coupe, Hatchback, Wagon, Convertible). Deleting asks for confirmation and cannot be undone.
Vehicle Reference Data is where you browse makes and models and edit or remove your custom models. Makes and models come from the shared global catalog, and you choose from them when creating a variant.
Common mistakes and edge cases
- MSRP left at 0. MSRP is required and must be greater than 0 — Step 1's Next stays disabled until it's set.
- Colors & Pricing won't let you continue. Next stays disabled and a red line above the colours says what's wrong: "Add at least one color", "Every color needs a name" (often a colour added with Add Color and left blank), or "Two colors are named …". Fix it and Next comes back. Saving with the problem still there shows Check the colors.
- Picking a make or model. The Make and Model pickers list the makes and models in the brand catalog (Part 2 below); search the list and pick one.
- Variant Code collisions. Leave Variant Code blank and let the system auto-number rather than typing your own.
- Picked the wrong variant for a vehicle. Don't edit the variant to fit the car; change the vehicle's Variant field from its own page instead.
Related
- Adding Vehicles to Your Fleet — once a variant exists, add physical vehicles against it.
- Bulk Vehicle Import — add many vehicles at once; the import matches existing variants or creates new ones.