
Contract Template Setup
Choose a contract template, set shared branding and an authorized signature, and add custom clauses
Settings → Contract Templates controls the agreement document your customers sign in SpectroNova Express. Three things live here:
- Template: one of three contract layouts, each previewable full-screen.
- Branding: a primary colour, footer text and an authorized signature, shared with your invoices and inspection reports.
- Custom terms and conditions: your own clauses, which replace the default terms.
Before you start
Only Workspace Admins can open this page.
- Settings are per workspace.
- Branding is shared. The primary colour, footer and signature are stored once and used on contracts, invoices and inspection reports. Changing them here changes them on invoices too, and the other way round.
- This page sets the Lessor's authorized signature and the layout. The customer's signature is captured when the agreement is signed: see Locking & Signing an Agreement.
Choose a template
Open Settings → Contract Templates
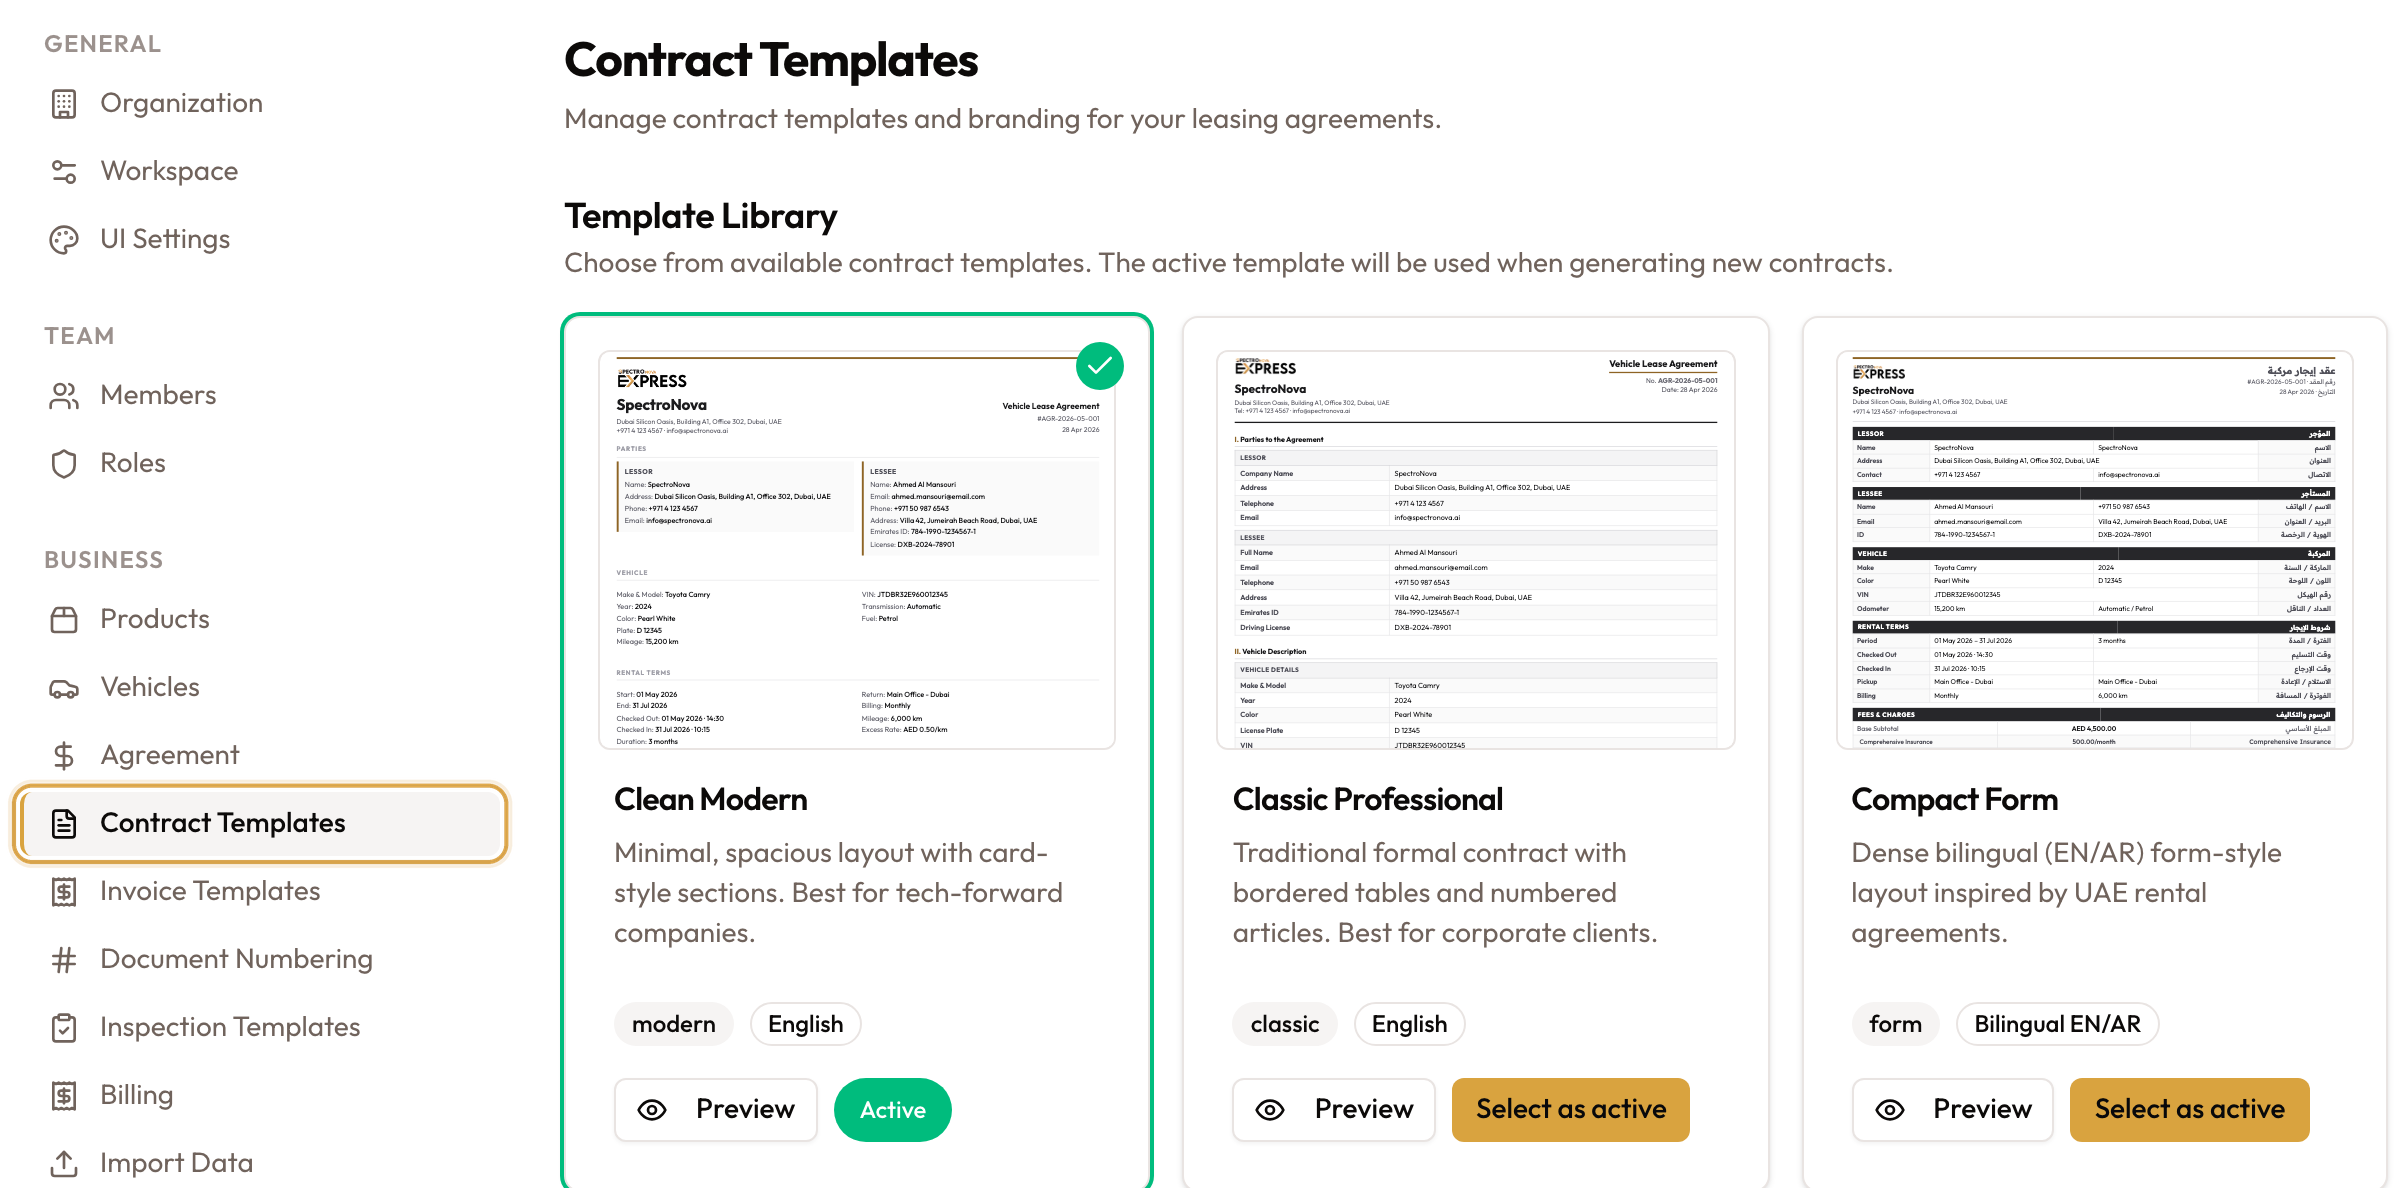
In the settings sidebar, under Business, click Contract Templates. The page is headed Contract Templates: "Manage contract templates and branding for your leasing agreements."
Browse the Template Library
"Choose from available contract templates. The active template will be used when generating new contracts." Three are available, each with a thumbnail, a category badge and a variant (language) badge:
| Template | Description | Variant | Default |
|---|---|---|---|
| Clean Modern | Minimal, spacious layout with card-style sections. Best for tech-forward companies. | English | Yes |
| Classic Professional | Traditional formal contract with bordered tables and numbered articles. Best for corporate clients. | English | |
| Compact Form | Dense bilingual (EN/AR) form-style layout inspired by UAE rental agreements. | Bilingual EN/AR |
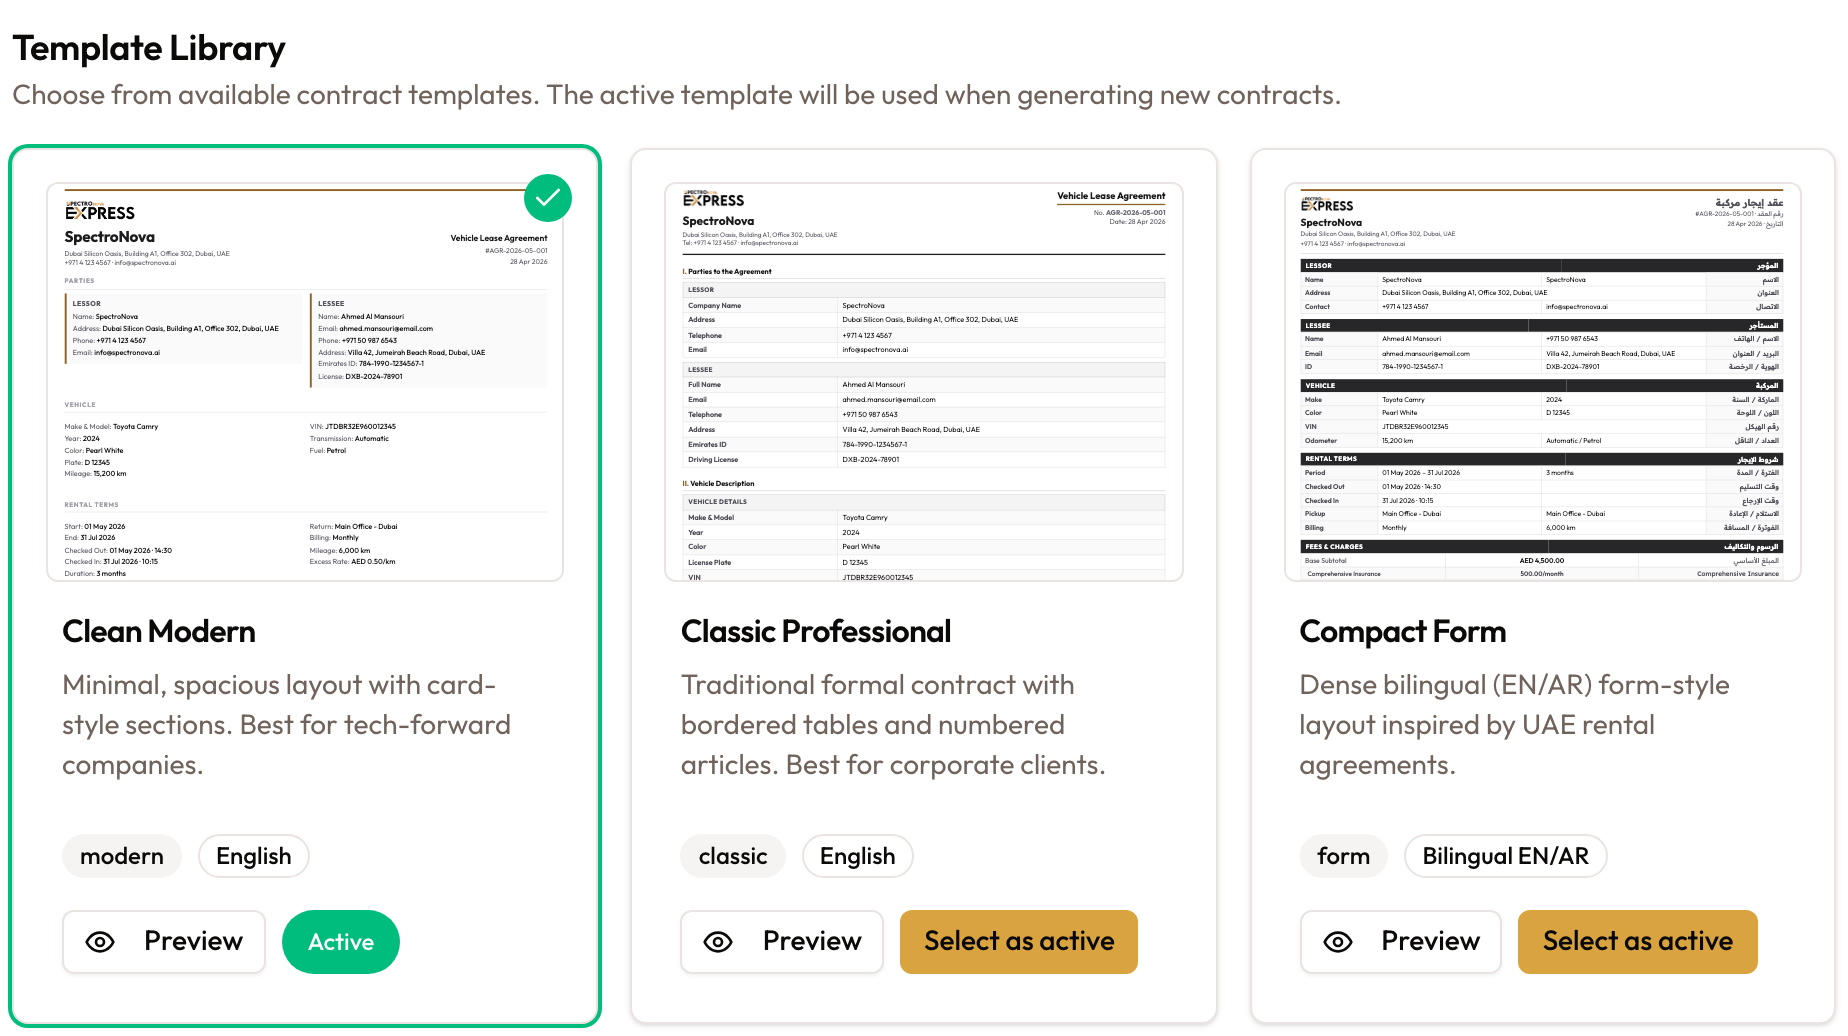
the three contract template cards (Clean Modern, Classic Professional, Compact Form) with category and variant badges
Preview, then select
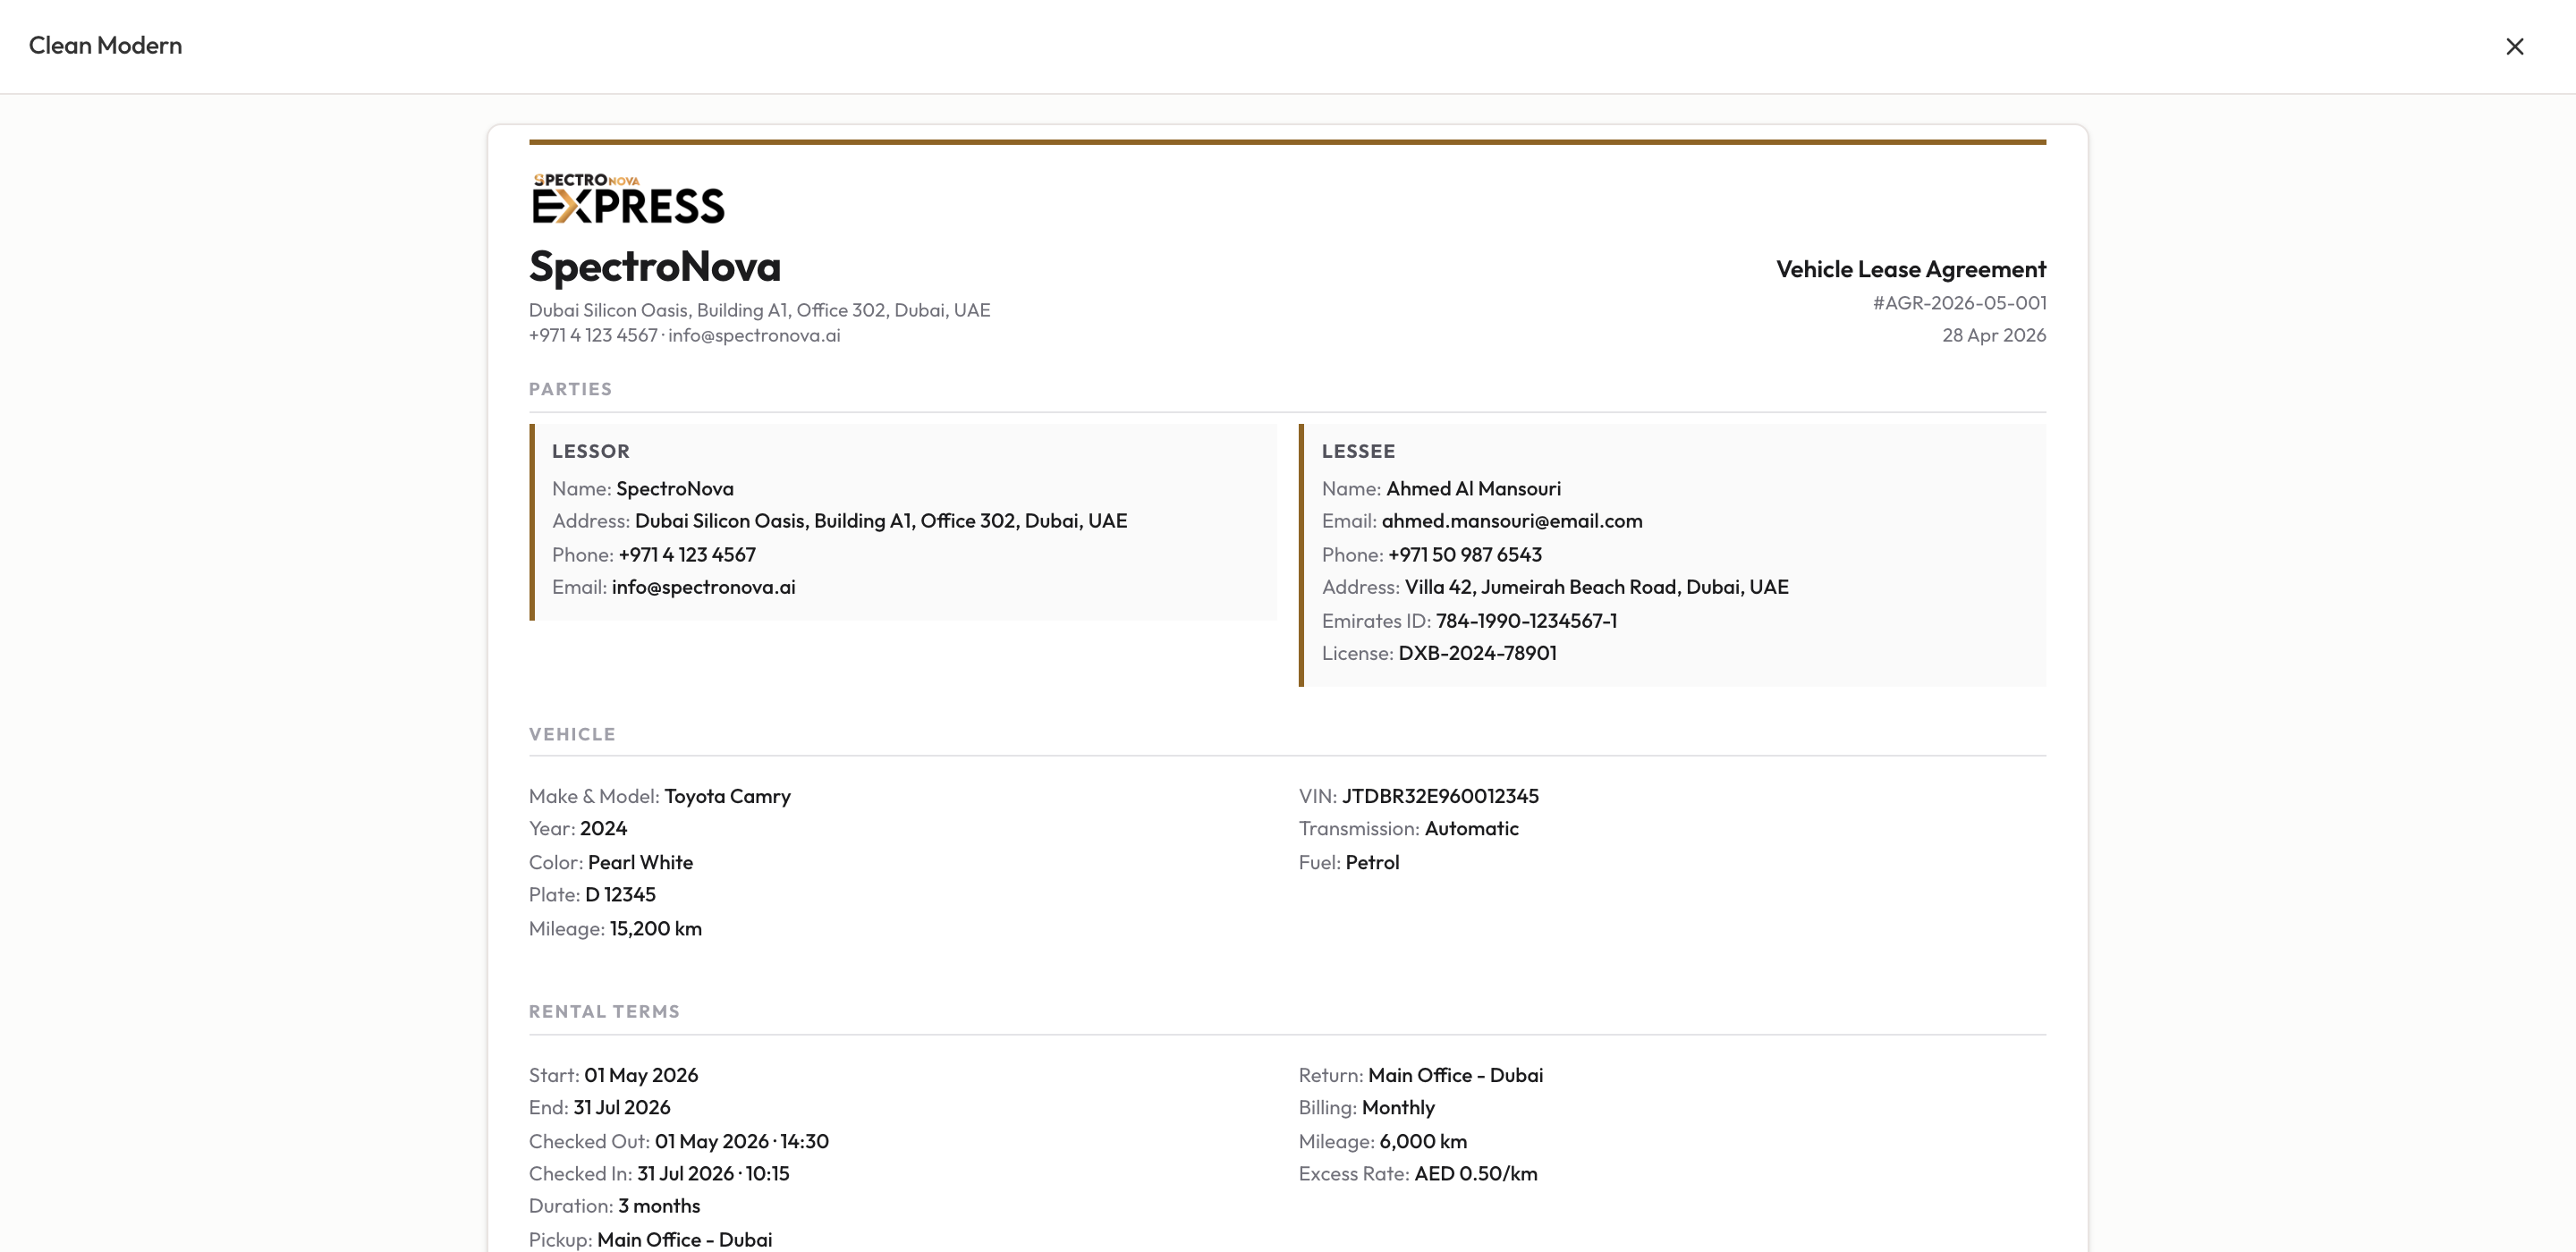
Click Preview to see a template full-screen with sample data. When you're ready, click Select as active.
Selecting a template saves immediately: the active one shows a green check and the Active badge, and you'll see "Branding settings saved successfully". It also saves any colour, footer or clause edits you haven't saved yet, so finish or discard those first.
Set your branding
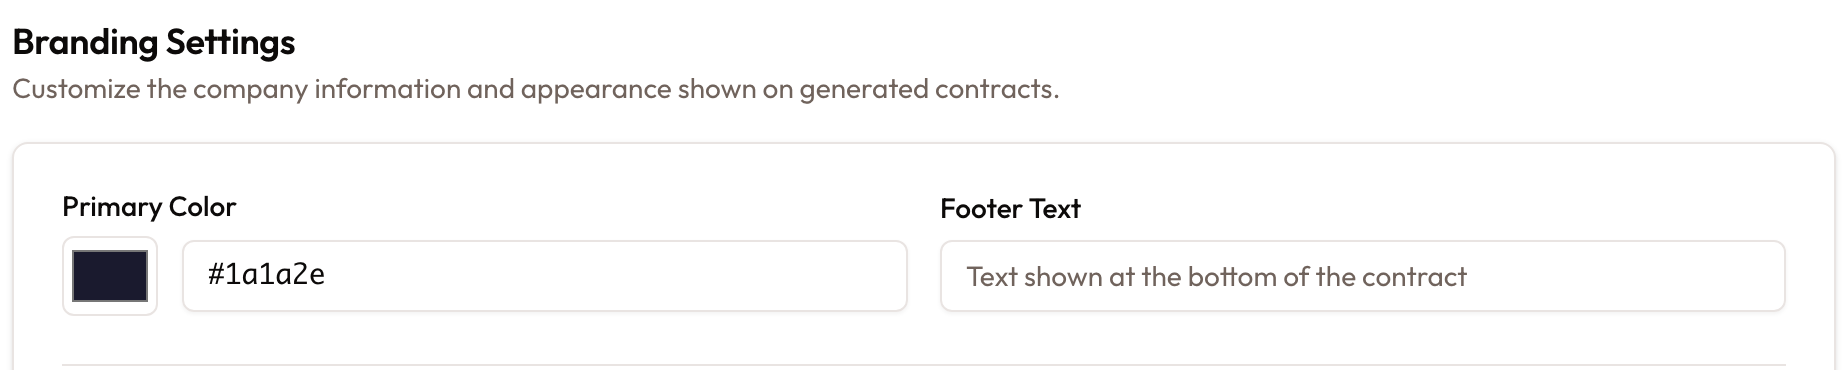
Under Branding Settings: "Customize the company information and appearance shown on generated contracts."
- Primary Color: a colour picker plus a hex field (for example,
#e85d04). - Footer Text: text shown at the bottom of the contract.
These two wait for Save Changes at the bottom of the page.
Add the authorized signature
Authorized Signature prints your signatory's signature "above the Lessor signature line on generated contracts."
- Click Upload Signature (or Replace Signature if one is already set) and pick an image file under 5MB.
- A cropper opens: "Crop tightly around the signature so it fills the box. The cropped image is what will print on contracts." Crop, then click Upload Signature.
- You'll see "Signature uploaded".
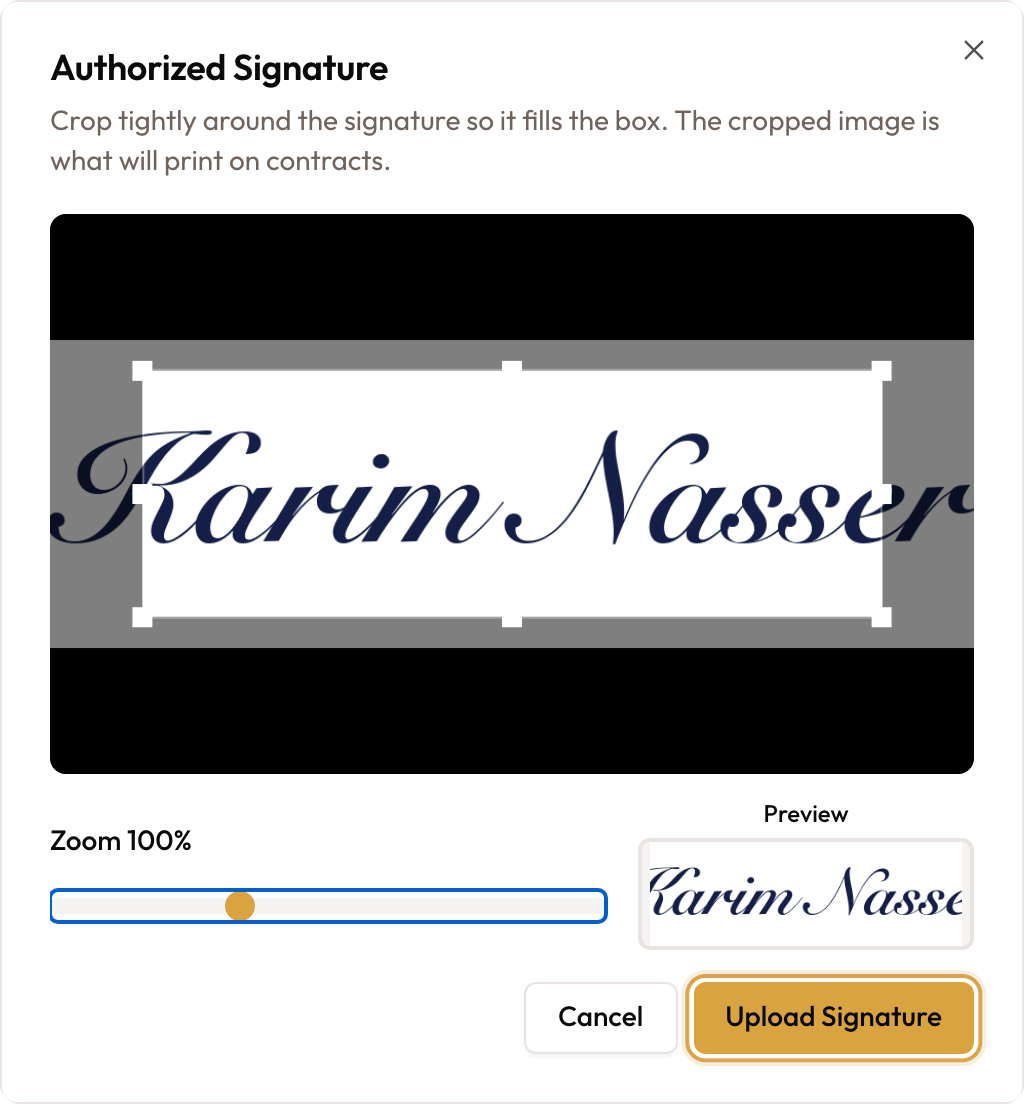
The signature saves as soon as it uploads; it doesn't wait for Save Changes. Remove deletes it straight away too. Until one is set, the box reads "No signature uploaded".
Add custom terms and conditions
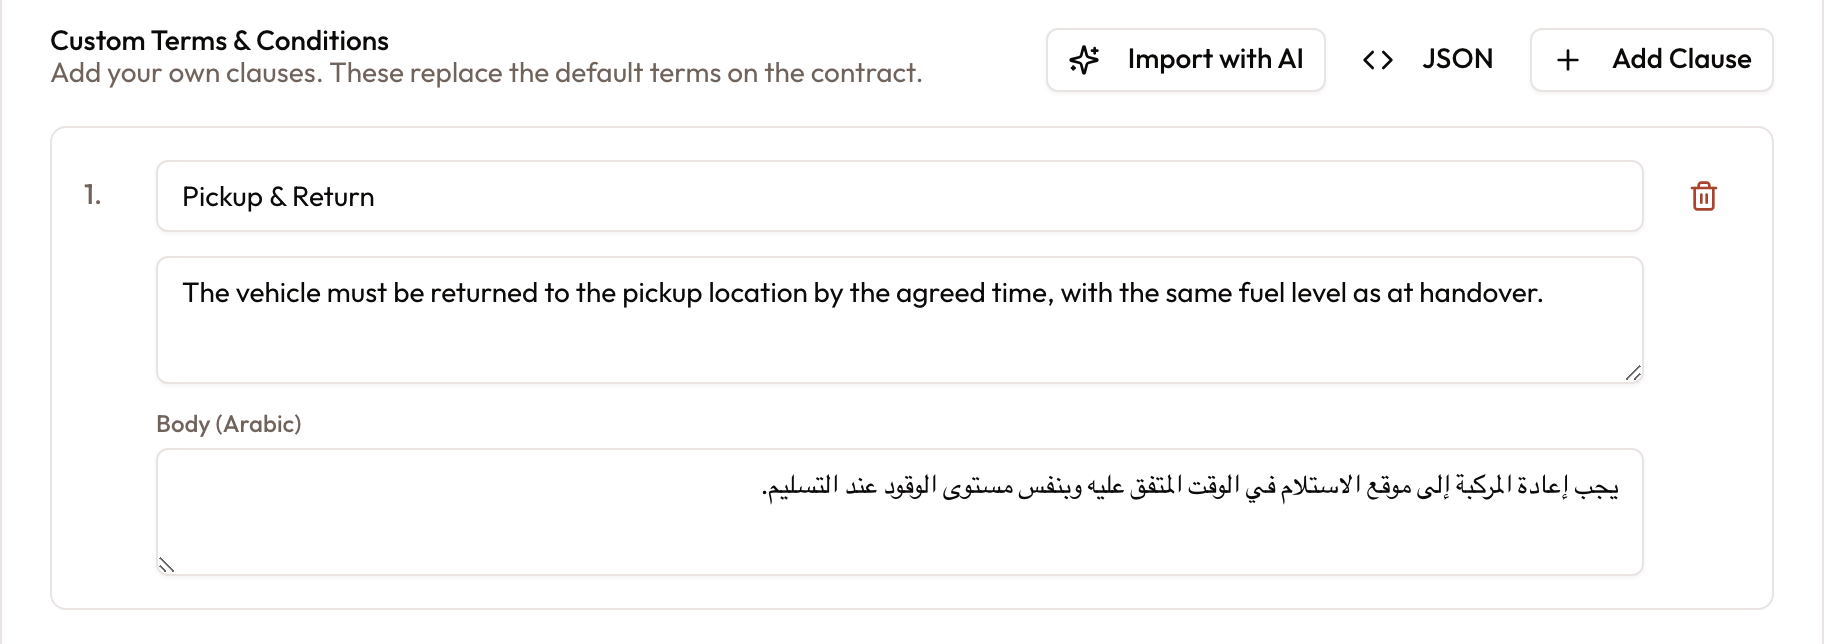
Under Custom Terms & Conditions: "Add your own clauses. These replace the default terms on the contract."
Custom clauses replace the default terms; they don't add to them. Leave the list empty to keep the built-in defaults ("No custom clauses. Default terms will be used.").
There are three ways to build them.
Add clauses one by one
Click Add Clause. Each numbered clause has:
- a title (for example, Pickup & Return)
- the clause text
- an optional Body (Arabic) field, written right to left
Remove a clause with its trash icon.
Edit as JSON
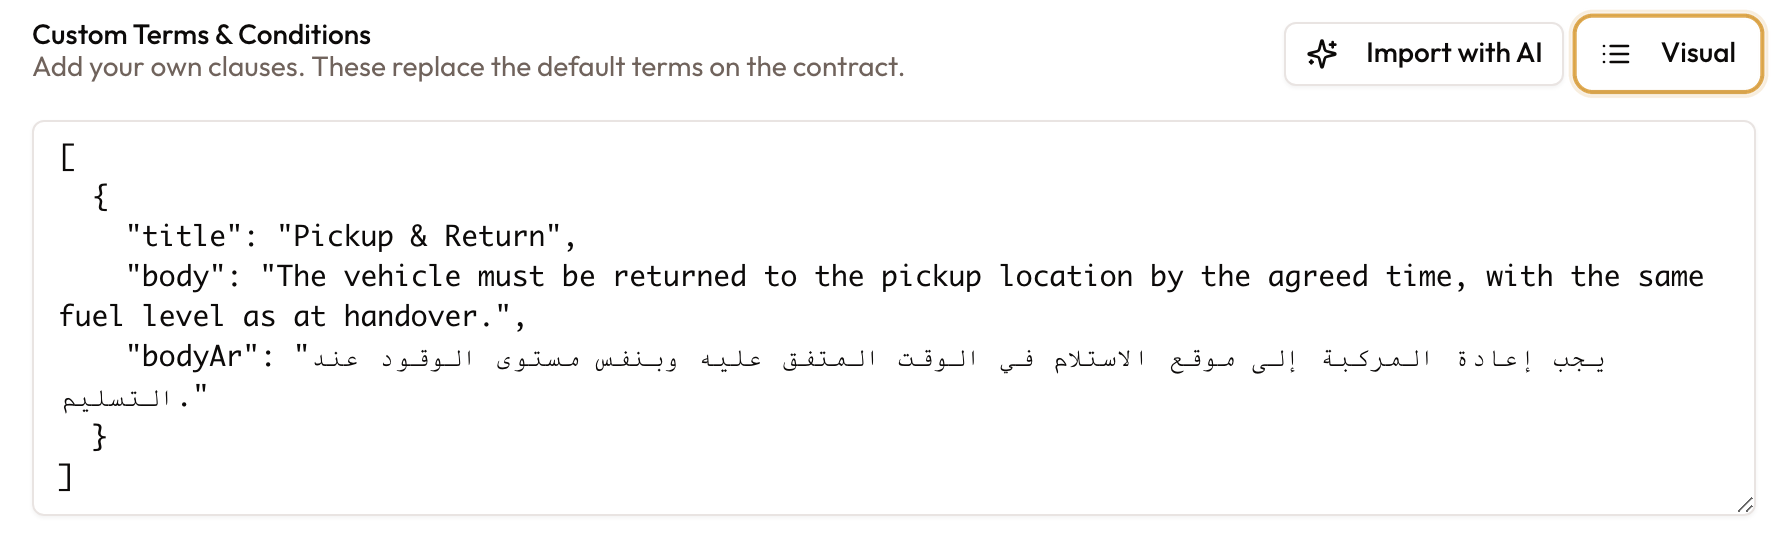
Click JSON to paste or bulk-edit clauses as a list of title / body /
bodyAr entries. Click Visual to apply them. If the text isn't a valid list,
an error shows under the box (for example "Must be a JSON array") and you stay
in JSON mode until it's fixed.
Import with AI
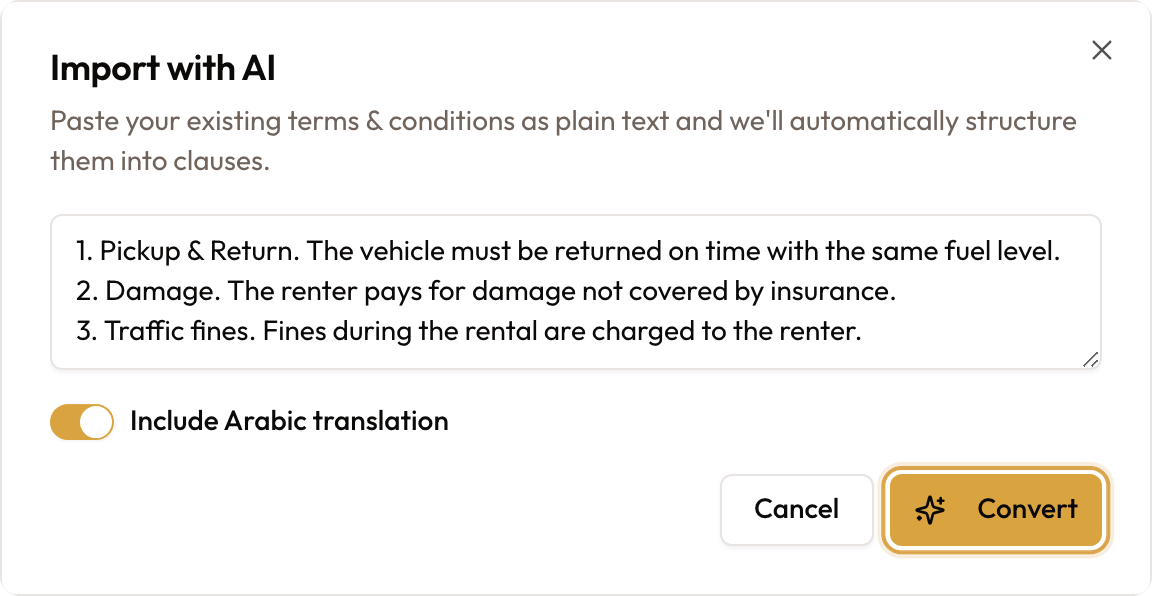
- Click Import with AI: "Paste your existing terms & conditions as plain text and we'll automatically structure them into clauses."
- Paste your terms into the box.
- Leave Include Arabic translation on (the default) to fill the Arabic text too, or switch it off.
- Click Convert. You'll see "Terms converted successfully", and the result replaces the current clause list.
Save
Click Save Changes (or Discard Changes to roll back). You'll see "Branding settings saved successfully". Clauses with neither a title nor text are dropped when you save.

Common mistakes & edge cases
- Selecting a template saves the whole page, including any colour, footer or clause edits you haven't saved yet.
- Signature changes save on their own. Discard Changes won't bring back a removed signature.
- Branding is shared: the colour, footer and signature also appear on invoices and inspection reports.
- Custom clauses replace the default terms. Leave the list empty to keep the defaults.
- Import with AI overwrites your clauses. Nothing is saved until you click Save Changes, so Discard Changes undoes an import you don't like. If it fails you'll see "Failed to convert terms".
- JSON edits only count once you switch back to Visual. Click Visual before Save Changes.
- The signature must be an image under 5MB, cropped to a wide box.
- This isn't where customers sign: the authorized signature is your (Lessor) side; the customer signs when the agreement is signed.