

Vehicle Checkout & Handover Inspection
Set up the inspection template, inspect the vehicle, capture the customer's signature and hand over, and what gets invoiced when you do.
Checkout is how a signed agreement becomes a running rental. In two steps you:
- record the vehicle's condition at hand-over (photos, damage, checklist, signature), then
- review it, set the handover time and complete the checkout.
The agreement becomes Active and the vehicle Rented. Checkout always raises the security deposit invoice. Whether it also raises the first rental invoice depends on your workspace's billing settings.
Before you start:
- The agreement is signed and shows Pending Checkout. Both signing paths get it there, see Locking & Signing.
- Your workspace has an active inspection template. Without one, the inspection step shows "No active inspection template found for this workspace." and there is nothing to complete.
Set up the inspection template
What the inspection asks for comes from the workspace's active inspection template, under Settings → Inspection Templates. You set this once, not for every rental. Changing it needs permission to manage workspace settings.
Choose the active template
Each template card shows its name, how many sections and items it has, and Customer signature required if it asks for a signature at hand-over.
- Click Show details on a card to see its sections and items.
- Select the template you want and click Save.
"Active template updated" confirms it. The active one carries an Active badge, and every new checkout and check-in in the workspace uses it.
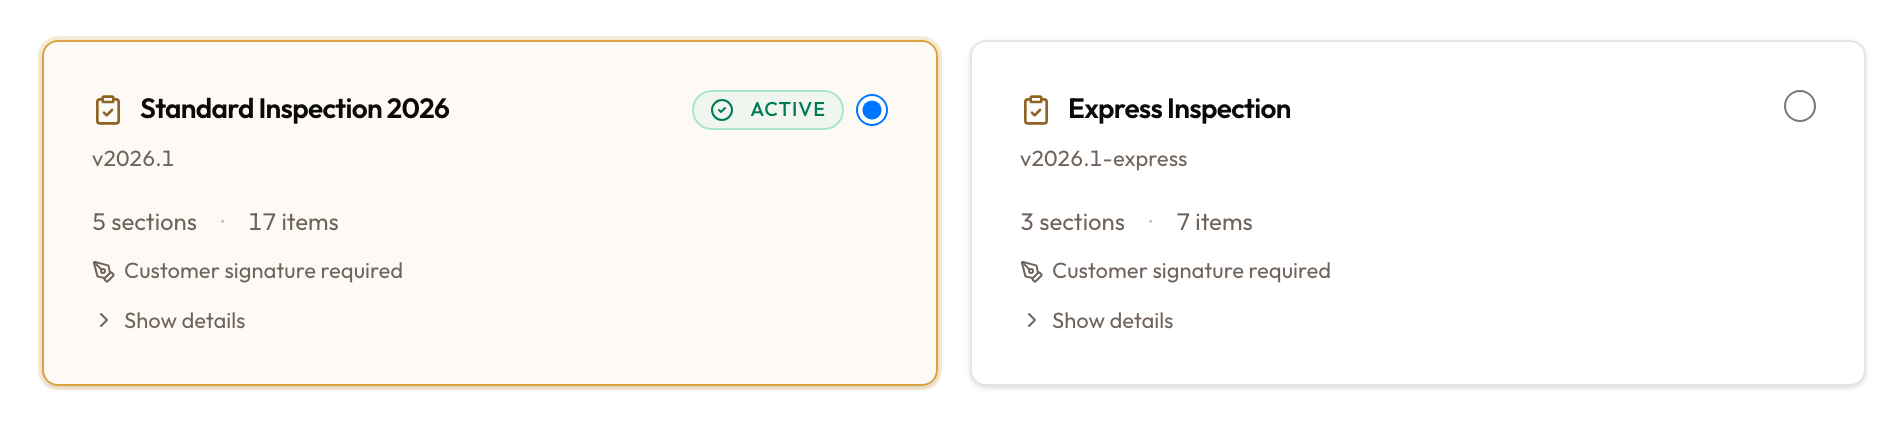
Settings → Inspection Templates: the template cards, one marked Active, with Customer signature required and Show details visible.
Set the photo labels
The Photo Upload Labels card lists the photos the active template asks for, in order: for example front, rear, each side, the dashboard.
- Add Photo Label adds one. Type the Label and click Add Photo Label.
- The pencil renames a label, the bin deletes it, and the arrows move it up or down.
Labels must be unique. Changes apply to future inspections only; past inspections keep the labels they were captured with.
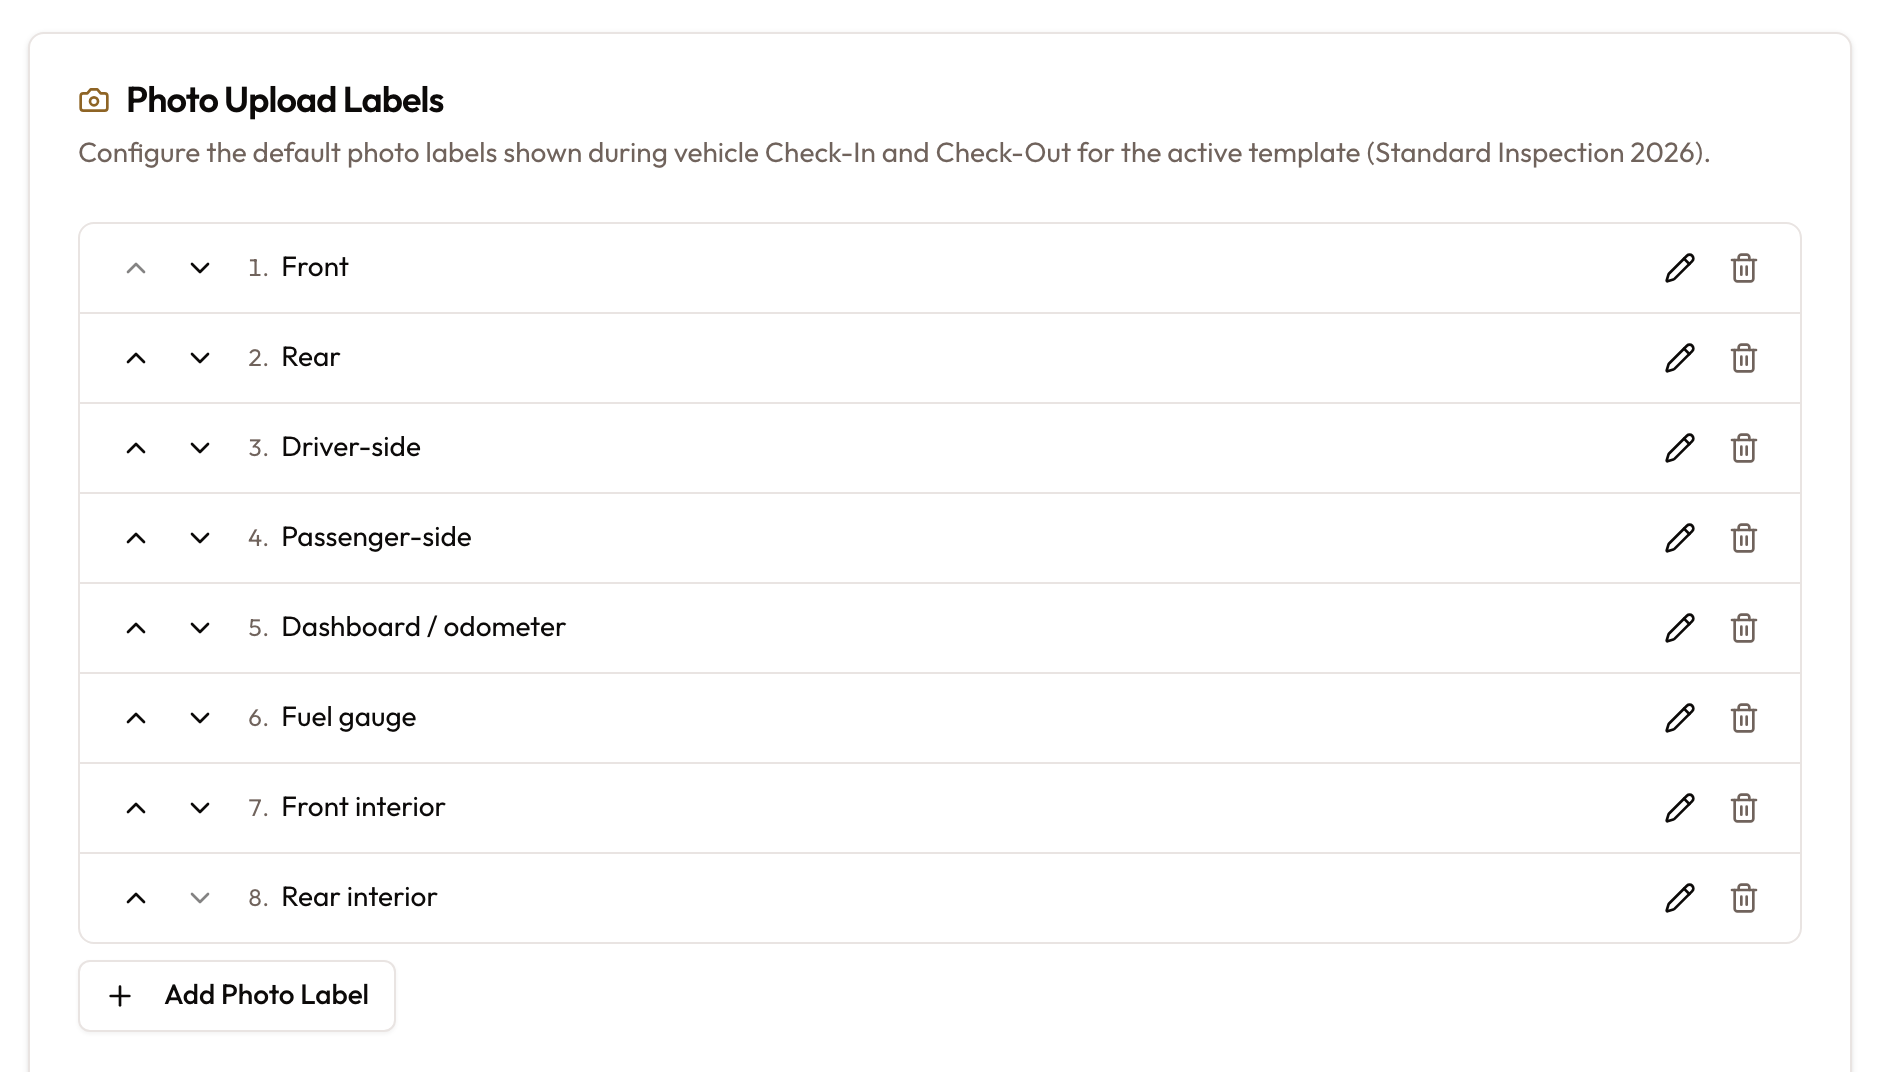
The Photo Upload Labels card: the numbered list of labels with their arrows, pencil and bin, and the Add Photo Label button.
Set the minimum number of photos
Under Minimum Required Photos, enter a number for Check-Out (and Check-In for returns). An inspection cannot be completed until it has that many photos, extra photos included. 0 means no minimum.
Click Save photo settings.
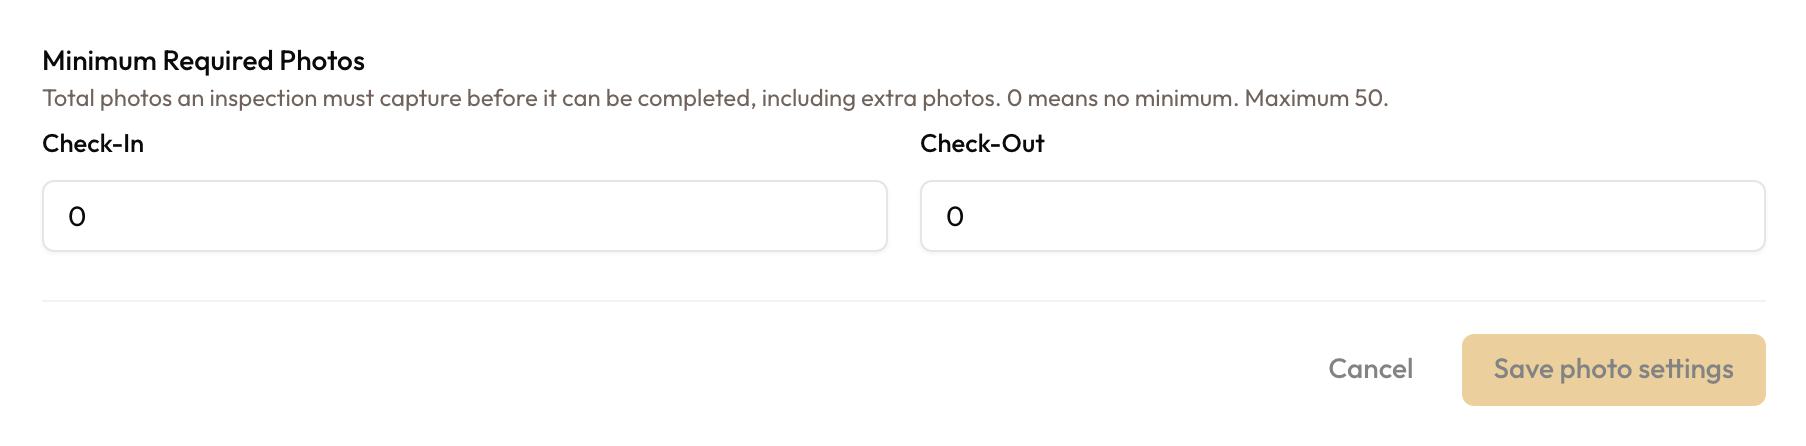
Minimum Required Photos with its Check-In and Check-Out fields and the Save photo settings button.
The photo settings belong to the active template. To change another template's photos, make it active first.
Start the checkout
Open the agreement and start
Open the signed agreement. Start the checkout from any of these:
- Start Checkout on the WHAT'S NEXT? banner, which reads "Agreement signed and ready. Complete vehicle checkout to activate."
- Start Vehicle Checkout in the sidebar, under Workflow Actions.
- Start Checkout on the agreement's Workflow tab.
The checkout opens on Step 1 of 2 — Vehicle Inspection.

The WHAT'S NEXT? banner reading "Agreement signed and ready. Complete vehicle checkout to activate." with its Start Checkout button.
Step 1 — Vehicle Inspection
The sections below come from your inspection template, so yours may differ in order and content.
Watch the progress bar
A bar at the top shows the vehicle, the agreement number, the customer and a Checkout badge. Under it, Inspection Progress counts the required items you have completed against the total.
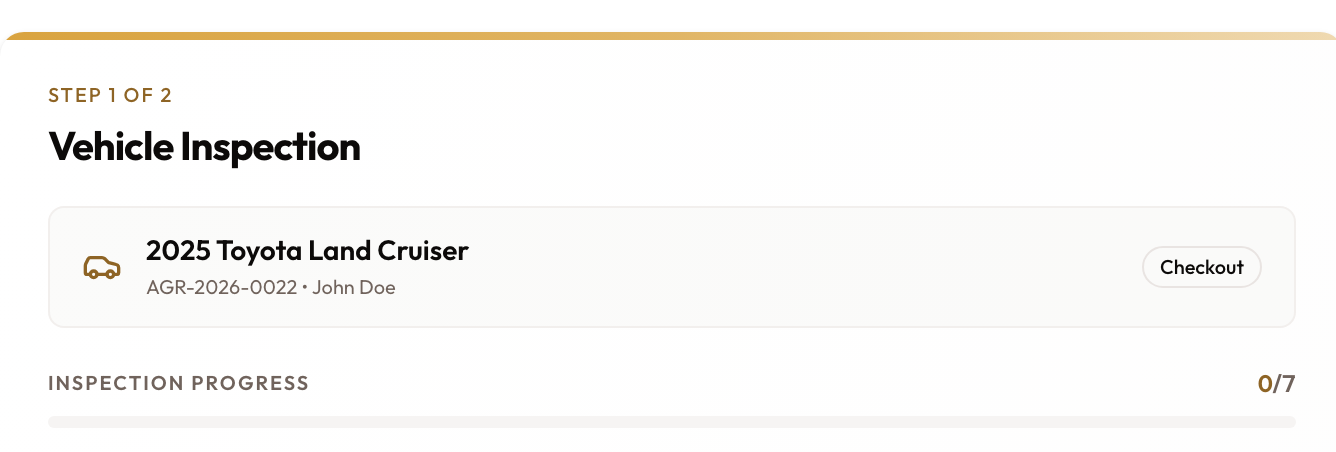
The top of Step 1 of 2 — Vehicle Inspection: the vehicle bar with its Checkout badge, and Inspection Progress.
Photograph the vehicle
The Photos section has one tile per photo label.
- Tap a tile. The camera screen opens with the label as its title.
- Tap Capture Photo, or Upload from Gallery to pick an existing picture.
- The photo uploads and you return to the grid, with the tile filled.
To redo a photo, tap its tile and choose Retake. The bin on a filled tile removes it. The section header counts how many tiles are filled.
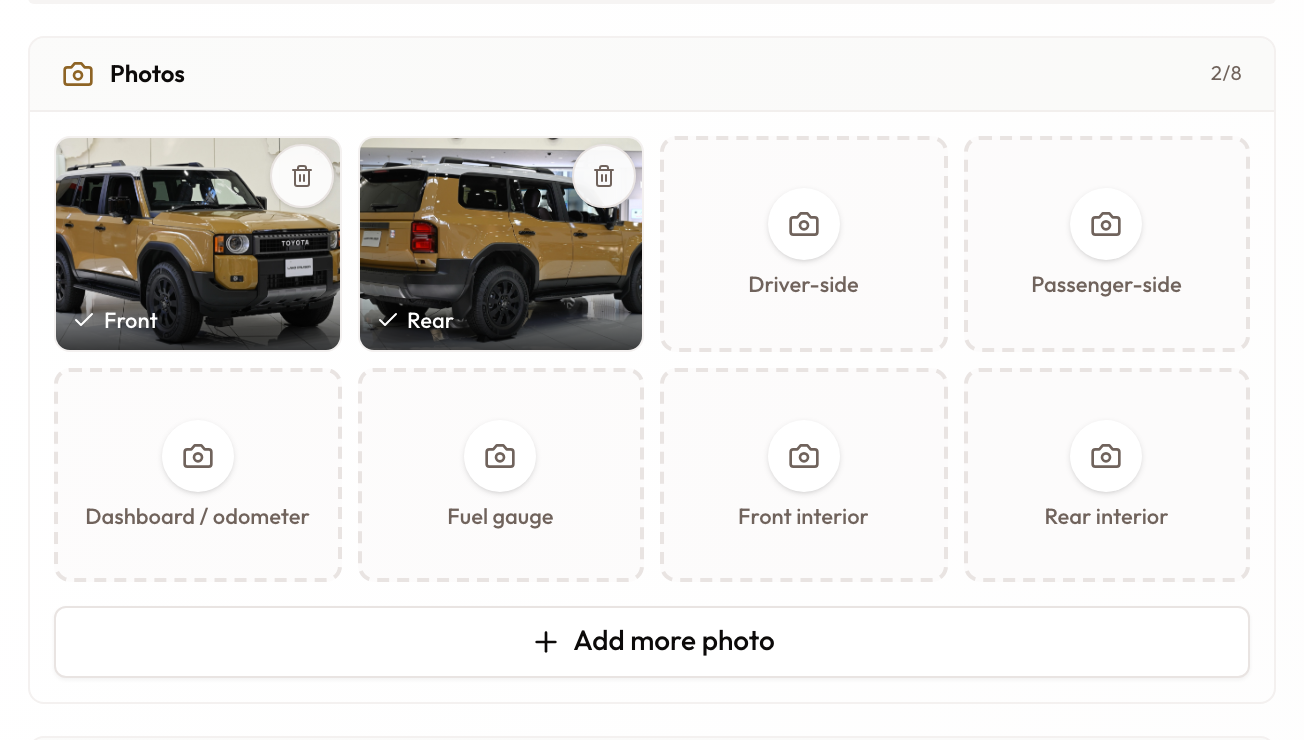
The Photos section with some tiles filled and some empty, the count in the header, and the Add more photo button under the grid.
Add extra photos and meet the minimum
Need a shot the template doesn't list, like the roof or the spare tyre?
- Tap Add more photo under the grid.
- Type a Photo label and tap Take photo.
- Take the photo as usual. It joins the grid with its own tile.
The label is saved with this inspection only. It does not change your template.
If your workspace sets a Check-Out minimum, the header shows … of … minimum instead, and extra photos count toward it. Until the minimum is met, a red message reads "Please upload at least … photos before completing Check-Out (… so far)." and Next Step stays locked.
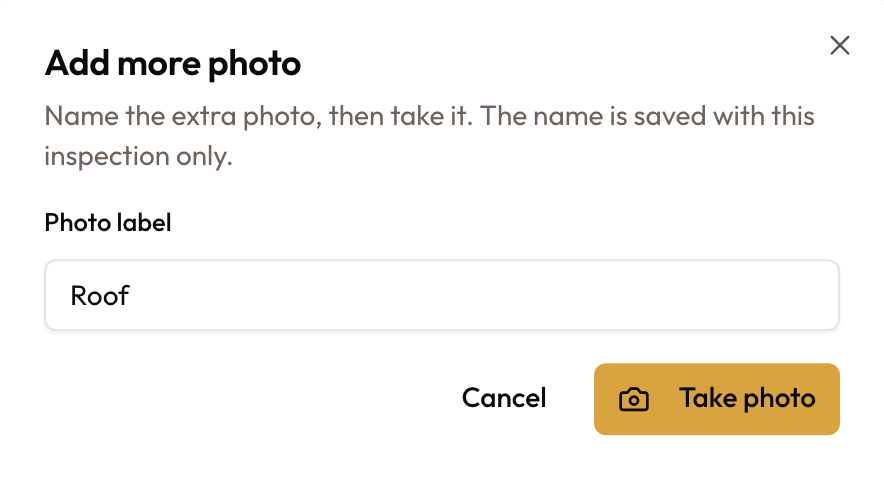
The Add more photo dialog with a Photo label typed in and the Take photo button.
Record existing damage
Click Add damage for anything already on the vehicle, and fill in:
- Type: dent, scratch, scuff, crack or other
- Severity: minor, moderate or major
- Location, for example front bumper, lower right
- Description (optional)
- Photos: at least one, with Add photo
Save stays disabled until the entry has a location and a photo. Each saved entry is listed in the section with its photos.
This is your evidence. Damage you don't record at checkout is hard to argue about when the vehicle comes back, because the customer can say it was already there. Damage photos are kept with the entry but do not count toward the photo minimum.
Complete the checklist
Work through the remaining sections, for example Mileage & Fuel, Functional Checks and Notes. Required items carry a red asterisk.
- Checks are answered Pass or Fail, with an optional note.
- The odometer field shows the vehicle's "Last recorded" reading. A lower figure is rejected: "Reading is below the last recorded mileage (…). It cannot go backwards."
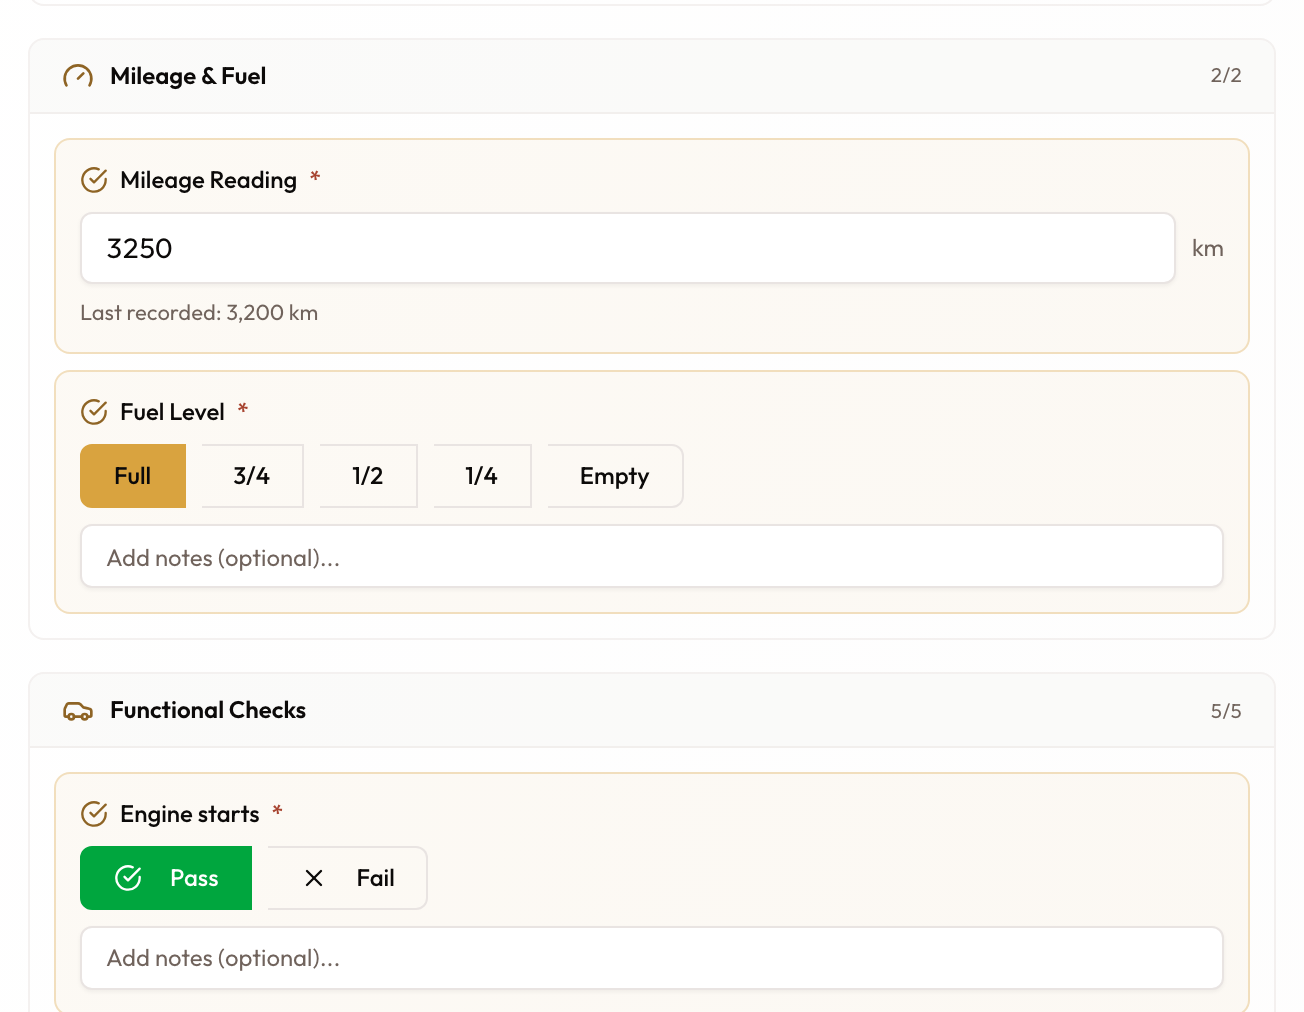
The Mileage & Fuel section with the odometer and its "Last recorded" line, and a Functional Checks item answered Pass.
Set the overall condition
Pick the Overall Condition: Excellent, Good, Fair, Poor or Damaged. It is required, and it shows again on the review step.

The Overall Condition block with Good selected.
Capture the signature
If the template asks for a signature, the Customer Signature block shows.
- Tap Capture Signature and have the customer sign on screen.
- Tap Save Signature. (Clear and Undo fix a stroke first.)
A green Signed pill and "Signed by …" confirm it. Replace Signature lets the customer sign again.
If the customer is not there, for example an after-hours drop-off, tick Customer not present (no-show) and fill in the No-show reason. The reason is required.
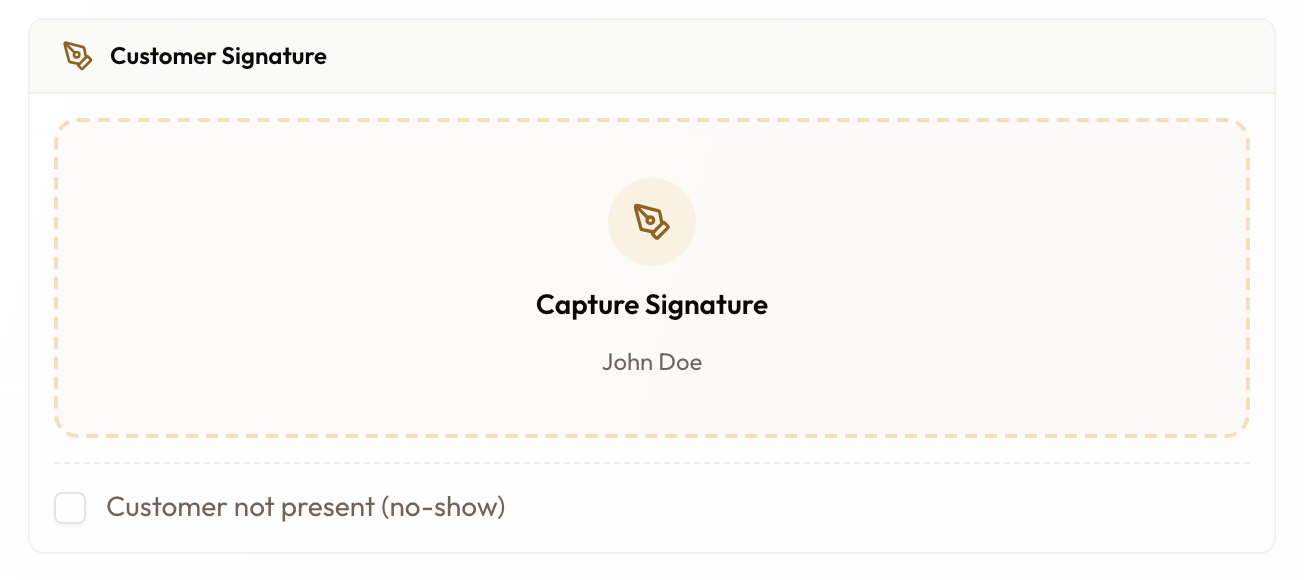
The Customer Signature block with Capture Signature, and the Customer not present (no-show) tickbox below.
Go to the review
Click Next Step. It stays disabled until everything required is done: the line beside it reads Complete all required items until then, and Inspection complete once it is.
Above the button, a line lists what is still missing, for example "2 required item(s) remaining: Fuel Level, Customer Signature…".

The bottom of the inspection: the "required item(s) remaining" line, then the action bar with Next Step and its status line.
Step 2 — Checkout Review
Check the review
Three counters sit across the top: Checklist, Photos and Signed. Below them:
- a green Ready to Complete panel, or
- a red Action Required panel, with Complete Checkout disabled.
Checkout Summary lists the Vehicle, Customer, Agreement and Overall Condition.
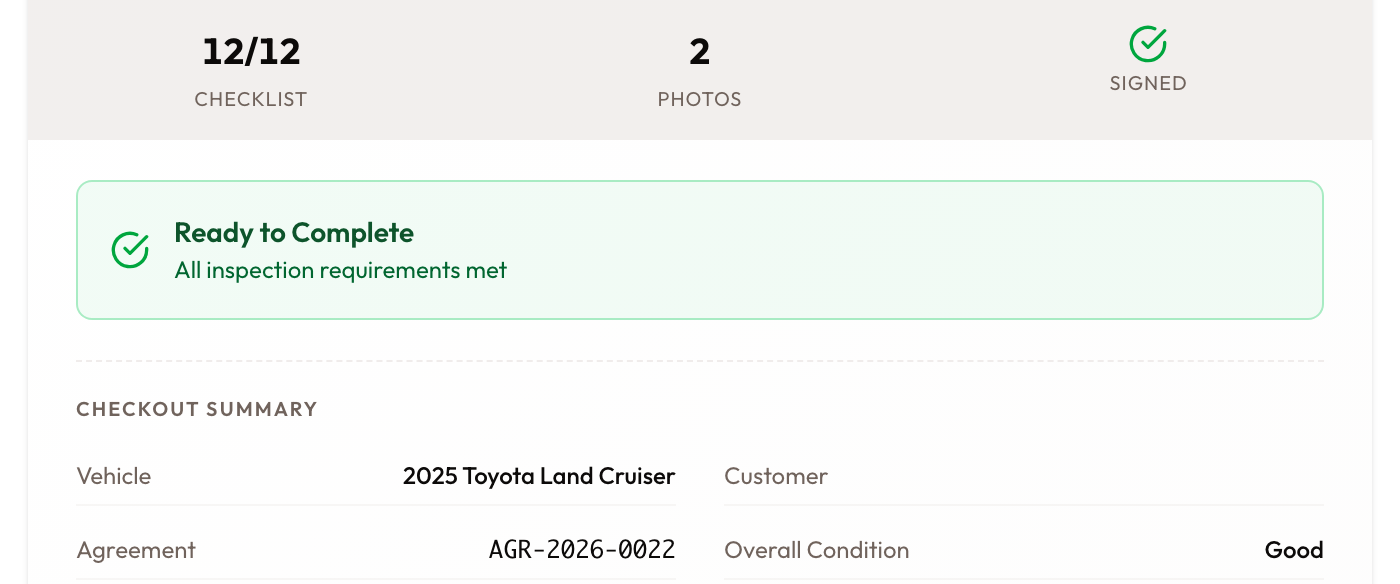
The three counters, the green Ready to Complete panel and the Checkout Summary.
Set the handover time
Vehicle handed over at defaults to now. If the vehicle went out before you got to the paperwork, set the real time. It can't be in the future or before the agreement's start date.
This time decides who pays for tolls and fines. Anything after it is charged to this agreement. If the car left at 9am and you complete checkout at noon, set 9am, or those three hours of driving are not on the customer's agreement.

The Vehicle handed over at picker with its hint.
Complete the checkout
Click Complete Checkout. Previous goes back to the inspection if something needs changing.
If the agreement's start date has already passed, Agreement Starts in the Past asks what to do. It shows the original and new dates, and keeps the same length of rental.
- Keep Original Dates keeps the dates as signed.
- Update Dates moves the rental to start today.
Checkout continues either way.
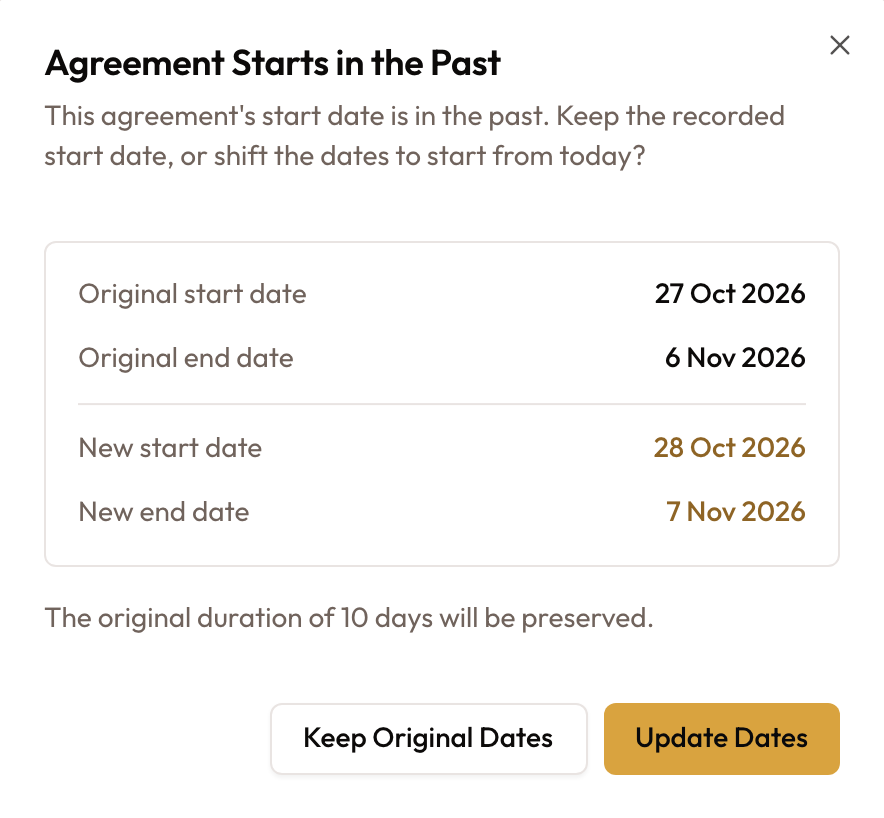
The Agreement Starts in the Past dialog showing the original and new dates, the duration note, and both buttons.
"Vehicle checkout completed successfully!" confirms it. You land back on the agreement, now Active, and the vehicle is Rented.

The agreement header after checkout, with the Active status badge.
What checkout raises
Checkout always raises the security deposit invoice, if the agreement takes its deposit by invoice. The first rental invoice, and whether the customer is emailed, depend on two switches under Settings → Billing, in Invoicing at handover.
| At checkout | When |
|---|---|
| Security deposit invoice raised | Always, when the deposit is taken by Invoice. Not when it is Pre-Auth or Waived. |
| First rental invoice raised | Only if Raise invoices automatically is on. |
| Invoices emailed to the customer | Only if Email the invoice to the customer is on too. This covers the deposit invoice. |
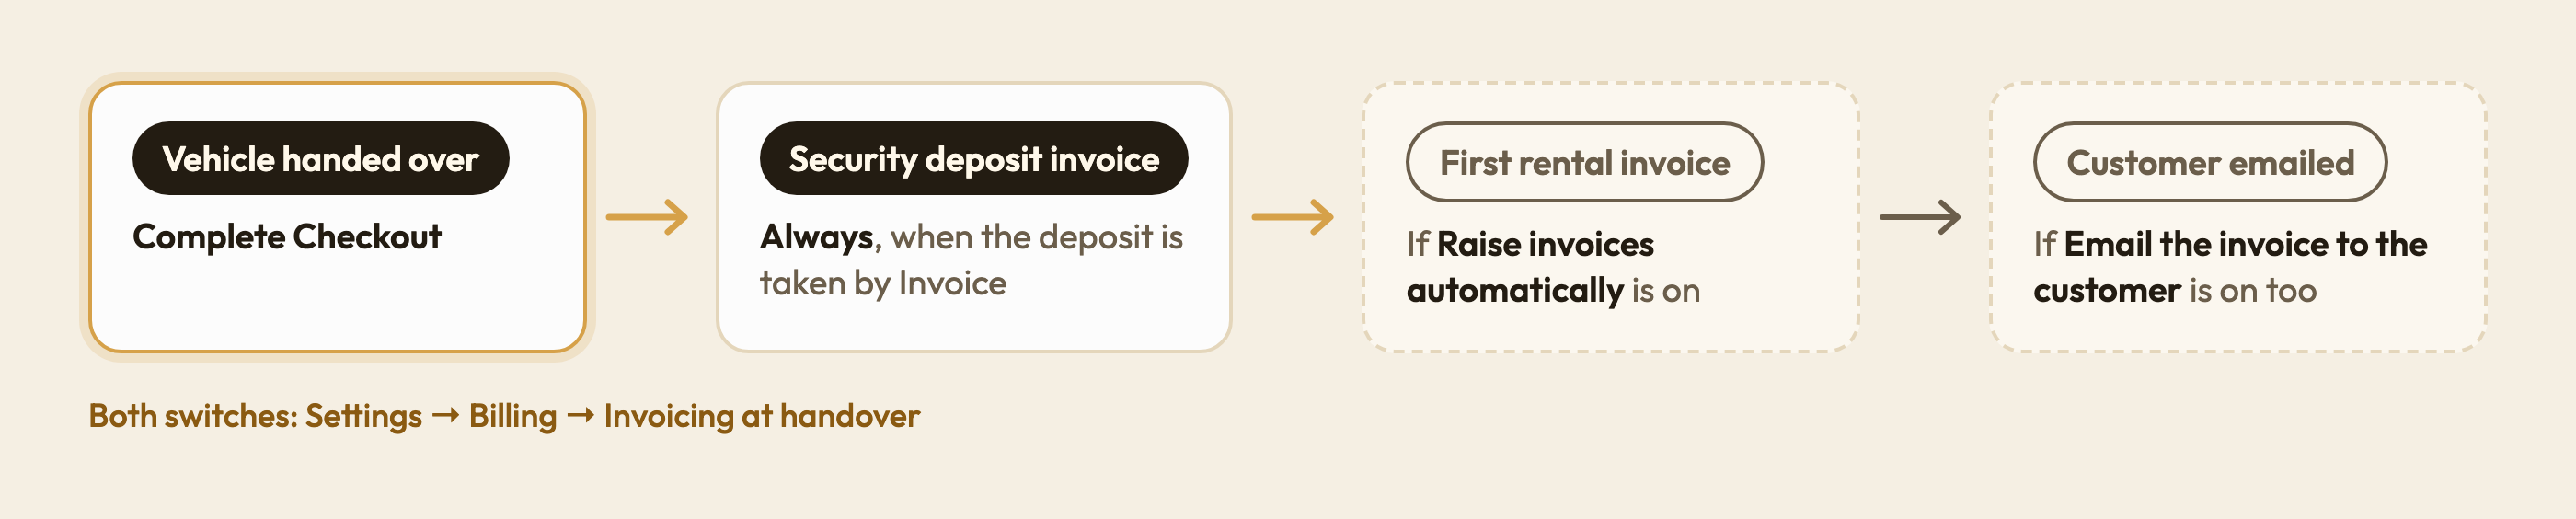
Diagram in the brand style: Vehicle handed over → Security deposit invoice (always) → First rental invoice (if Raise invoices automatically is on) → Customer emailed (if Email the invoice to the customer is on).
The deposit invoice does not wait. With Raise invoices automatically off, the settings page says the deposit invoice is raised when you bill. It isn't: checkout raises it straight away. Only the rental invoice waits.
SpectroNova Express also emails the customer that the rental has started, with the signed agreement and the checkout checklist attached, if the customer has an email address.
Where the rental is billed afterwards
- Short-term rentals (billed as a Single Invoice): the agreement opens on the Rental Account. A period not billed at checkout waits under Not yet billed until you click Bill rental or Bill this period. See The Rental Account & Bill Rental.
- Monthly agreements: the payment schedule is always created. With automatic invoicing off, the first payment has no invoice yet, and you raise it from the schedule. See Viewing Agreement Details & Timeline.
Common problems
Next Step stays locked though every item looks done.
- The photo minimum isn't met. The red message under the photos says how many are needed; use Add more photo. Damage photos don't count.
- The odometer reading is below the last recorded figure.
- A no-show is ticked but the No-show reason is empty.
Read the "required item(s) remaining" line above the button.
"Not set" next to Overall Condition. It was skipped. Go back with Previous and pick one.
Signed shows a cross after a no-show. That's expected: no signature was captured. The checkout can still complete because the no-show reason is recorded instead.
No rental invoice after checkout. Raise invoices automatically is off in Settings → Billing. Bill from the Rental Account (short-term) or the payment schedule (monthly).
A deposit invoice appeared with invoicing off. That's by design: the deposit is taken at hand-over. With emailing off, the customer has not been sent it yet. You can send it from the invoice, see Sending Invoices.
The template's photo labels are wrong for this car. Use Add more photo for this checkout. To change the labels for every future checkout, edit them in Settings → Inspection Templates.
What to read next
- Vehicle Check-In & Return Inspection: the other half of the pair, when the vehicle comes back
- The Rental Account & Bill Rental: billing a short-term rental after checkout
- Viewing Agreement Details & Timeline: reading the agreement once it is active
Pricing & Rates
How SpectroNova Express prices a rental — 24-hour days, rate tiers, overriding the rate, all-in prices, daily billing and discounts.
Viewing Agreement Details & Timeline
Read an agreement at a glance: the next action, the tabs, the Overview for monthly agreements and short-term rentals, the deposit, the timeline and the sidebar.