

Express Rental (Walk-Up)
Create and hand over a short-term rental in one guided pass — renter, vehicle, condition, signature, activate.
Express Rental serves a walk-up customer in one pass. When you activate it, SpectroNova Express:
- creates the agreement,
- locks the contract and records the renter's signature,
- checks the vehicle out with your condition record and photos,
- marks the vehicle rented.
There is no separate lock-and-sign or checkout step.
An Express rental is always a short-term rental of 1 to 14 days. It bills as a Single Invoice and is always charged at the daily rate, so once it is active its money lives on the agreement's Rental Account.
- Whether the rental is invoiced at activation depends on your Raise invoices automatically setting (Settings → Billing), exactly as for a standard checkout.
- A deposit taken On invoice is invoiced at activation either way.
Before you start you need permission to update agreements, and at least one vehicle in Available status. For anything longer than 14 days, use the full agreement wizard instead.
A progress bar tracks five stages: Renter → Vehicle & terms → Condition → Signature → Review.

Getting into Express
Switch to Express
- Open Agreements and click Create Agreement.
- On the full wizard, flip the Express rental switch at the top right.
The Express page opens on Step 1 of 5.
- The choice is remembered on this device. Next time, Create Agreement opens Express directly. Other devices are unaffected.
- To go back, flip the Express switch at the top right of the Express page. The full wizard is then remembered instead.
- A new agreement started with a vehicle and dates already chosen, such as from the fleet calendar, always opens the full wizard.

Stage 1 — Who's renting?
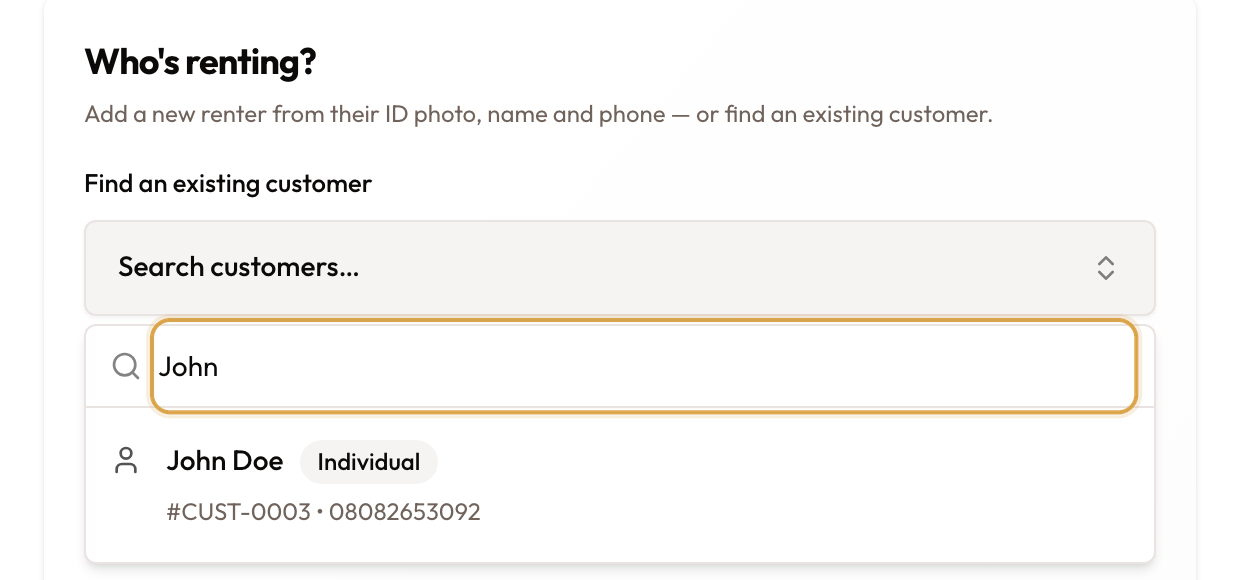
Find an existing customer
Under Find an existing customer, search and pick the match. The new-renter form disappears and the renter is selected.
Or add a new renter
Below or new renter:
- Optional: tap Scan ID or passport and scan an Emirates ID or Passport. The scan fills in the name and the ID photo for you. It does not create the customer on its own.
- Optional: tap ID photo (front) to photograph the ID yourself.
- Fill in First name, Last name and Phone.
- Tick I have checked the ID and the renter is 21 or older.
- Tap Create customer.
Create customer stays greyed out until the three fields are filled and the box is ticked. If the phone already belongs to a customer, a banner shows who it is. Tap Use them rather than creating a duplicate.
For the complete customer form see Adding Individual & Company Customers, and for ID scanning see Customer KYC Process.
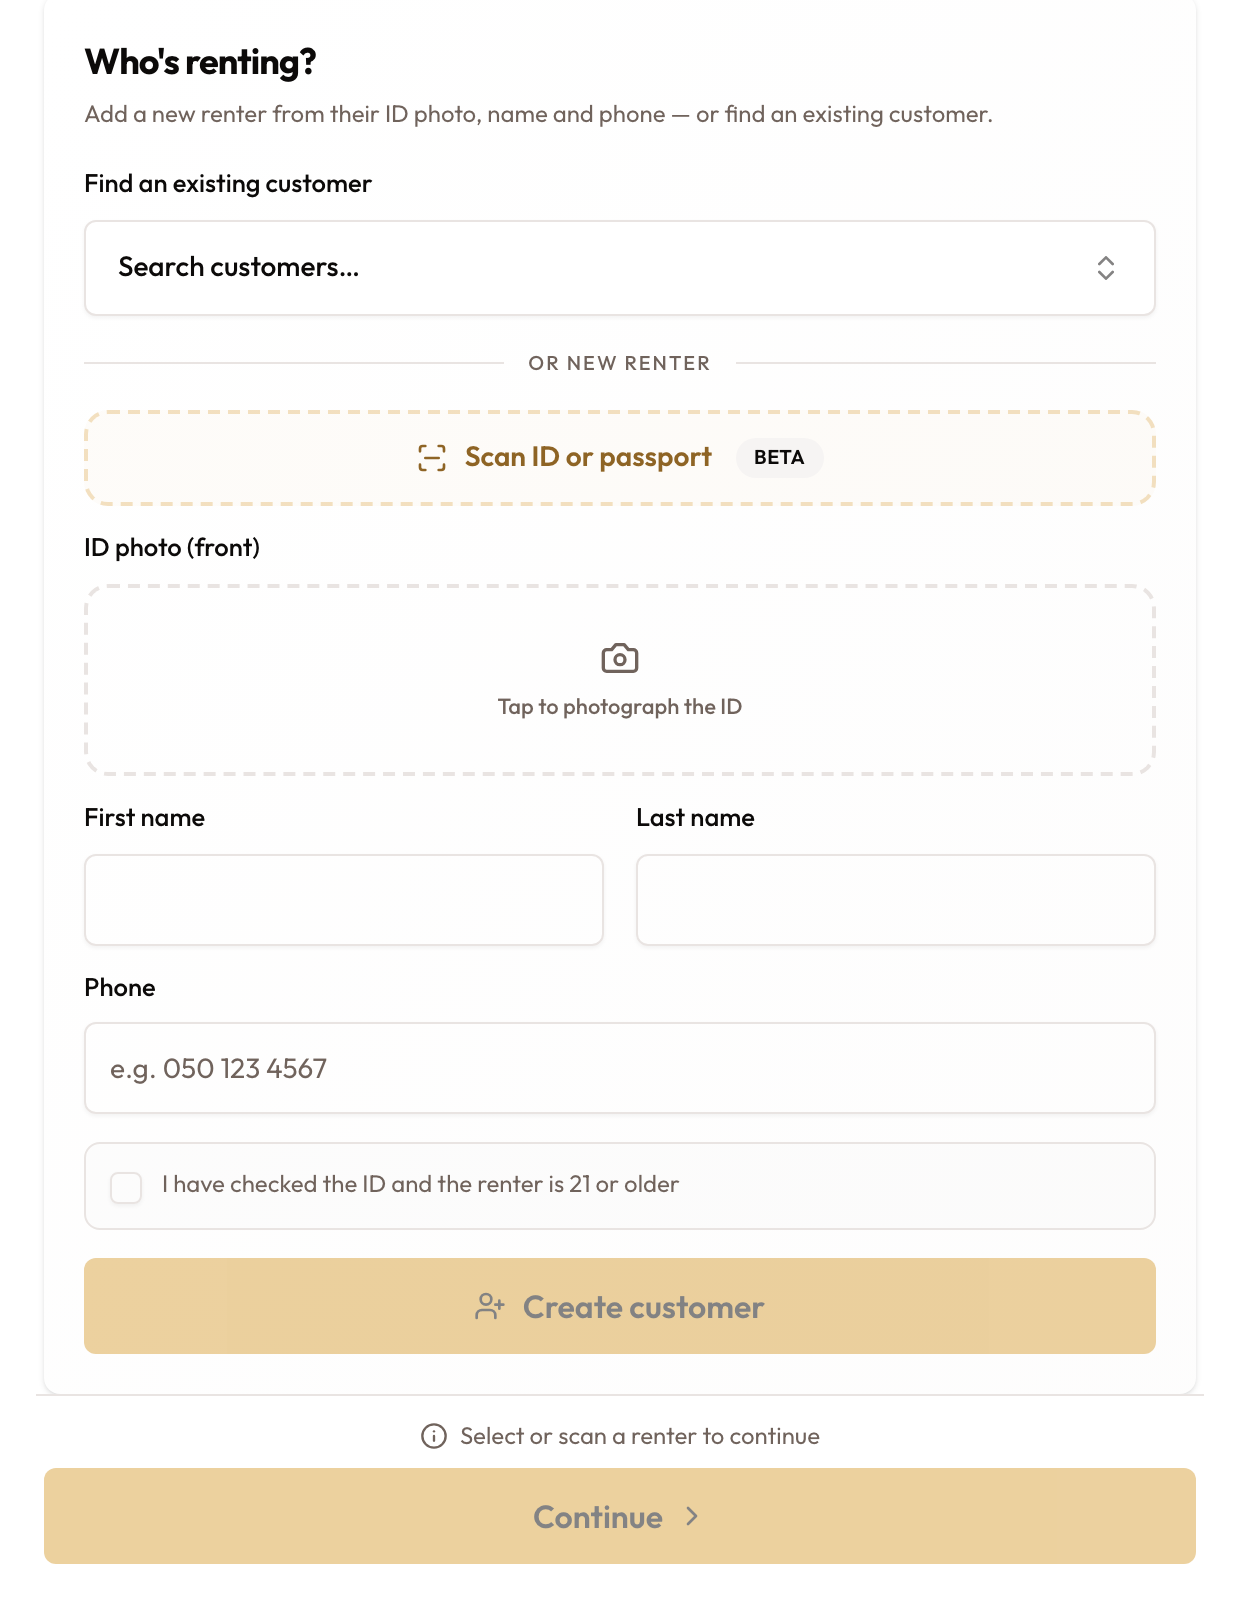
The Who's renting? step: search for a customer, or add a new renter below.
Continue with the renter
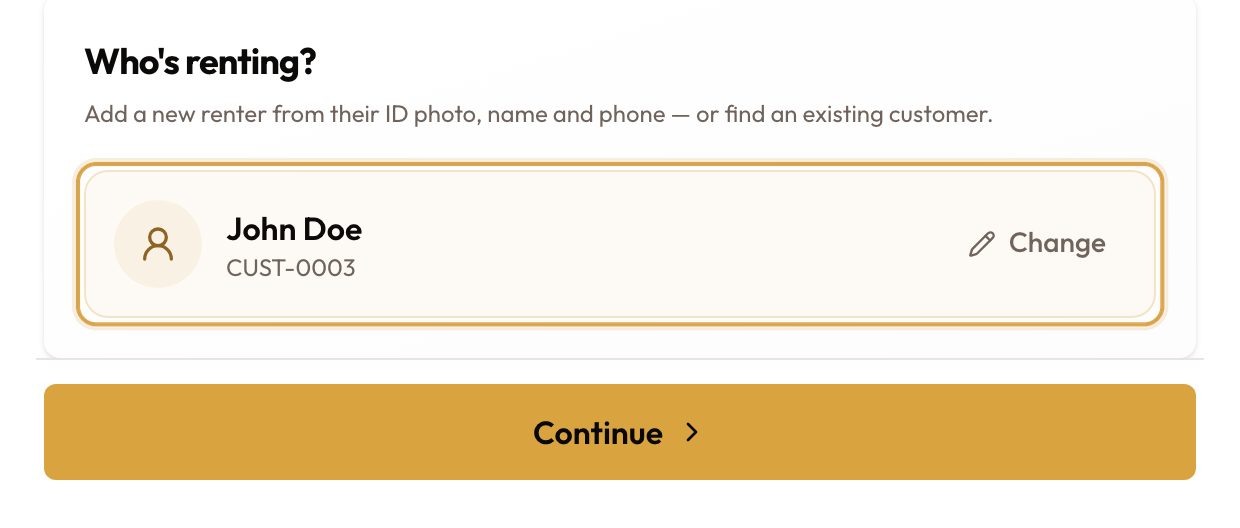
A card shows the renter's name and customer number, with Change to pick someone else. Tap Continue.
Continue stays greyed out until a customer is selected or created. A half-filled form is not enough.
Stage 2 — Vehicle & terms
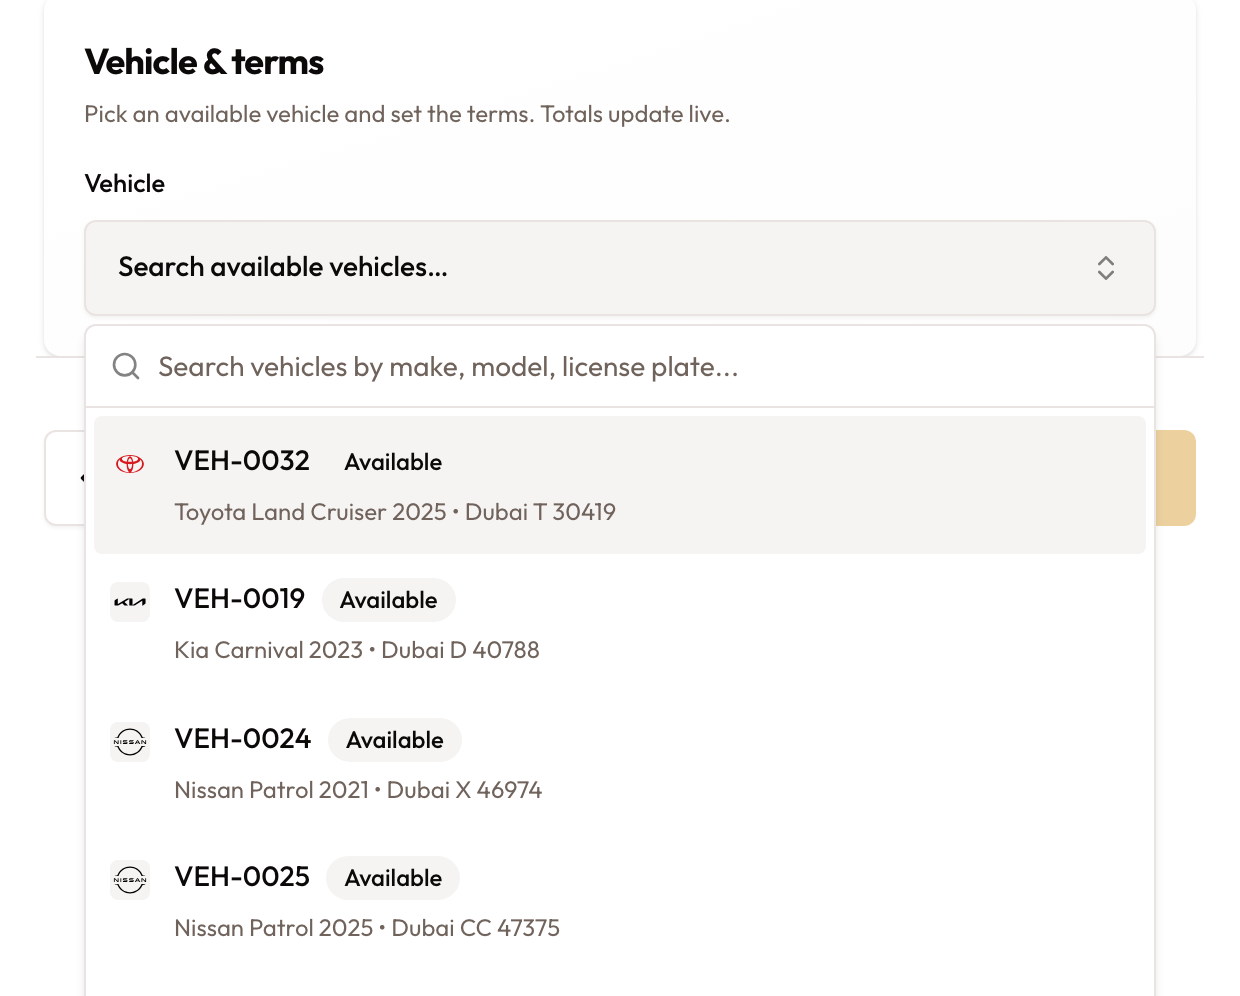
Pick the vehicle
Search the Vehicle picker. Only vehicles in Available status are listed. Once you pick one, the Terms and the Charge summary appear, and the Daily rate fills from the rate card.
Set the start date, rate and duration
| Field | What to do |
|---|---|
| Start date | Today by default. You can backdate it up to 2 days, or set a later date. |
| Daily rate | Prefilled from the rate card. Change it if you agreed a different rate. |
| Duration | 1 to 14 days with the − and + buttons. Return follows. |
Clearing the rate box to type a new figure is safe: the rate card does not refill it once you have edited it. Express always charges the daily rate for every day, even for a week or more. See Pricing & Rates for how rates work in the full wizard.
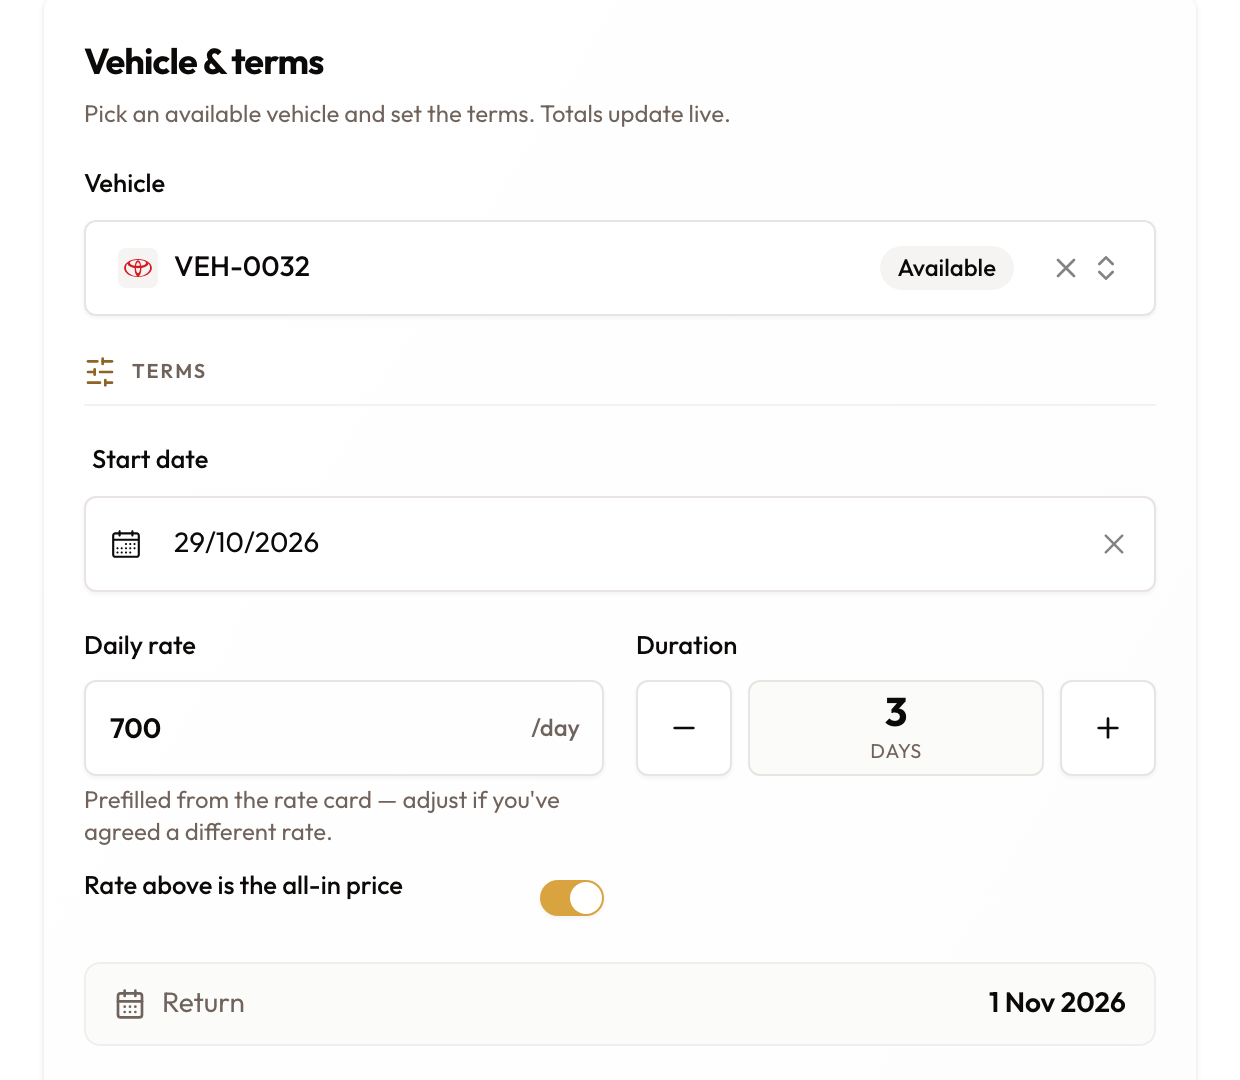
Vehicle & terms: start date, daily rate and duration, with the totals below.
Check whether the rate includes tax
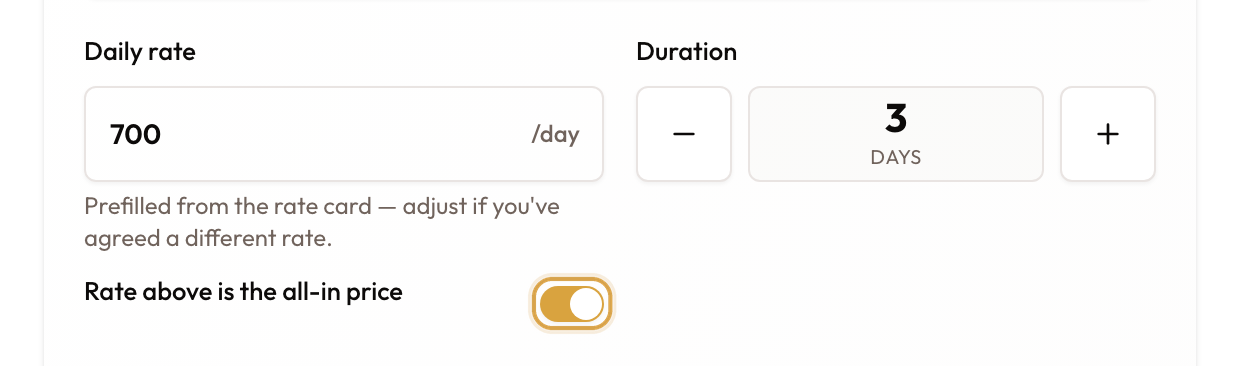
Rate above is the all-in price is on by default: the daily rate is what the customer pays, tax included, and SpectroNova Express works the tax out of it.
Turn it off if the rate you agreed is before tax. The tax is then added on top. Either way, the totals shown are exactly what gets invoiced.
Set the deposit
Pick the Security deposit method:
- On invoice (the default) — a deposit invoice is raised at activation.
- Pre-auth — held outside SpectroNova Express; no deposit invoice.
- Waived — no deposit. The Deposit amount field disappears.
Unless you chose Waived, enter the Deposit amount. The charge summary adds it as a separate Security deposit line. For what happens to the deposit afterwards, see Security Deposits.
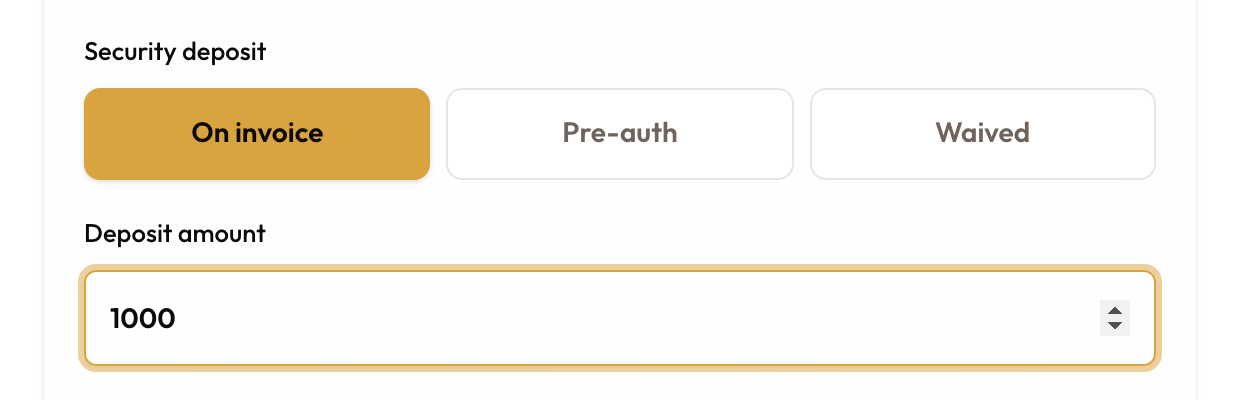
Security deposit set to On invoice, with the amount shown under the total.
Check the charge summary
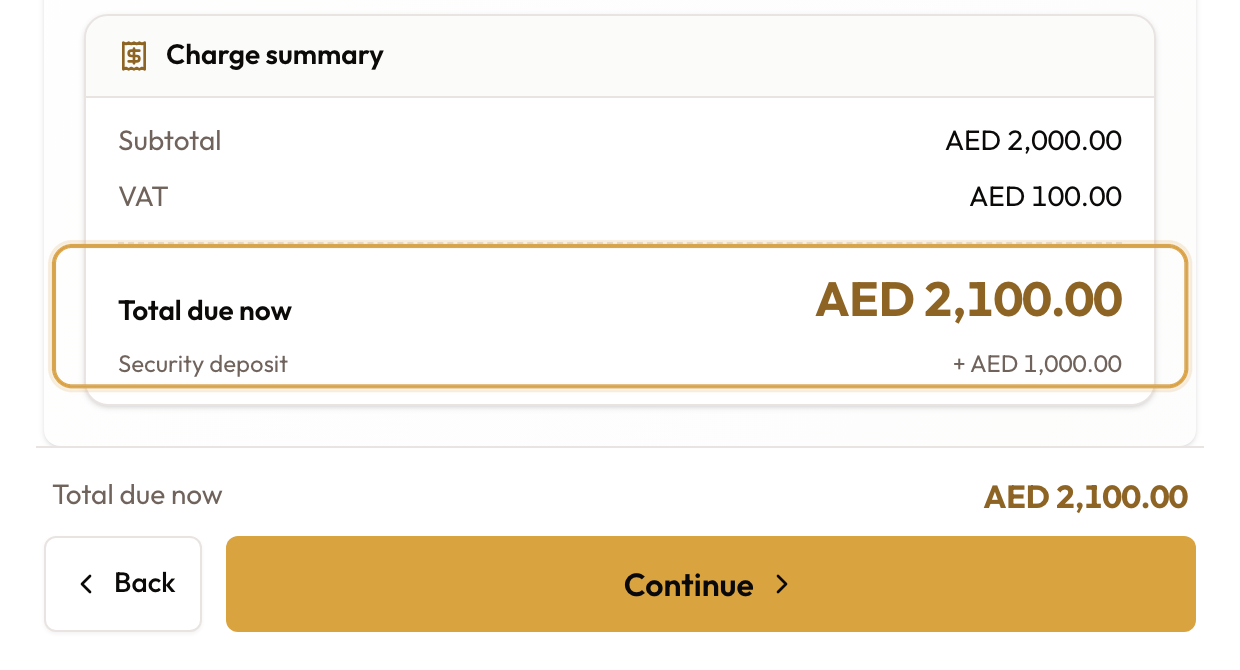
The Charge summary shows Subtotal, VAT, Total due now and the security deposit when there is one. It recalculates as you change the terms.
Total due now is the rental total. It is invoiced at activation only when Raise invoices automatically is on; otherwise it waits on the Rental Account until someone bills it.
Tap Continue. It needs a vehicle and a daily rate above 0.
Stage 3 — Condition & photos
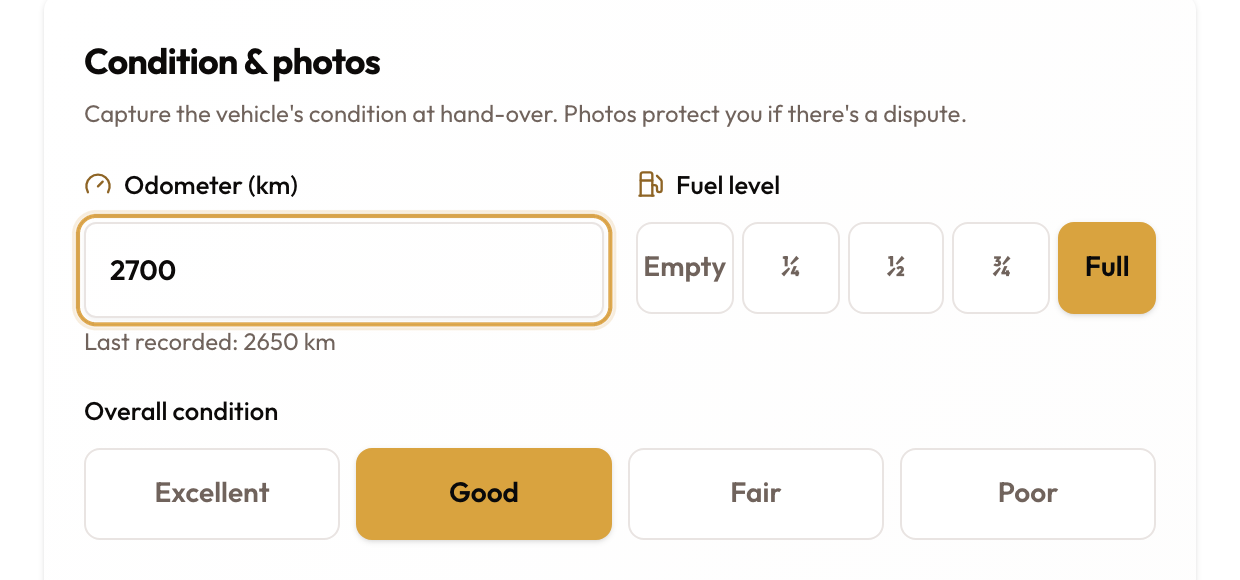
Record odometer, fuel and condition
- Enter the Odometer (km) reading. The hint below shows the last recorded reading. A lower figure is rejected: mileage can't go backwards.
- Pick the Fuel level: Empty, ¼, ½, ¾ or Full.
- Pick the Overall condition: Excellent, Good (the default), Fair or Poor.
Photograph the vehicle
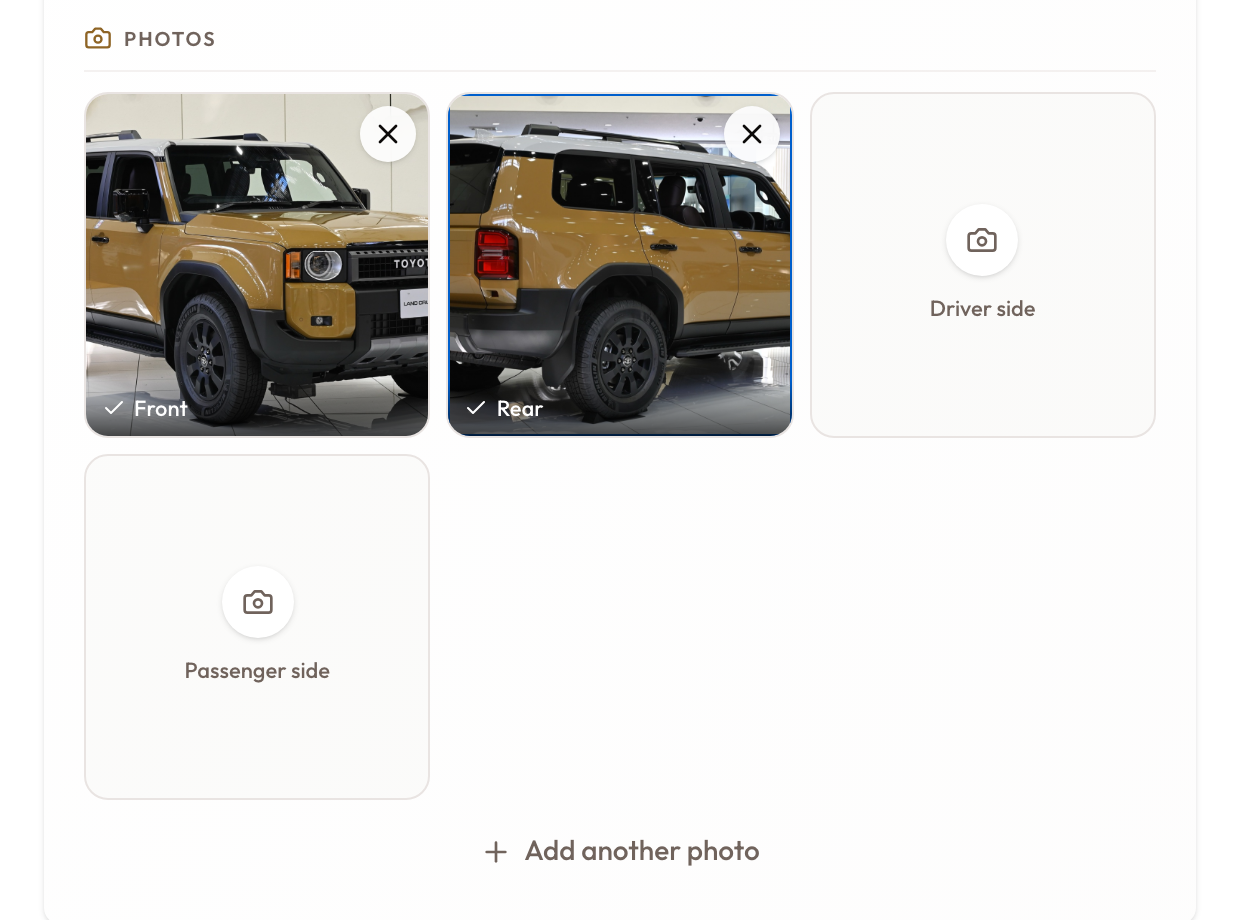
Under Photos there is a tile for Front, Rear, Driver side and Passenger side. Add another photo adds an extra tile, for example for existing damage. The X on a filled tile removes that photo.
How many photos you need is your workspace's Check-Out minimum, under Settings → Inspection Templates → Minimum Required Photos (see Set up the inspection template):
- 0, the default: photos are optional and there is no counter.
- Above 0: a chip counts your photos (for example 2 of 6 required) and turns green when you reach the minimum. Continue stays greyed out until then. If the minimum is more than four, extra Additional tiles appear.
Capture each photo
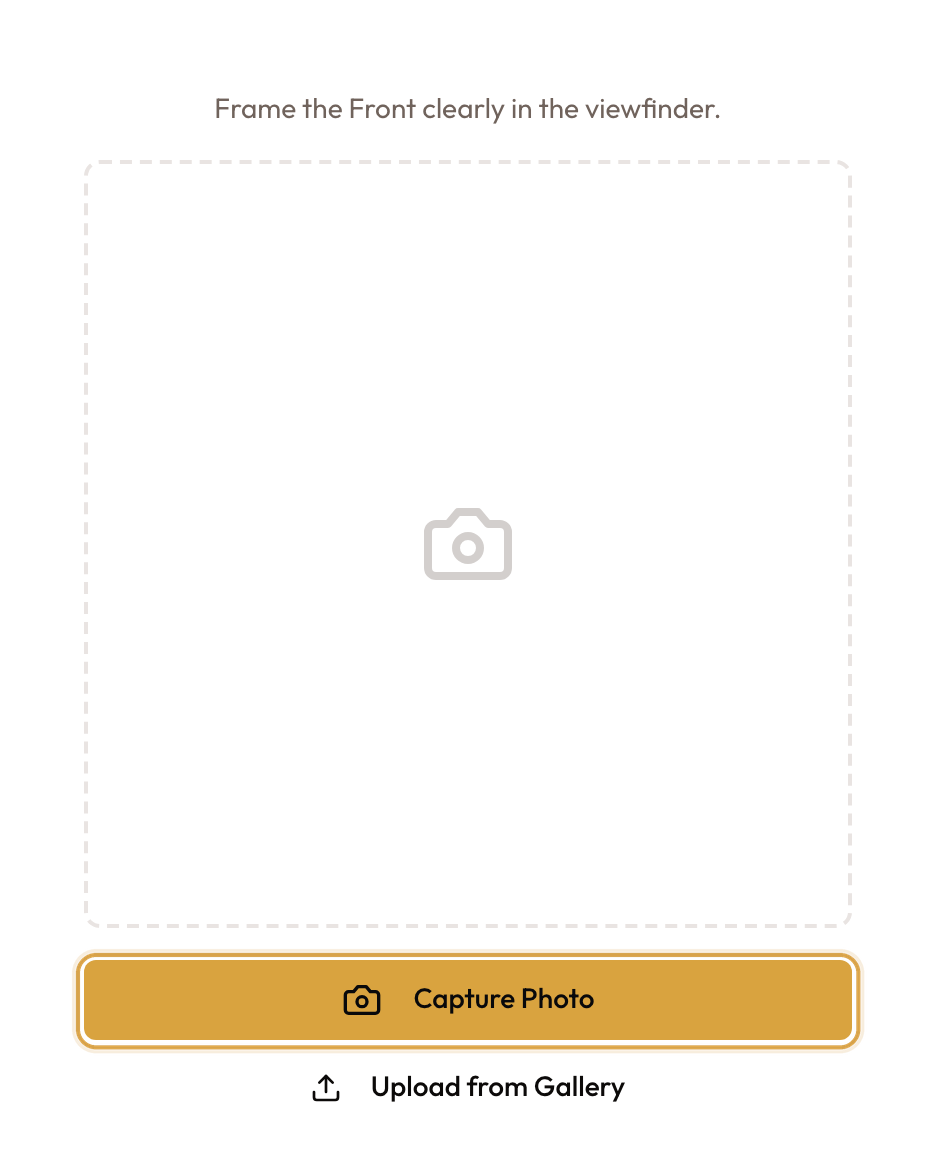
Tap a tile. A full-screen view opens with the angle's name and a framing hint.
- Capture Photo opens the camera; Upload from Gallery picks a saved image.
- Once a photo is there, Retake replaces it.
- The X closes the view without changes.
The photo uploads and the view closes. The tile fills only once the photo is stored, so a filled tile means it is saved. A file that is not an image, or is too large, is rejected and the tile stays empty.
Tap Continue when the odometer, fuel level and any required photos are done.
Stage 4 — Signature
Collect the signature
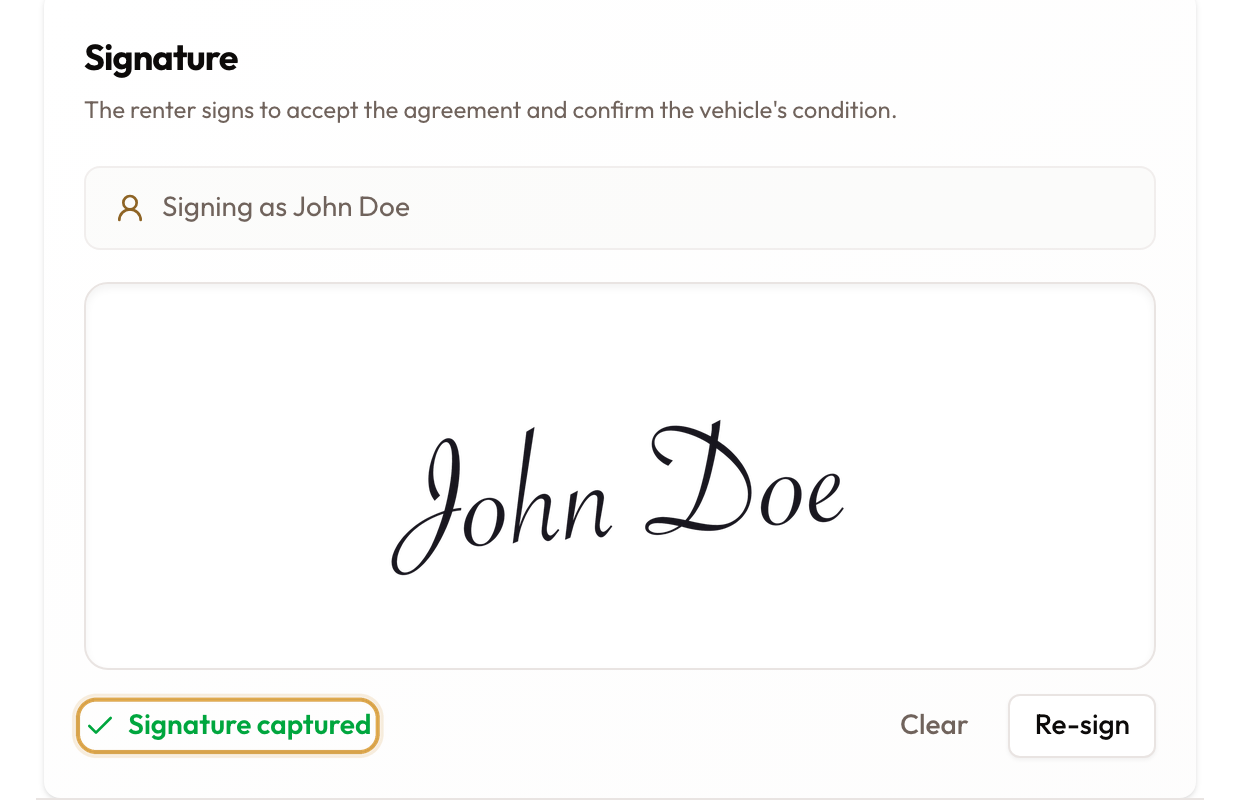
- Tap Sign here.
- The renter signs in the Customer Signature window. Clear and Undo fix mistakes.
- Tap Save Signature.
The signature shows with Signature captured. Re-sign replaces it. Tap Continue.
Stage 5 — Review & hand over
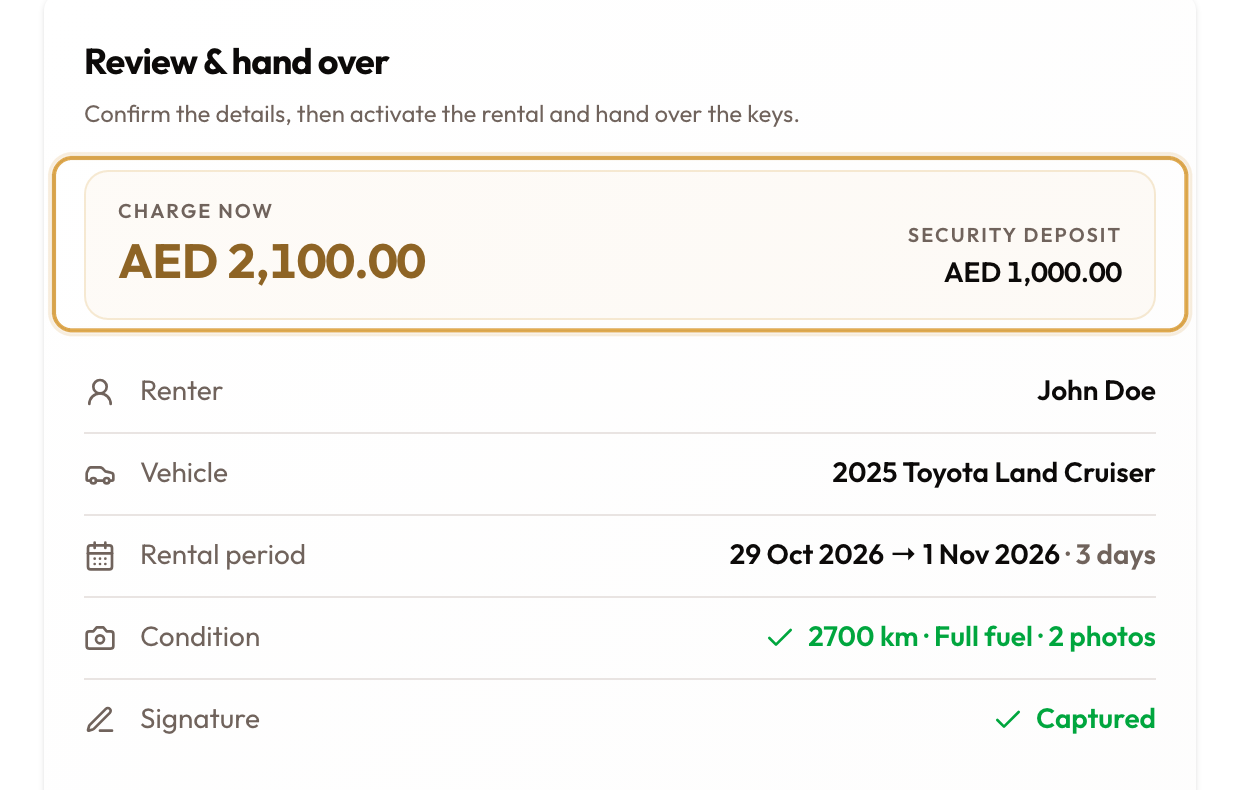
Review the rental
The review shows Charge now (with the Security deposit beside it, if any), then:
- Renter and Vehicle
- Rental period: start → return, and the number of days
- Condition: odometer, fuel and number of photos
- Signature: Captured
Use Back to fix anything on an earlier stage.
Set the handover time (optional)
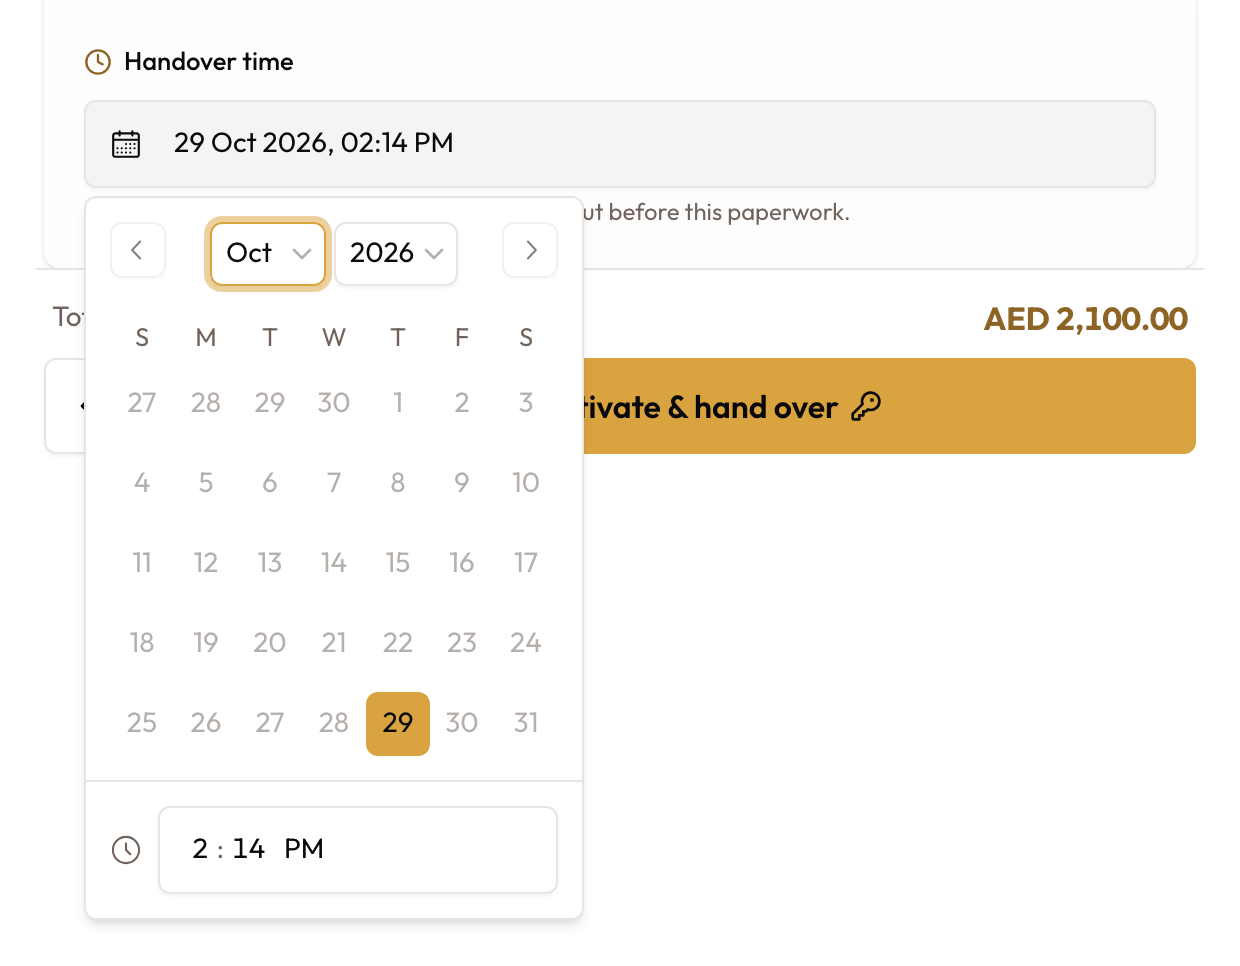
Handover time is now by default. If the vehicle physically went out before the paperwork, set the real time.
- It can't be before the start date, later than now, or after the return date.
- For a backdated rental it starts on the start date.
Activate and hand over
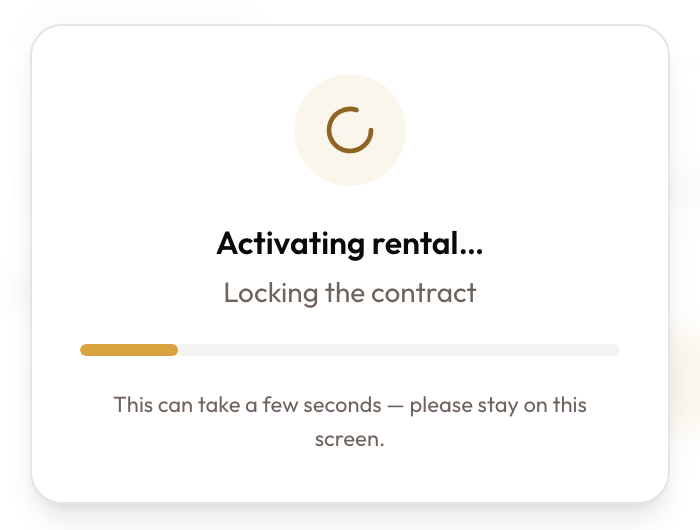
Tap Activate & hand over. An overlay works through locking the contract, recording the signature, generating the invoice, sending the documents and handing over the keys. Stay on the screen until it finishes.
The overlay shows the same phases whatever your billing settings, even when no rental invoice is raised or emailed.
If activation fails, for example because the vehicle was taken in the meantime, the reason shows under the review summary. The draft agreement is removed automatically, so nothing is left half-built.
Check what was created
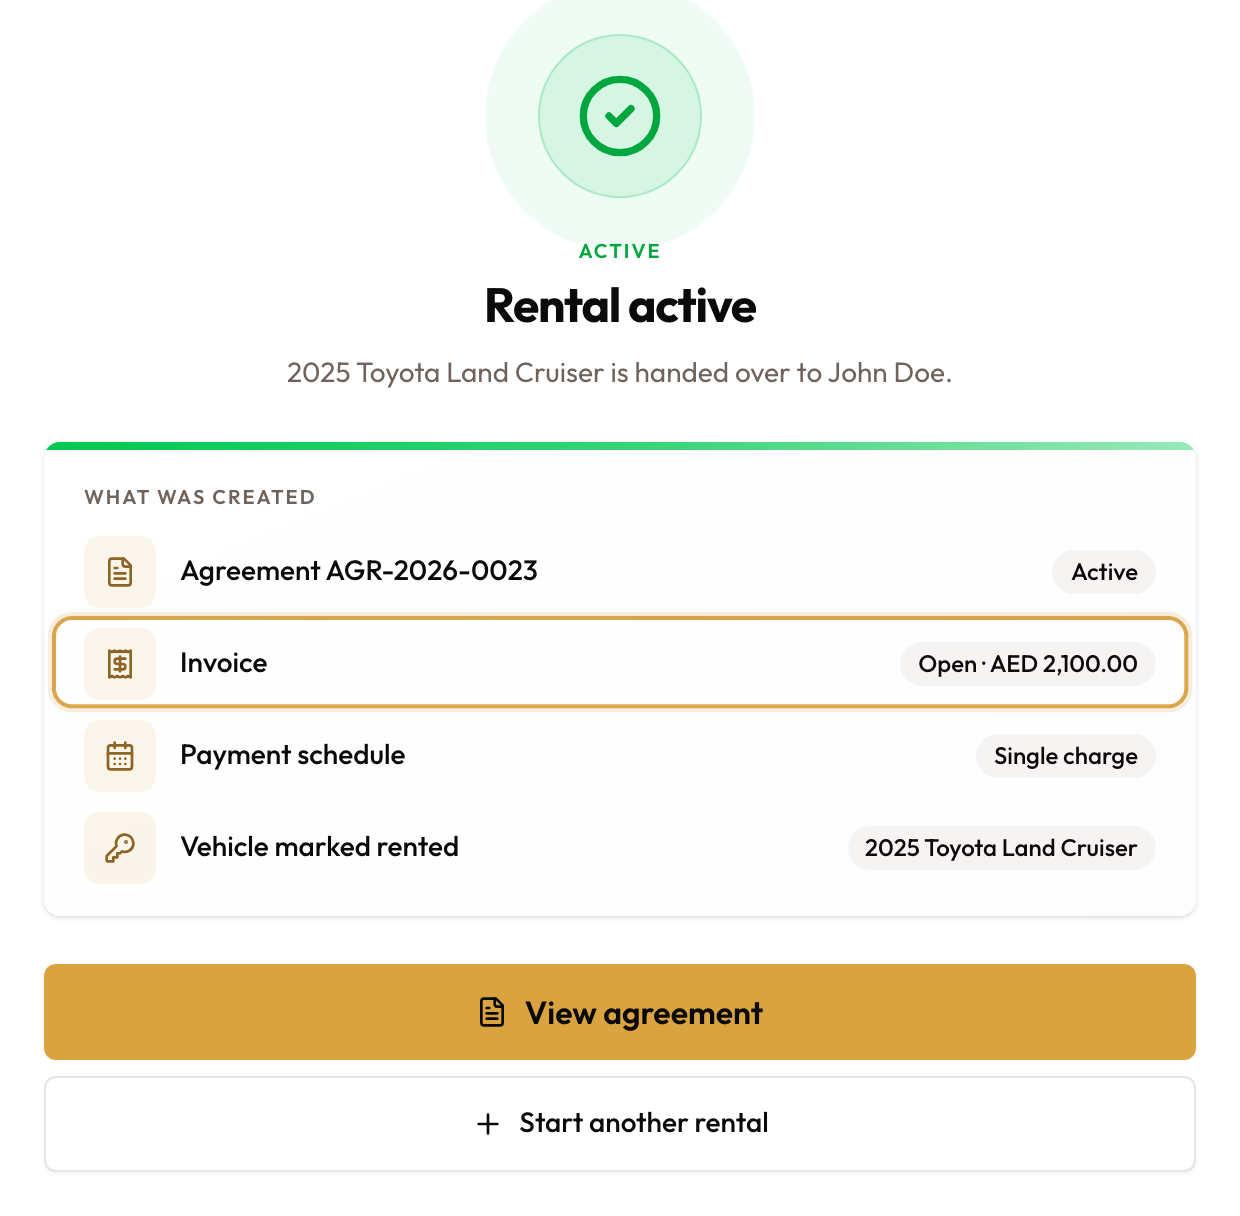
The Rental active screen lists What was created:
- Agreement, marked Active
- Invoice
- Payment schedule
- Vehicle marked rented
Tap View agreement to open it, or Start another rental to clear the form for the next walk-up.
The Invoice row always shows, even when no rental invoice was raised. If Raise invoices automatically is off, the amount is the rental total, waiting under Not yet billed on the agreement's Rental Account. Open the agreement and click Bill rental when you are ready. The Payment schedule row also shows for every Express rental, but a short-term rental's Overview shows the Rental Account, not a payment schedule.
Common problems
| What you see | What it means |
|---|---|
| Create customer stays greyed out | Fill First name, Last name and Phone, and tick the age box. |
| The scan finished but no renter is selected | A scan only fills in the form. Add the phone, tick the age box, then tap Create customer. |
| Continue greyed out on Vehicle & terms | Pick a vehicle and set a daily rate above 0. |
| Totals are off by the tax | Check Rate above is the all-in price. It is on by default. |
| Cannot set more than 14 days | Express is capped at 14 days. Use the full wizard. |
| Start date can't go further back | Backdating is limited to 2 days. |
| Odometer rejected | The reading is below the vehicle's last recorded mileage. Check the dashboard. |
| Continue greyed out on Condition & photos | Odometer or fuel level is missing, or your workspace sets a photo minimum and not enough photos are attached. Check the of … required chip. |
| A photo tile stays empty | The upload was rejected (not an image, or too large). Try again. An empty tile means no photo is stored. |
| No rental invoice after activation | Raise invoices automatically is off. The rental is active; bill it from the Rental Account with Bill rental. Only a deposit taken On invoice was invoiced. |
| You keep landing on Express | This device remembers Express. Flip the Express switch off to go back to the full wizard. |
Locking & Signing an Agreement
Lock the contract, capture the customer's signature on a tablet, and get the agreement ready for checkout — or cancel it before signature.
Agreement Types Explained
The two kinds of rental — short-term and long-term — and how the length of the rental decides which one you get.