

Quick Start
The order to set SpectroNova Express up in, from signing up to your first rental and its invoice.
This page is the map, not the manual. It shows the order to do things in and links to the guide that covers each one. Each stage builds on the one before: the most common cause of a stuck setup is skipping ahead.
You can run a first rental on day one. Loading a whole fleet and customer list usually takes longer, so most teams do a test rental first and import the rest after.
1. Create your account
- Sign up with your email or with Google.
- On the Set up your company screen, fill in:
- Company name
- Phone number
- How many vehicles do you run?
- Click Start my free trial.
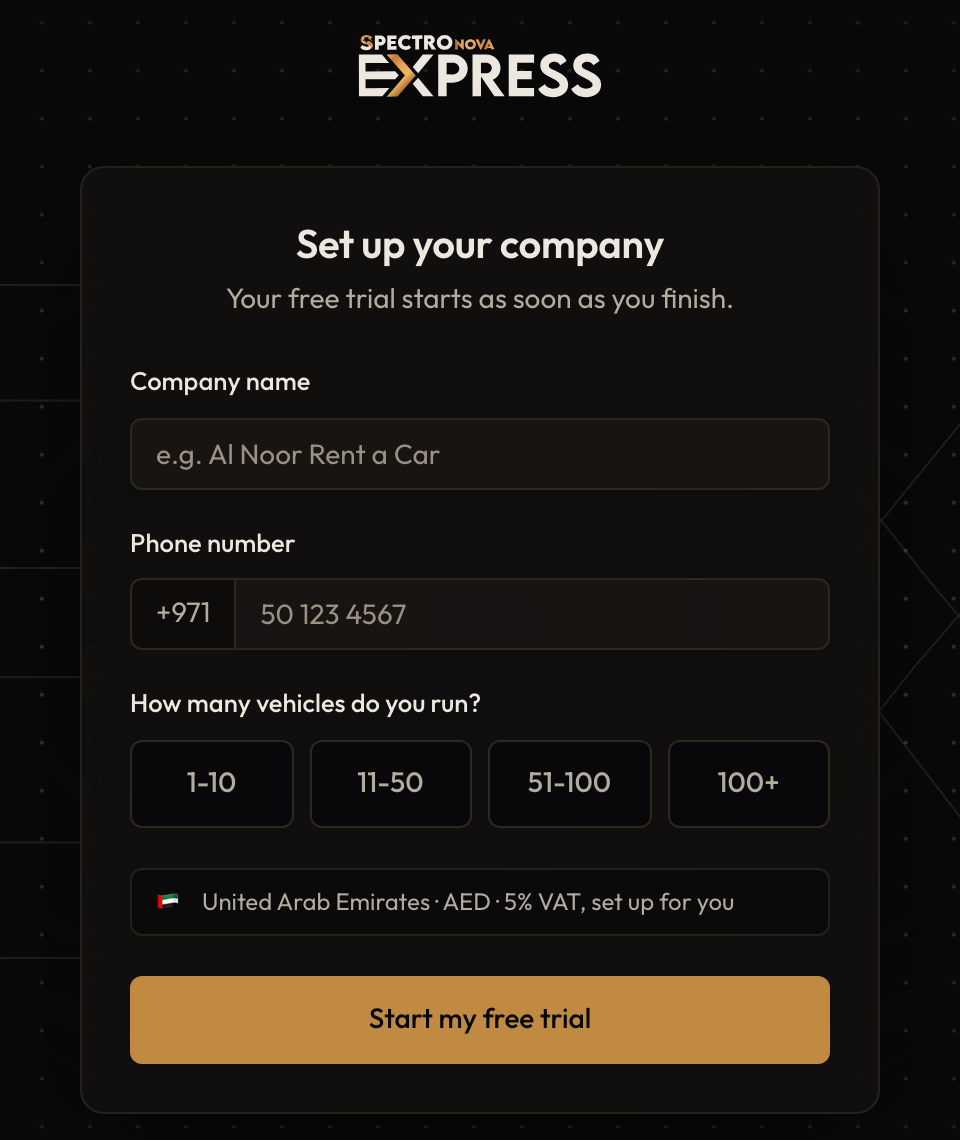
Set up your company: Company name, Phone number, how many vehicles you run, and Start my free trial.
You don't need to set the country: the screen shows United Arab Emirates · AED · 5% VAT, set up for you.
SpectroNova Express then creates:
- your organization
- a first workspace called Main branch
Your account may first need approval. If you see We're reviewing your account, you'll get an email when it is ready; most accounts are approved within 24 hours.
When the account is ready, a welcome page shows a short course, Your first rental, start to finish.: five videos in the order you will do them. Watch them now, or click Go to dashboard and come back to them later.
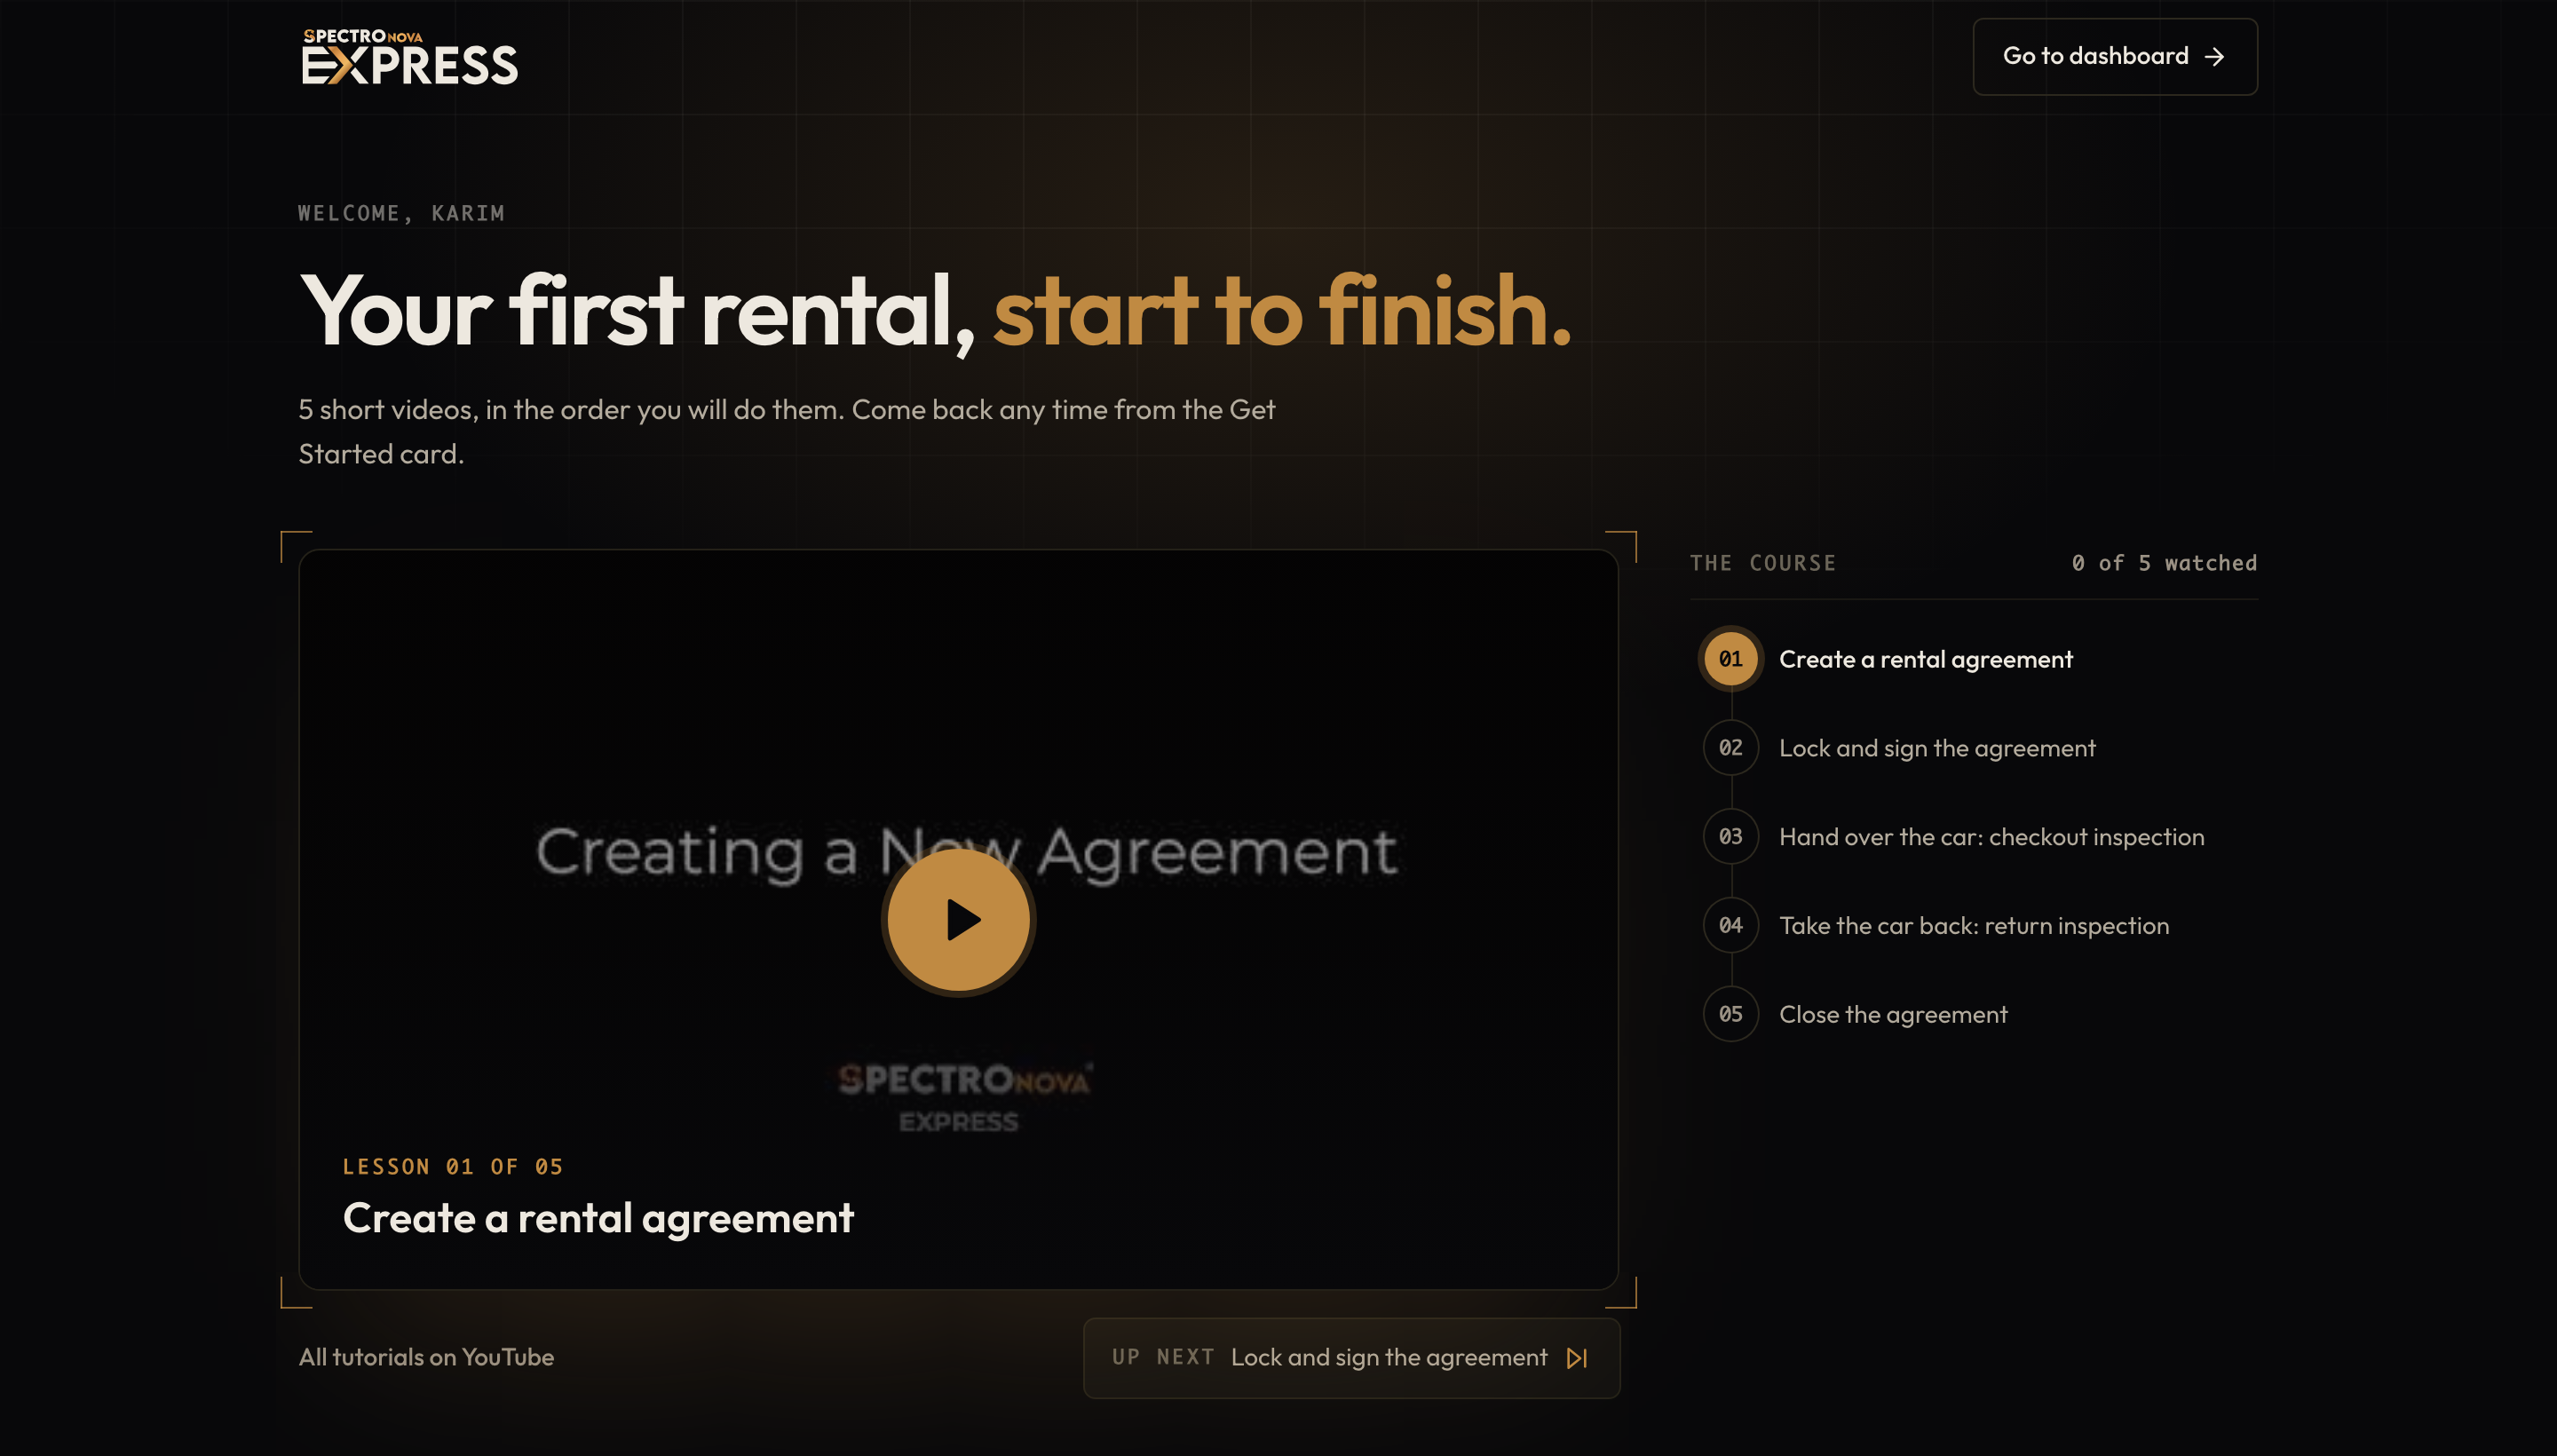
The welcome page: Your first rental, start to finish. with the course list on the right and Go to dashboard at the top.
See Creating Your Account & First Login for every field and what happens after you sign in.
2. Follow the Get Started card
On the dashboard, the Get Started card tracks three steps:
- Add your first customer
- Set up your fleet — one sheet imports your vehicles, variants, pricing and colours together
- Create your first lease agreement — connects a customer with a vehicle
The card also links back to the course with Watch the tutorials. It disappears once all three steps are done.
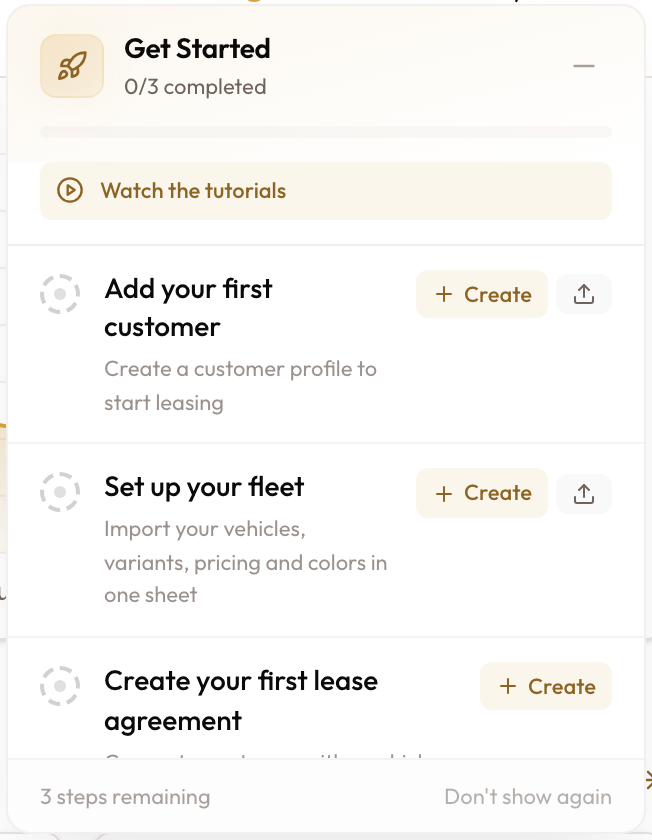
The Get Started card on a new account: Watch the tutorials and the three steps, each with Create.
3. Check your settings
Open Settings. These decide how every later agreement and invoice behaves, so look at them before your first real rental:
| Settings page | What it decides | Guide |
|---|---|---|
| Organization and Workspace | Company details, TRN, workspace details | Setting Up Your Organization |
| Members and Roles | Who can do what | Inviting Team Members |
| Products | Add-ons, extras and charges you sell | Product Catalog Setup |
| Agreement | Defaults for new agreements | Agreement Settings |
| Billing | Whether invoices are raised and emailed automatically | |
| Document Numbering | How invoice and agreement numbers look | Document Numbering |
| Contract Templates and Invoice Templates | What your contracts and invoices look like | Contract Template Setup, Invoice Template Customization |
| Inspection Templates | What the handover and return inspections ask for, including how many photos | |
| Notifications | Payment reminders: when they go out, how, and quiet hours |
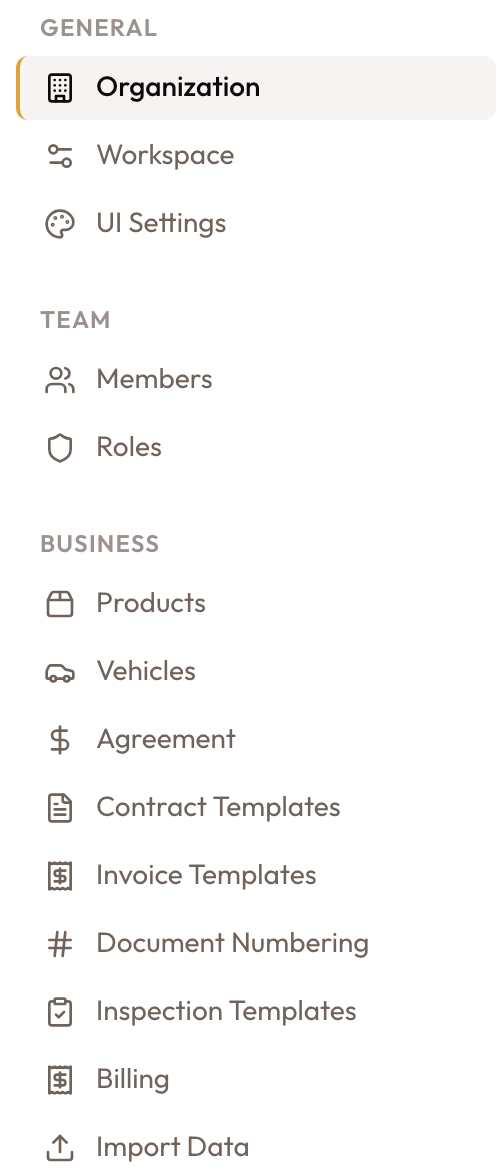
The General, Team and Business groups of the Settings menu hold the pages above.
4. Load your fleet and your customers
Vehicles and customers are what every rental attaches to. Add a few by hand to learn the screens, then import the rest.
- Adding Vehicles to Your Fleet
- Adding Individual & Company Customers
- Customer Search, Filtering & Bulk Import
5. Run your first rental
Create an agreement for a customer and a vehicle, lock and sign it, and hand the vehicle over with a checkout inspection. Follow the whole path once:
- Short-Term Rental Workflow — a rental billed once, from the agreement's Rental Account
- Long-Term Rental Workflow — a rental billed every month
- Express Rental (Walk-Up) — a walk-in customer, renter to handover in one pass
6. Bill and get paid
A long-term rental raises its invoices from the monthly schedule. A short-term rental is billed with Bill rental on the agreement. Whether invoices are raised automatically depends on your Billing settings. From there it is sending invoices, recording payments and following up on what is overdue.
Then what?
For the concepts behind all of this, read the Introduction.
Introduction to SpectroNova Express
What SpectroNova Express does, how it is organised, and the life of a rental from first quote to closed agreement.
Creating Your Account & First Login
Sign up with email or Google, set up your company on one screen, and where SpectroNova Express takes you when you sign in.